Adobe Premiere Pro is a powerful video editing platform with tools capable of handling everything from quick social edits to complex film and broadcast projects. This guide focuses specifically on working with sound effects and audio clips inside Premiere Pro, helping you get comfortable with everyday audio editing tasks quickly and efficiently.
By the end of this article, you should feel much more confident working with sound effects and audio clips in Premiere Pro. We’ll cover core actions like moving, muting, trimming, and replacing audio clips, as well as more advanced techniques such as automation, looping, reversing audio, and adding fades and crossfades.
If you’re still building your sound library, our free sound effects collection is a great place to start, along with our guide on downloading and using sound effects in your projects.
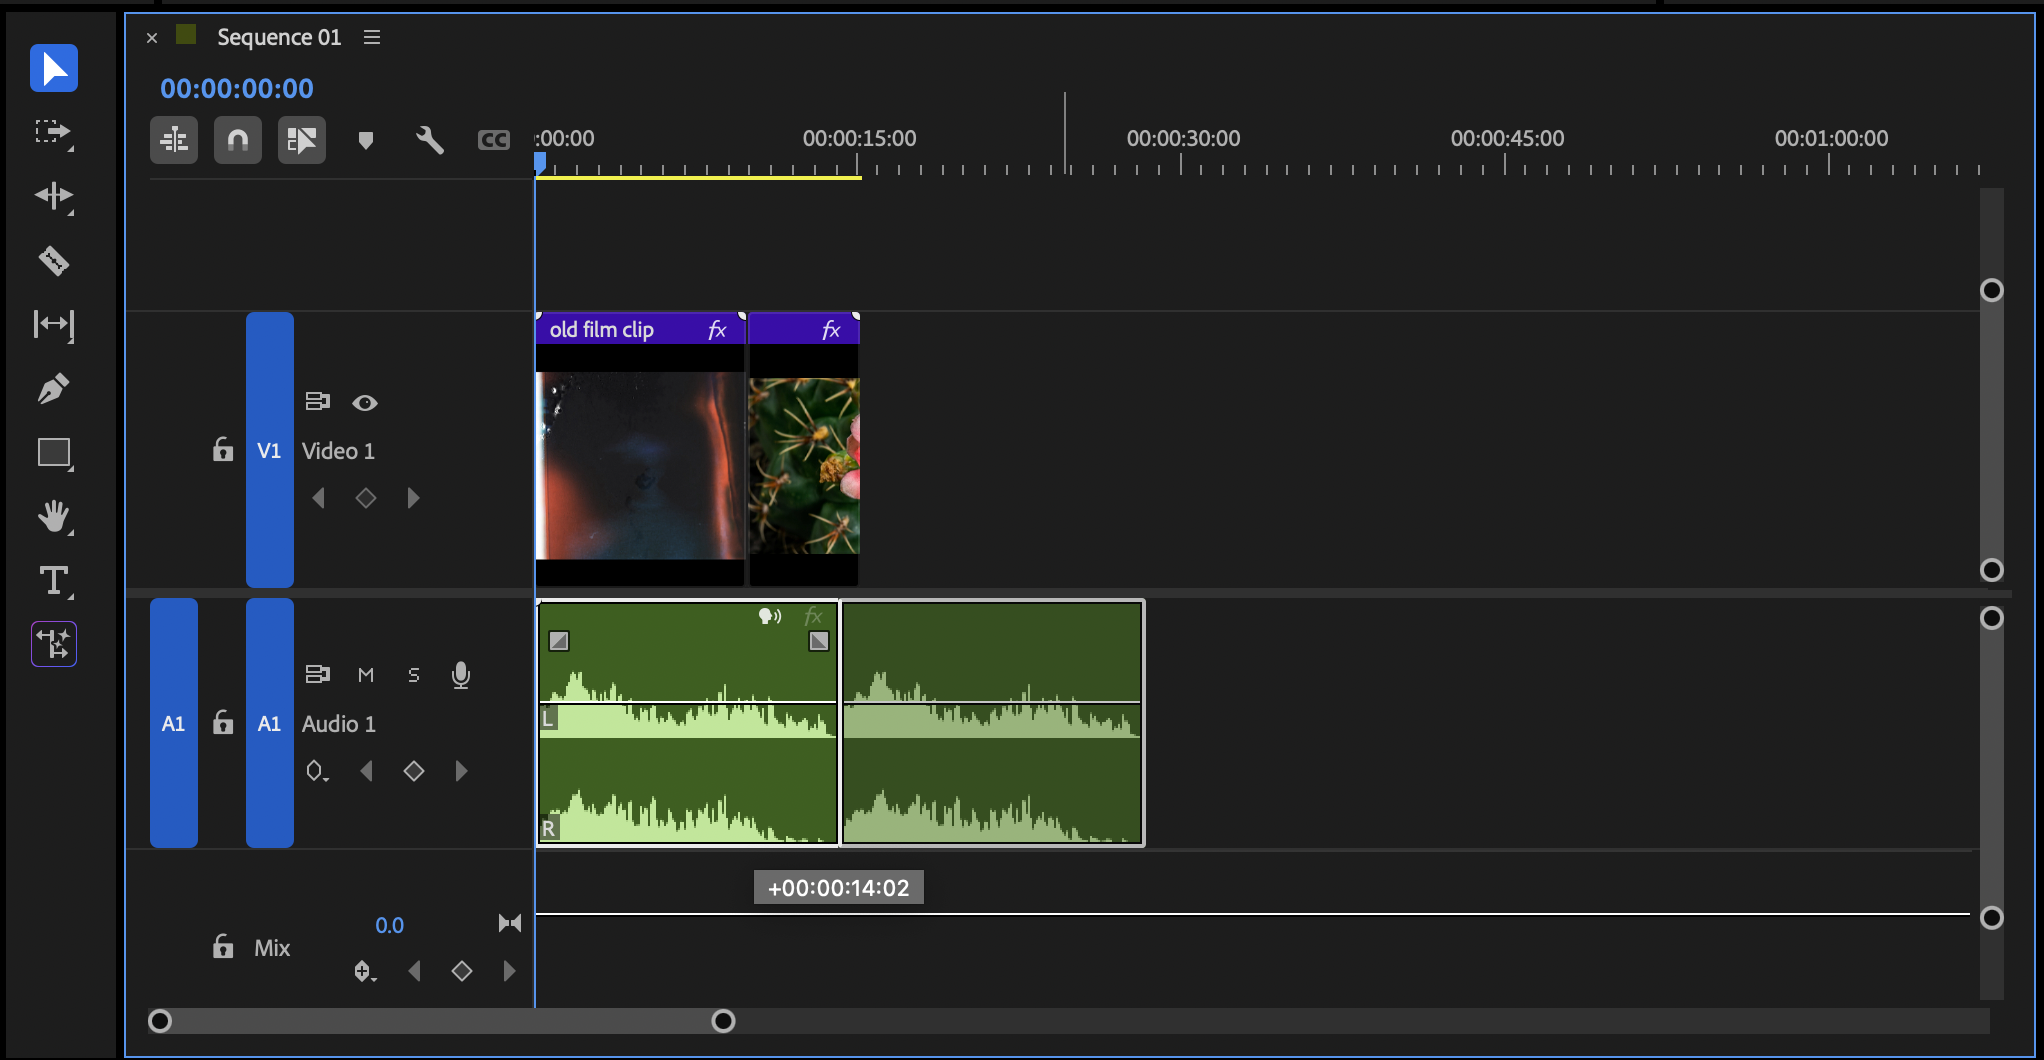
Moving audio clips in Adobe Premiere Pro couldn’t be simpler, and you’ll likely do it constantly during any edit. Select the audio clip in the timeline using the Selection tool (V), then drag it left or right to reposition it against your video. You can also drag it vertically to place it on a different audio track if your timeline becomes busy.
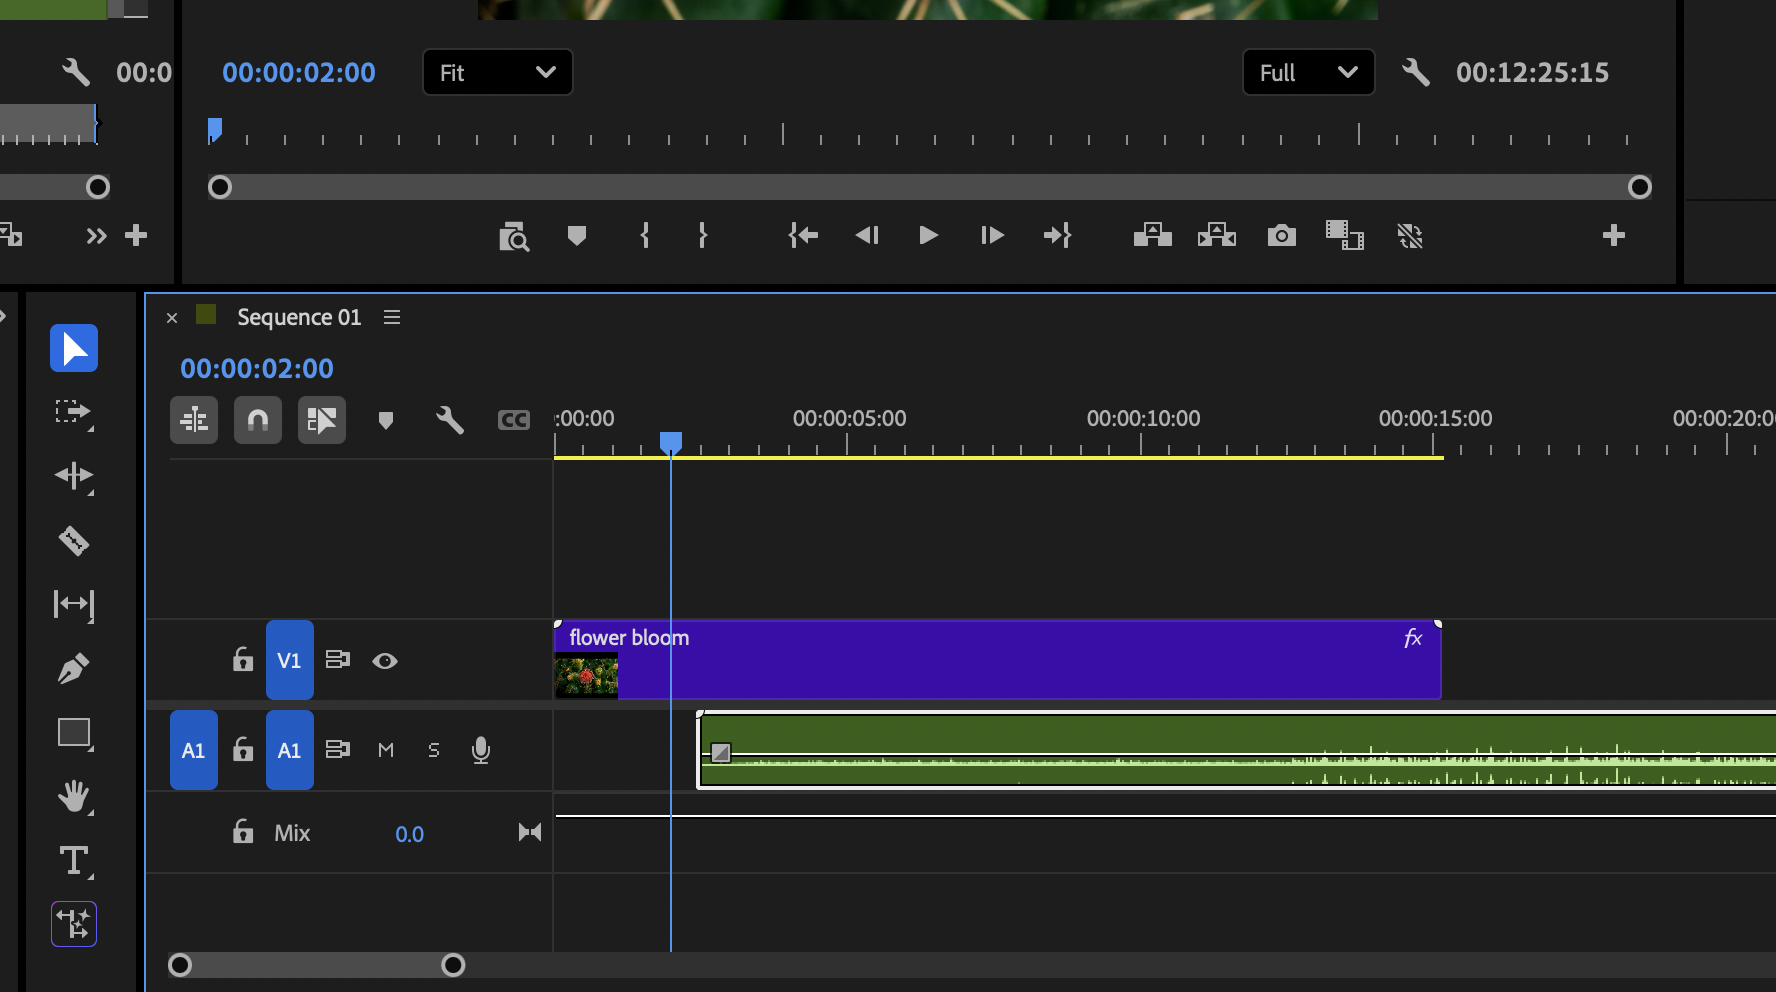
For more precise placement, you can toggle snapping on or off using the S key. With snapping disabled, clips move freely without locking to edit points or the playhead.
Top Tip:
If you’re only trying to reposition a clip slightly, turning snapping off can help avoid accidental jumps to nearby edits.
To mute audio in Premiere Pro, you can lower the clip’s volume directly in the timeline or via the Effect Controls panel. Select the clip, open Effect Controls, and adjust the Volume level to silence it.
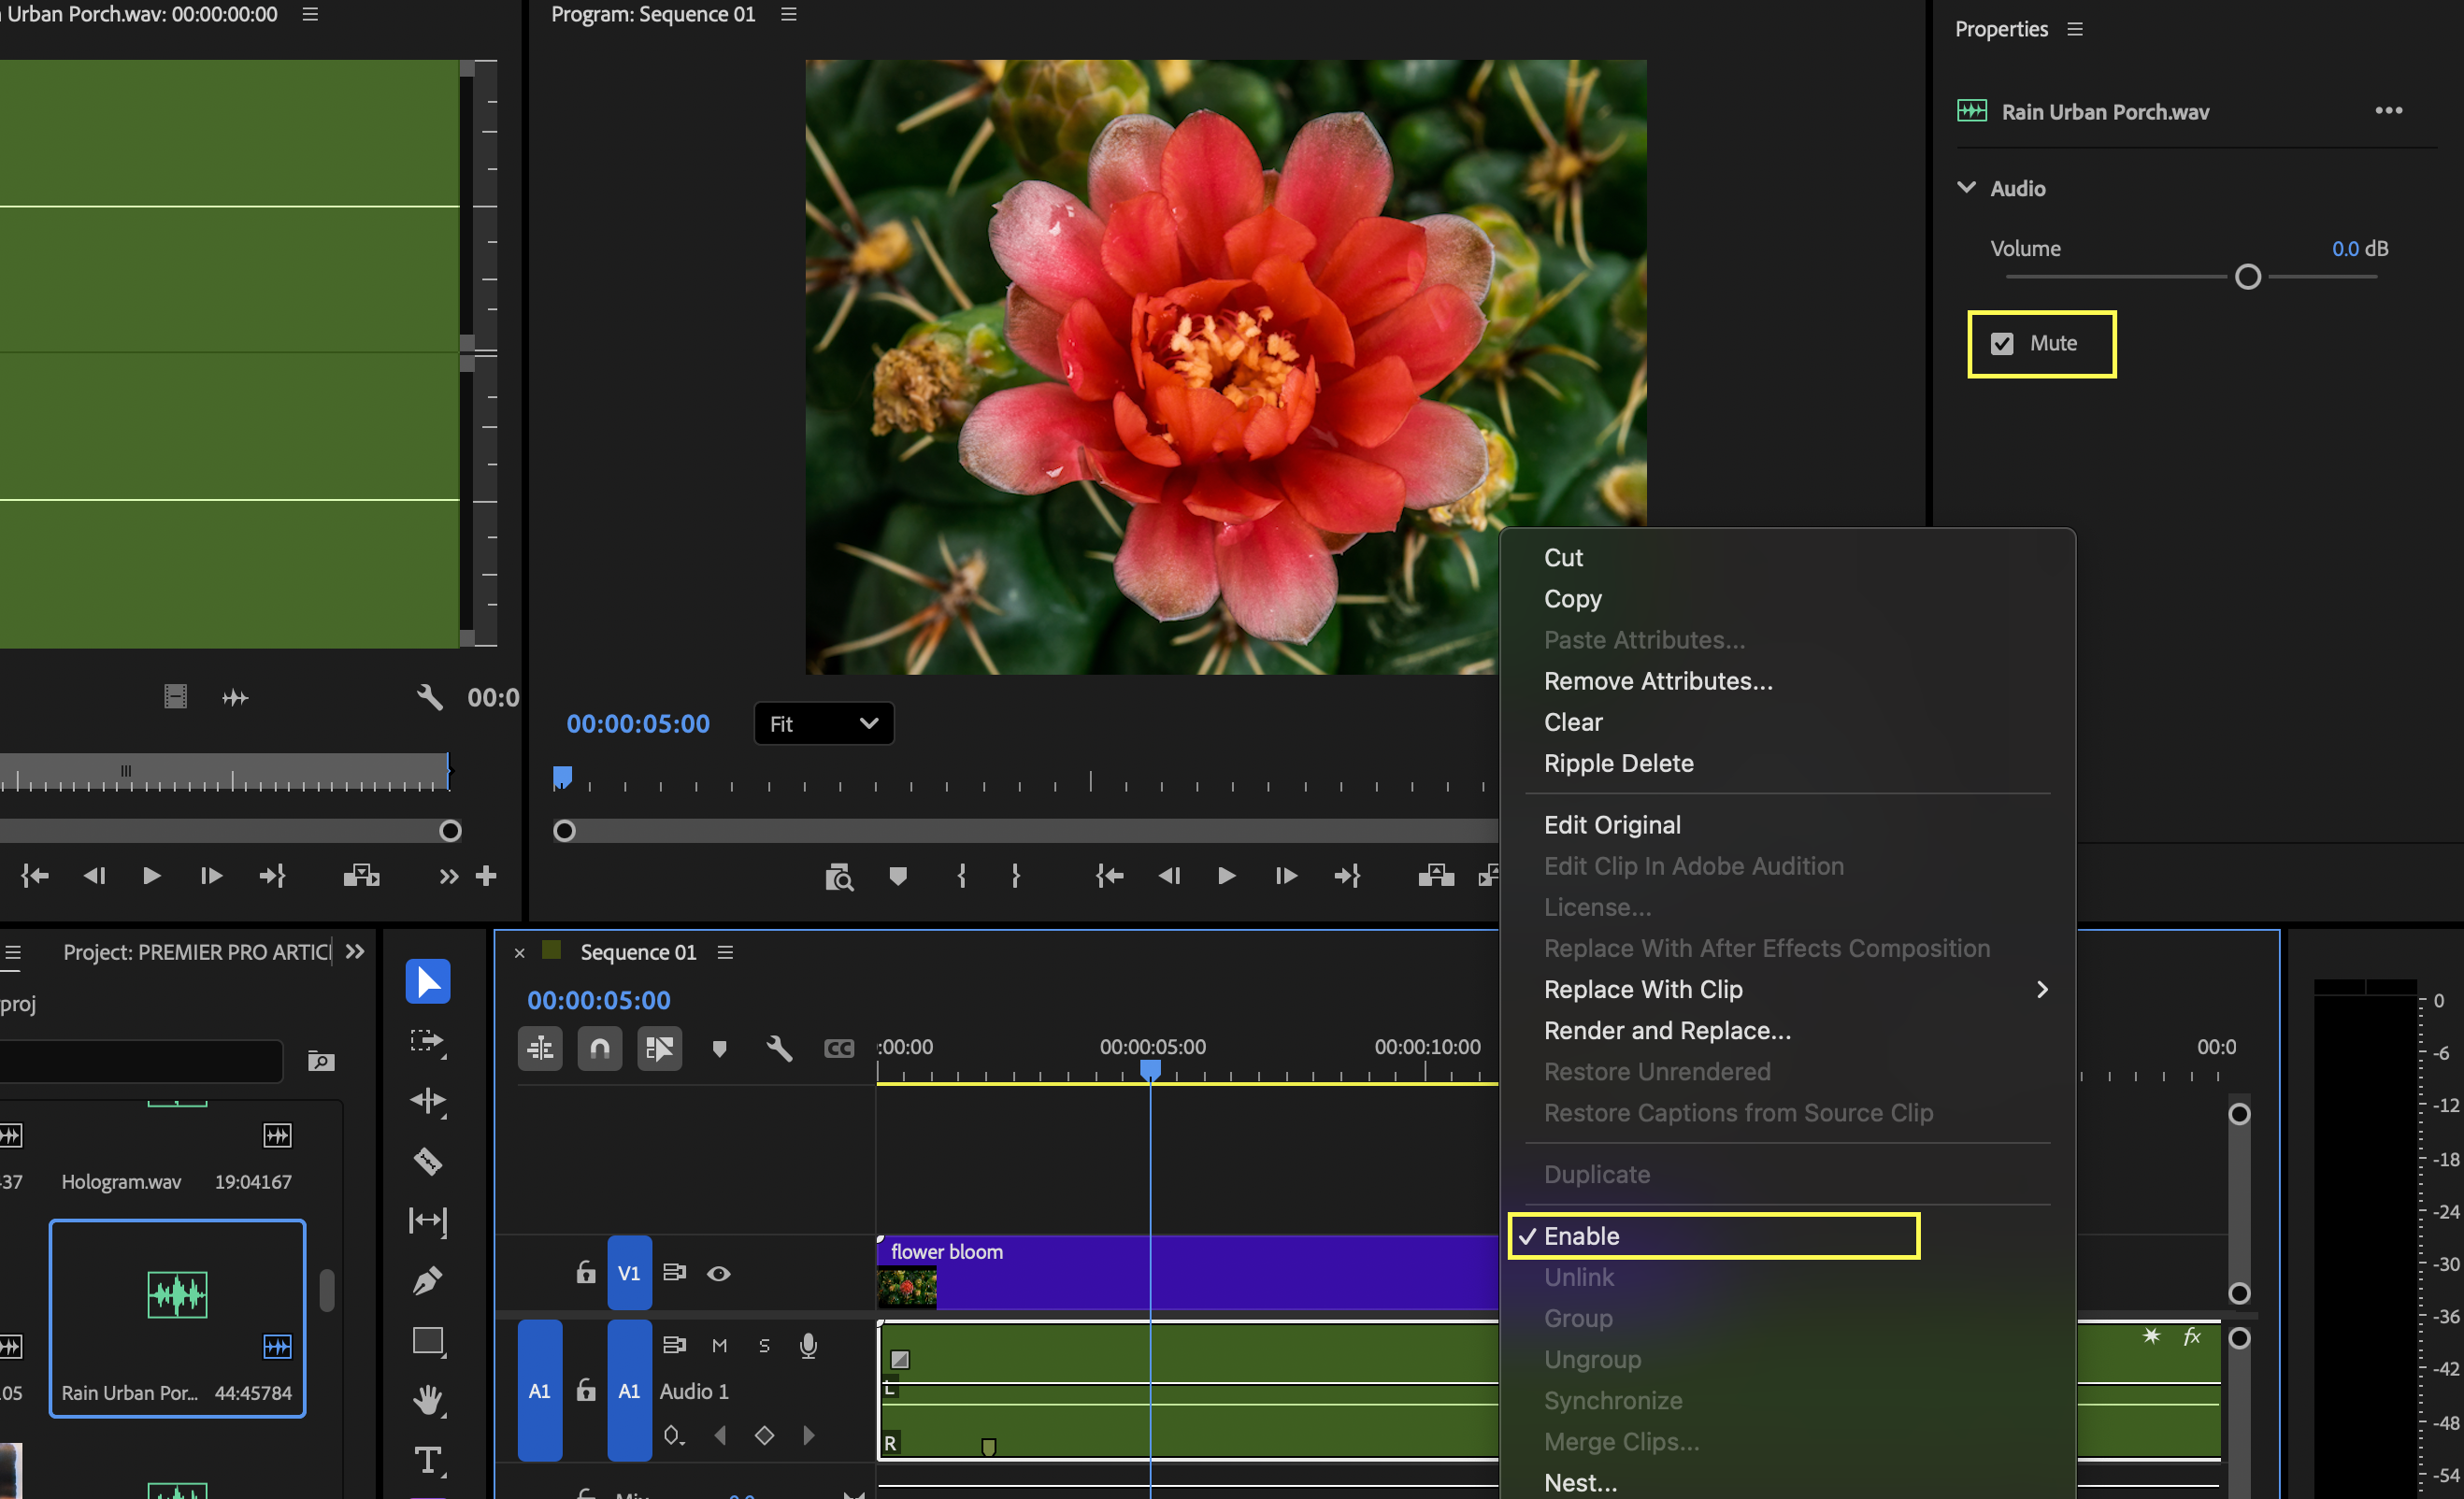
You can also mute entire tracks using the M button in the track header, or you can disable the clip using Cmnd+Shift+E, which is useful when testing different sound design ideas or comparing variations.
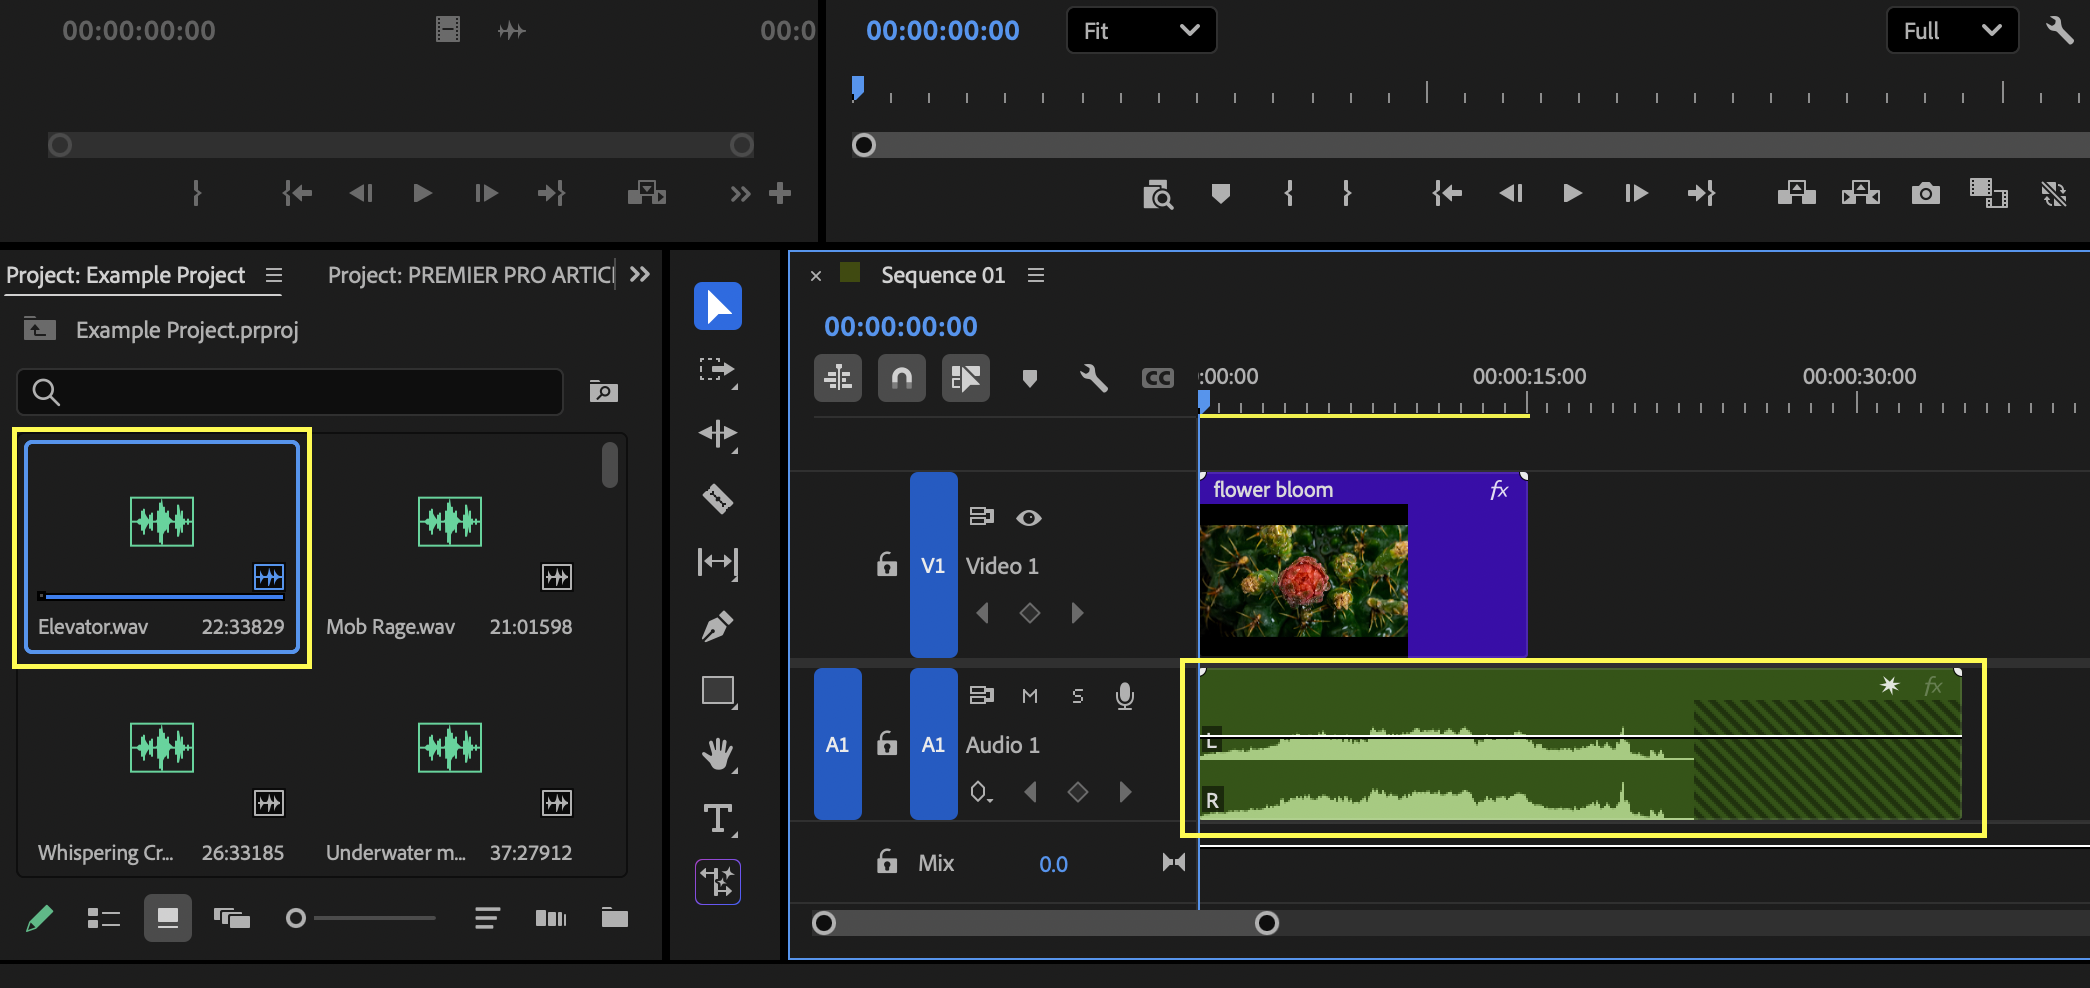
Replacing an audio clip allows you to keep its timing while swapping out the sound itself. To do this, hold Alt (Windows) or Option (Mac) and drag a new audio file from the Project panel directly onto the existing clip in the timeline. Premiere Pro replaces the clip while preserving its position and duration.
This is ideal for swapping temporary sound effects or replacing early draft recordings with final versions.
Trimming audio clips is essential for tightening edits and aligning sound effects precisely. Hover your cursor over the start or end of an audio clip until the trim handle appears, then click and drag inward to shorten the clip.
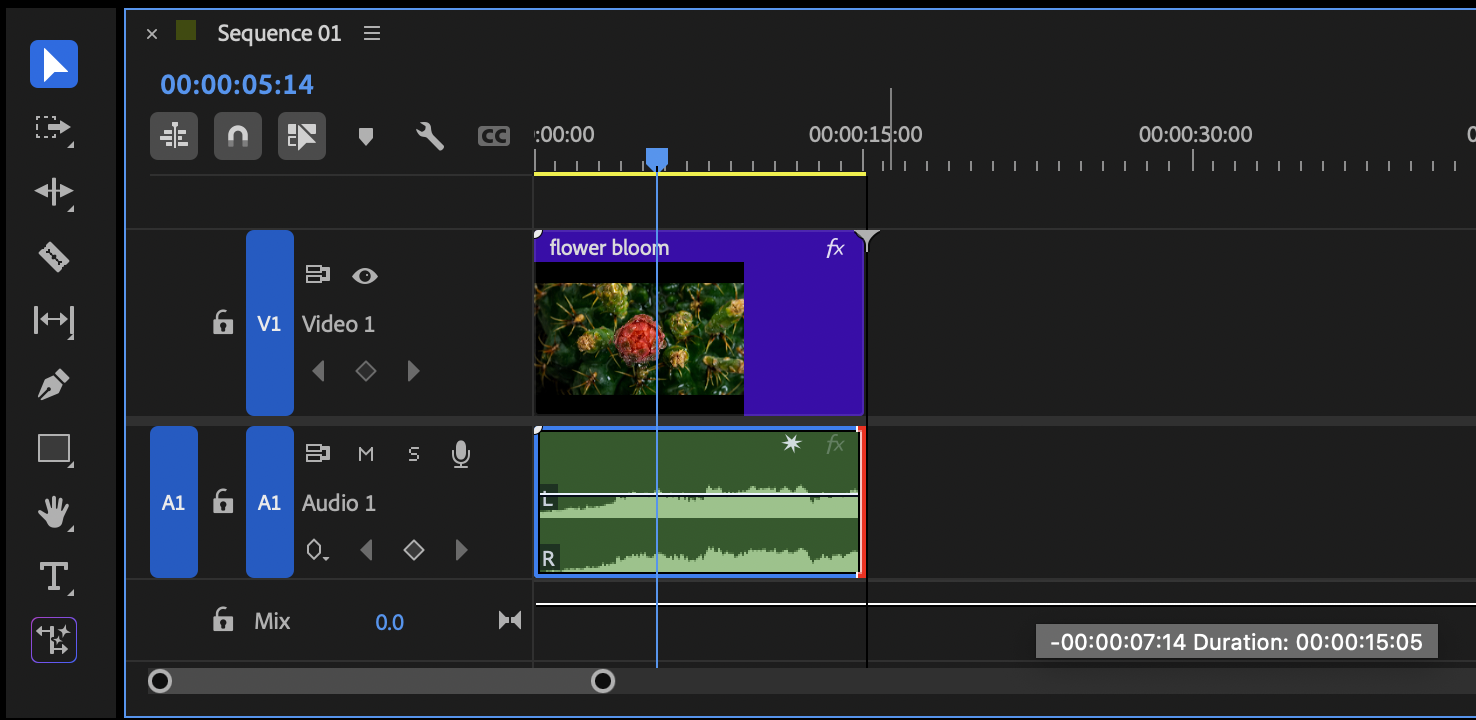
The waveform updates in real time, helping you trim accurately to transients or dialogue starts. Zoom in using the = and – keys for finer control.
Top Tip:
Zooming in close makes it much easier to avoid clicks and cut cleanly on natural zero crossings.
Splitting an audio clip lets you isolate sections, remove unwanted sounds, or apply different effects to specific moments. Move the playhead to where you want the cut, select the clip, and press Ctrl + K (Windows) or Cmd + K (Mac) to make an edit.
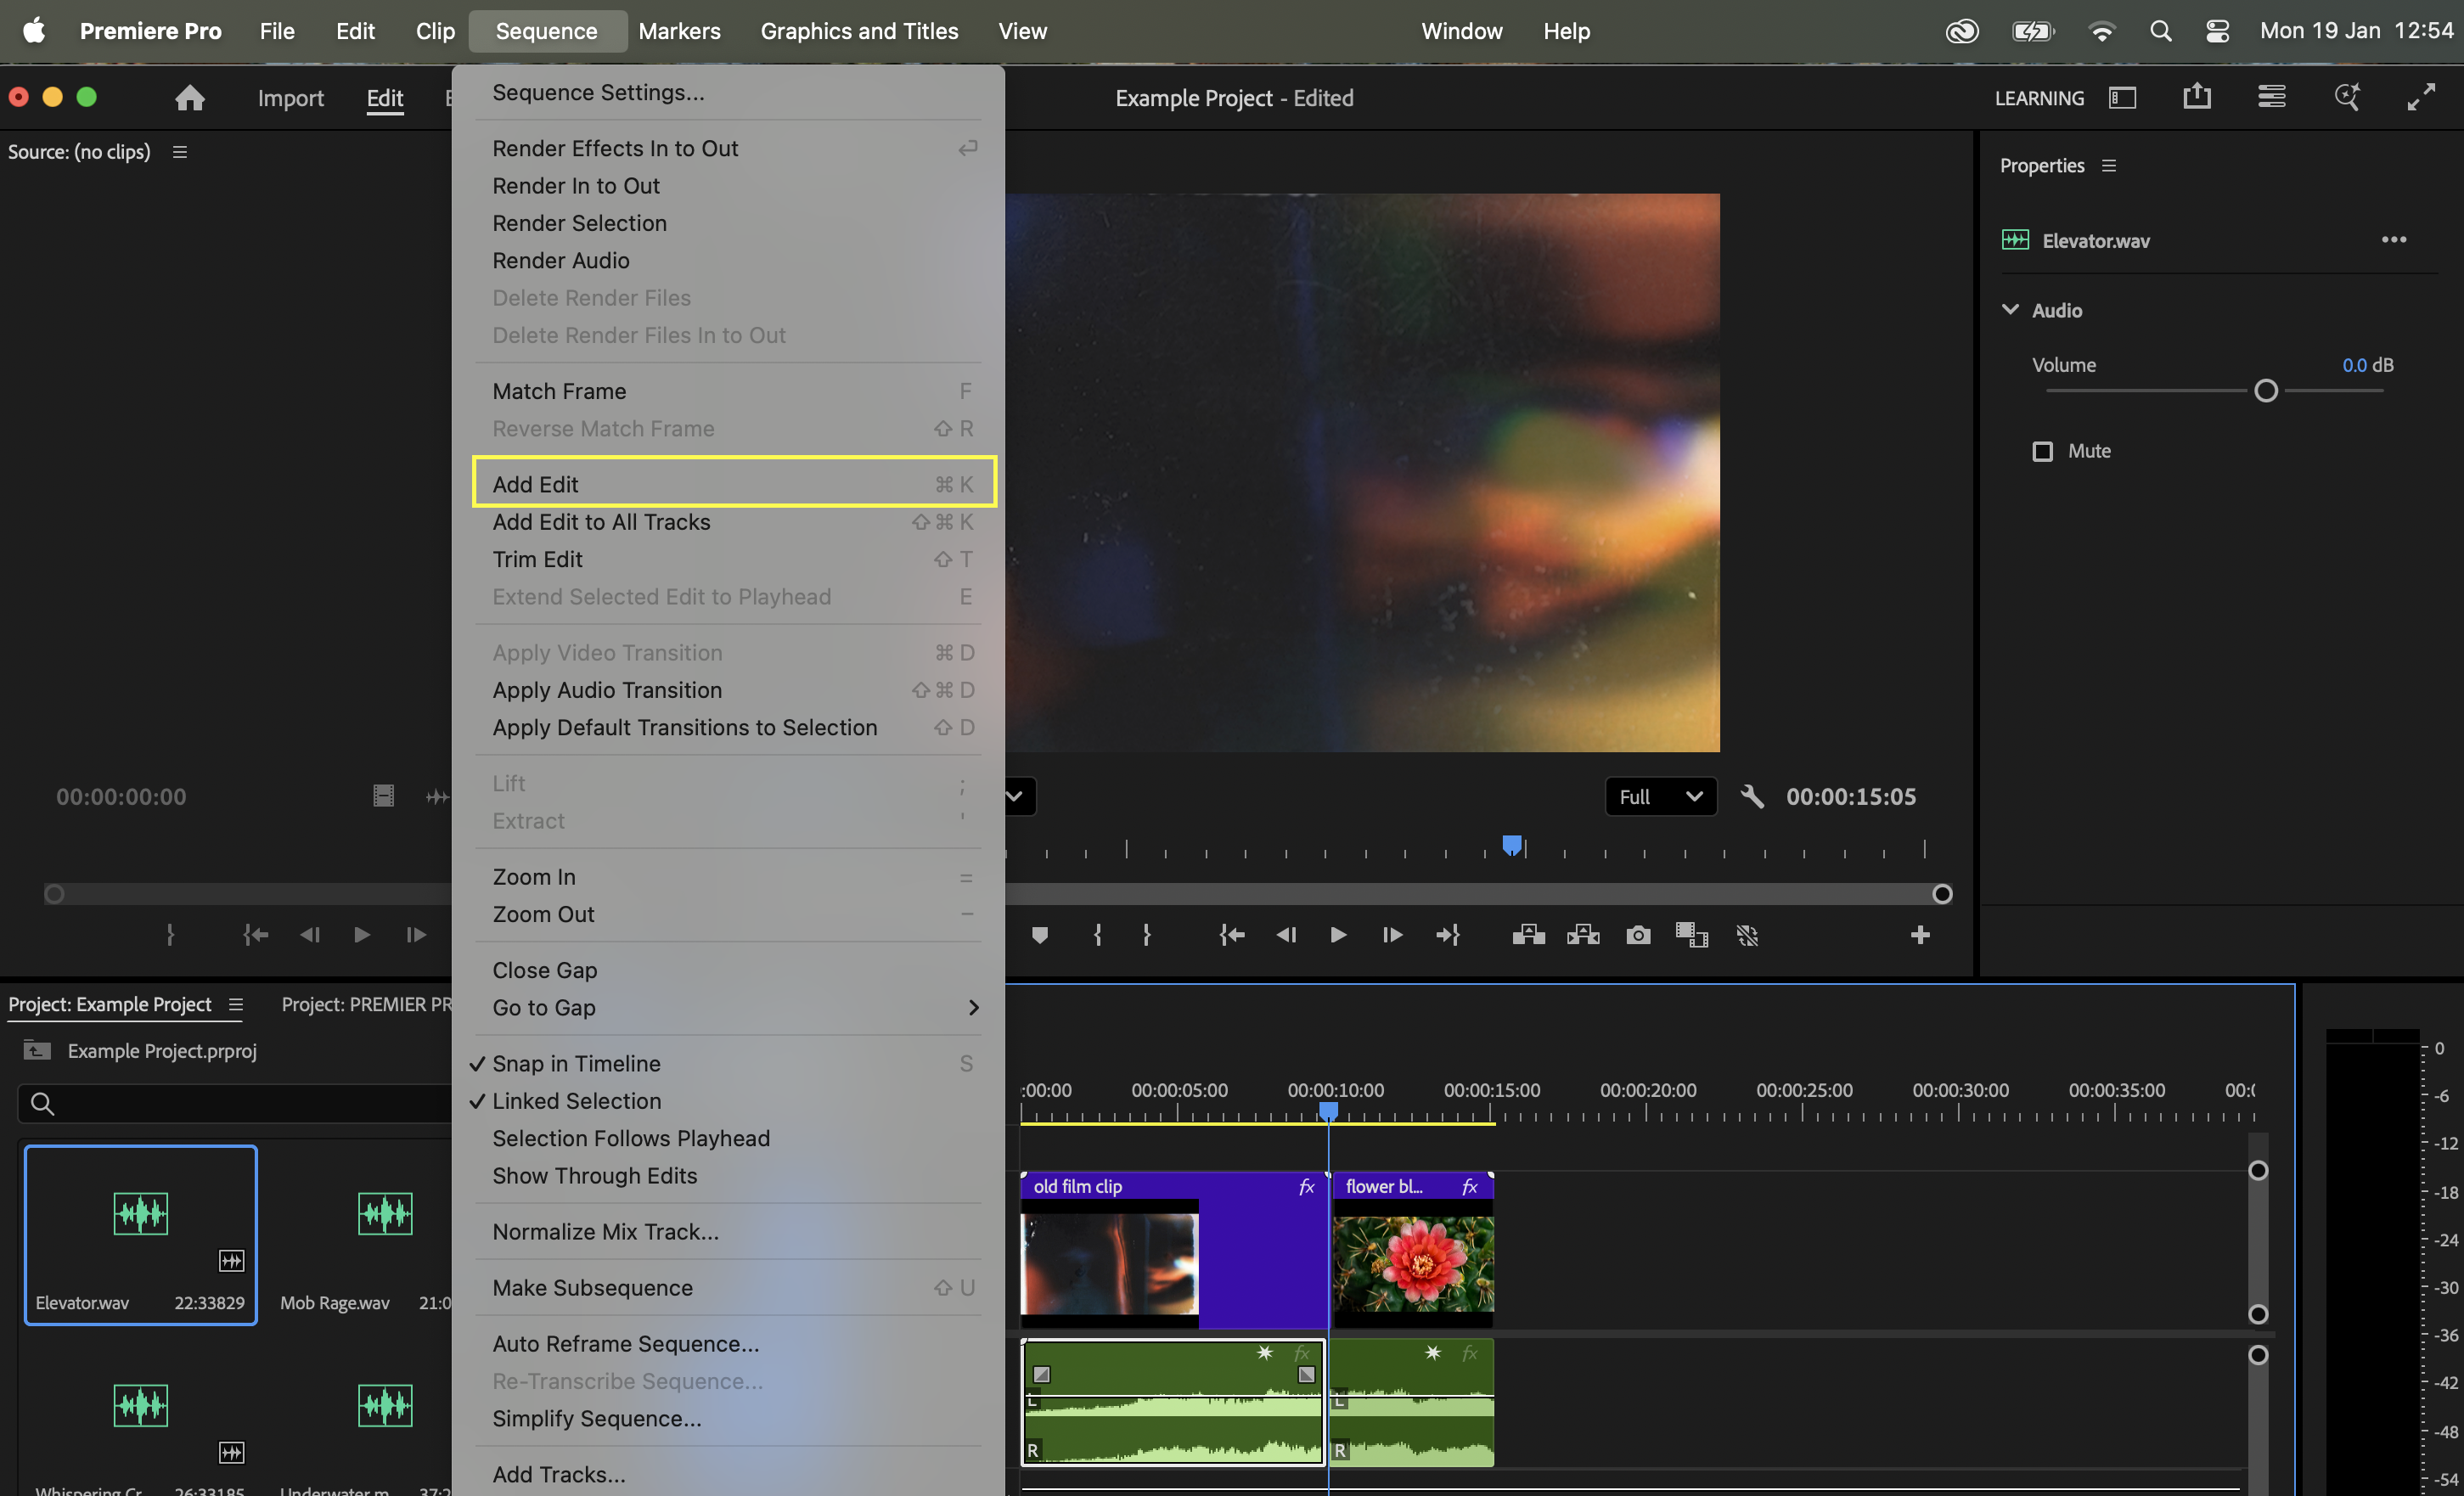
You can also use the Razor tool (C) and click directly on the clip.
Once split, each segment can be moved, trimmed, faded, or processed independently.
Top Tip:
Splitting clips before applying fades gives you more flexibility when shaping transitions.
Automation allows you to control volume changes over time. To automate a clip’s volume, select the audio clip and click the fx button to open the Effect Controls panel. Enable keyframing on the Volume parameter, then add keyframes at different points and drag them up or down to adjust levels.

You can also show clip keyframes directly in the timeline, making automation adjustments quicker and more visual.
Automation is ideal for ducking music under dialogue or emphasising specific sound effects.
Looping audio clips is useful for extending ambience, music beds, or repeating sound effects. Premiere Pro does not automatically loop audio, so this is done manually. Hold Alt (Windows) or Option (Mac), then drag the clip to create a duplicate. Place the duplicate directly after the original and repeat as needed.
Adding a short crossfade between duplicates helps smooth the loop.
Top Tip:
Even very short crossfades can prevent audible looping artefacts, especially with ambience.
Reversing audio is great for creative sound design, transitions, and accent moments. Right-click the audio clip, select “Speed/Duration…” and tick “Reverse Speed”. Finally, press OK to apply the reverse effect.
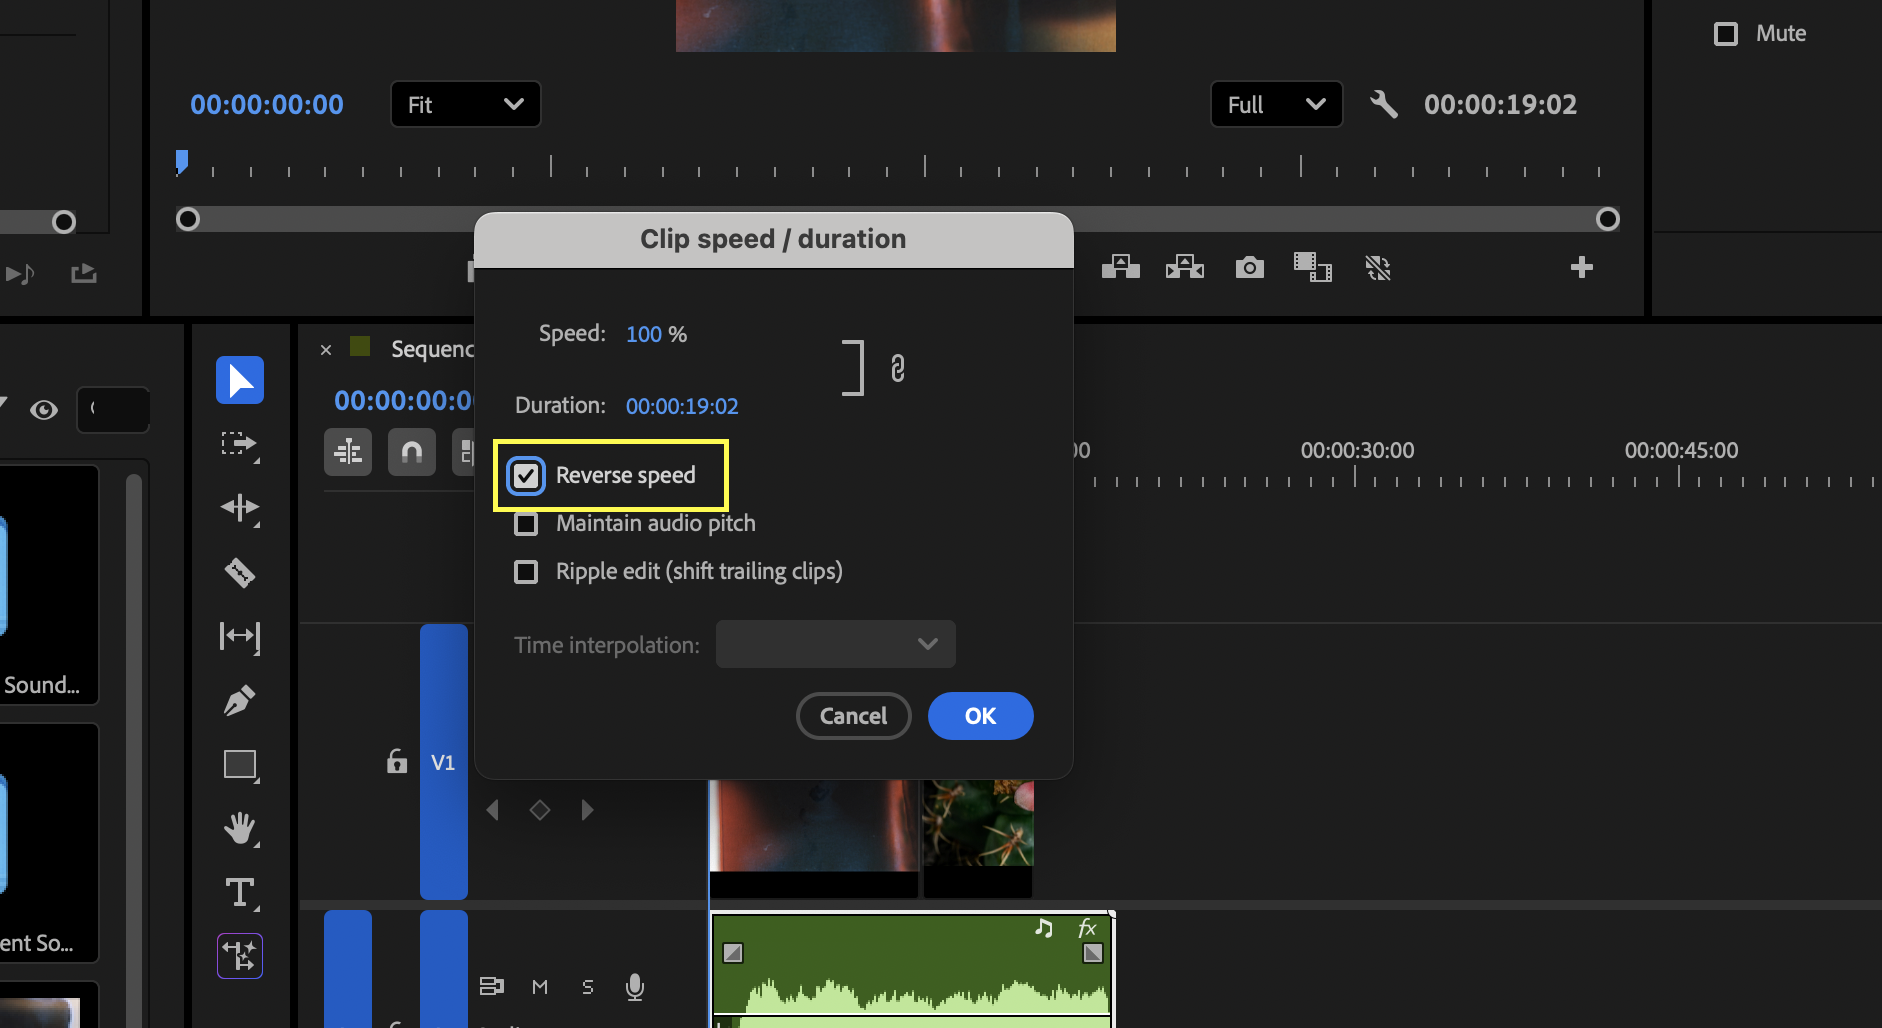
Premiere Pro processes the change instantly, and the waveform updates to reflect the reversed playback.
This works particularly well on risers, impacts, breaths, and whooshes.
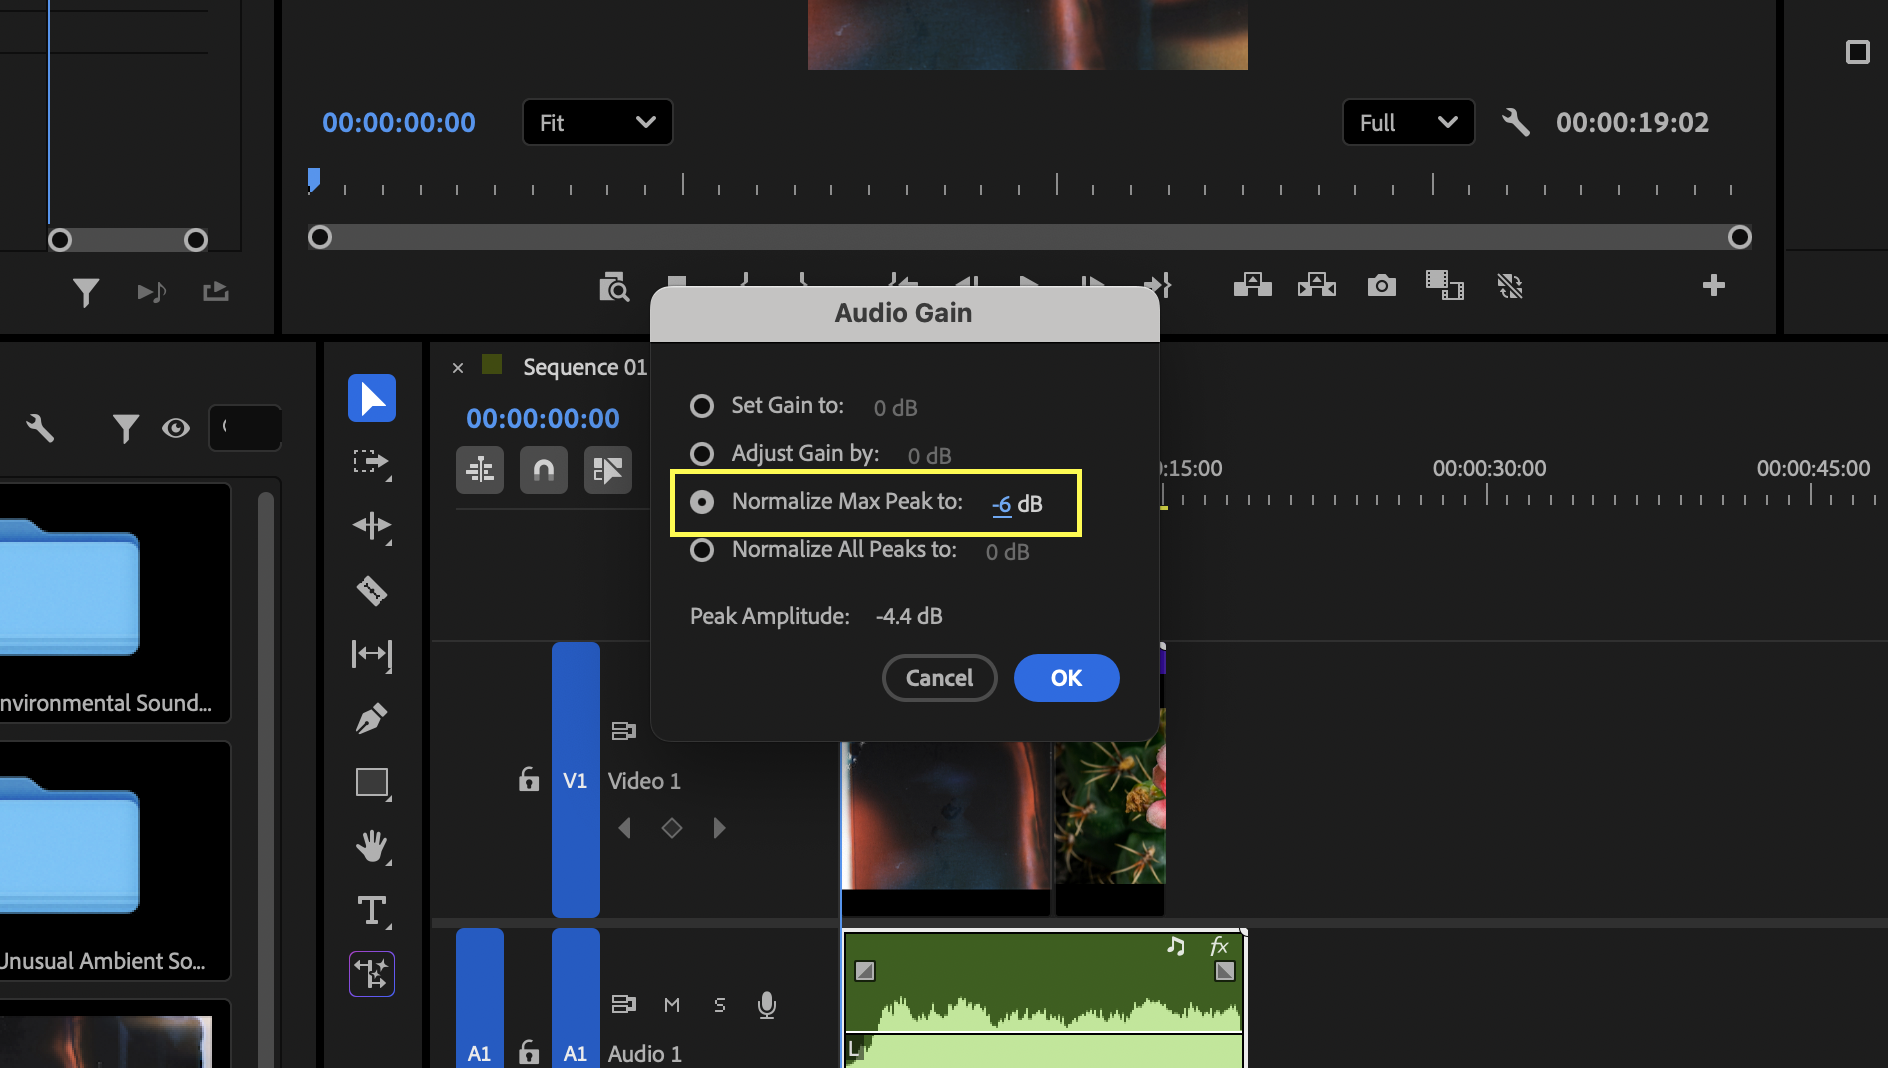
Normalising helps correct inconsistent loudness by raising audio to a consistent level. Select the clip, press G to open the Audio Gain window, then choose Normalize Max Peak and set your desired level.
Normalisation is useful for dialogue recorded at uneven levels or sound effects sourced from different libraries. You can combine this with compression for better dynamic control.
Panning lets you place audio across the stereo field. Select the clip, open Effect Controls, and adjust the Balance control to move the sound left or right.
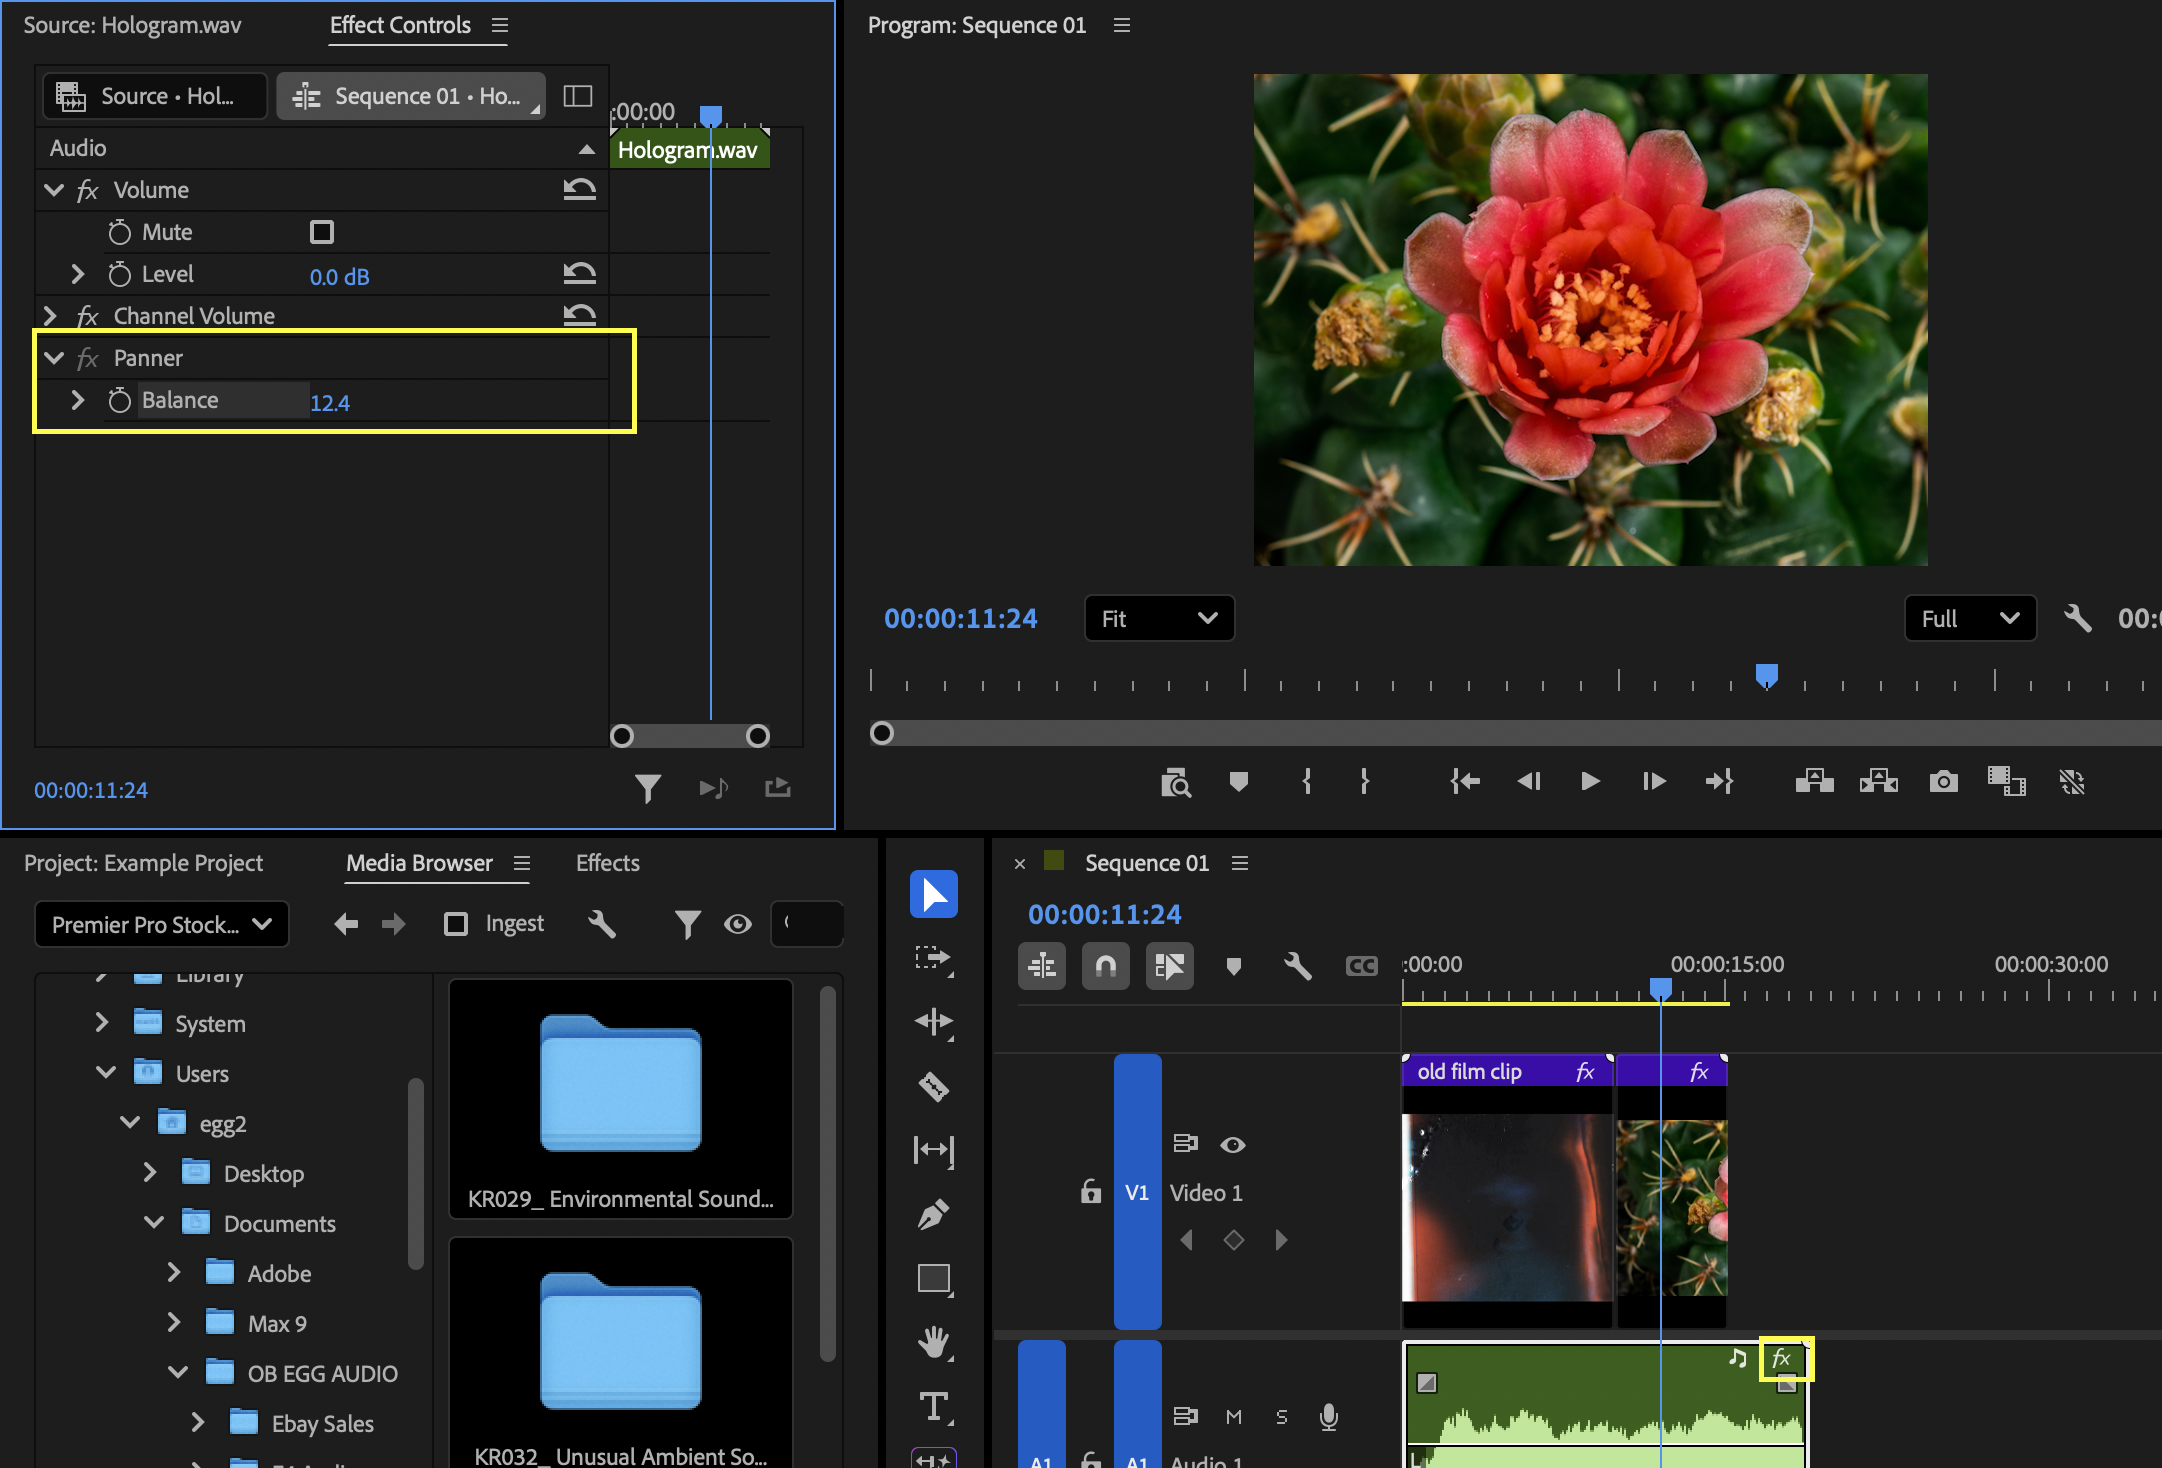
This is ideal for matching on-screen movement or creating a wider, more immersive soundstage.
Premiere Pro includes a wide range of built-in audio effects such as EQ, Noise Reduction, Dynamics, and Reverb. To apply one, open the Effects panel, browse the Audio Effects category, and drag your chosen effect onto the clip.
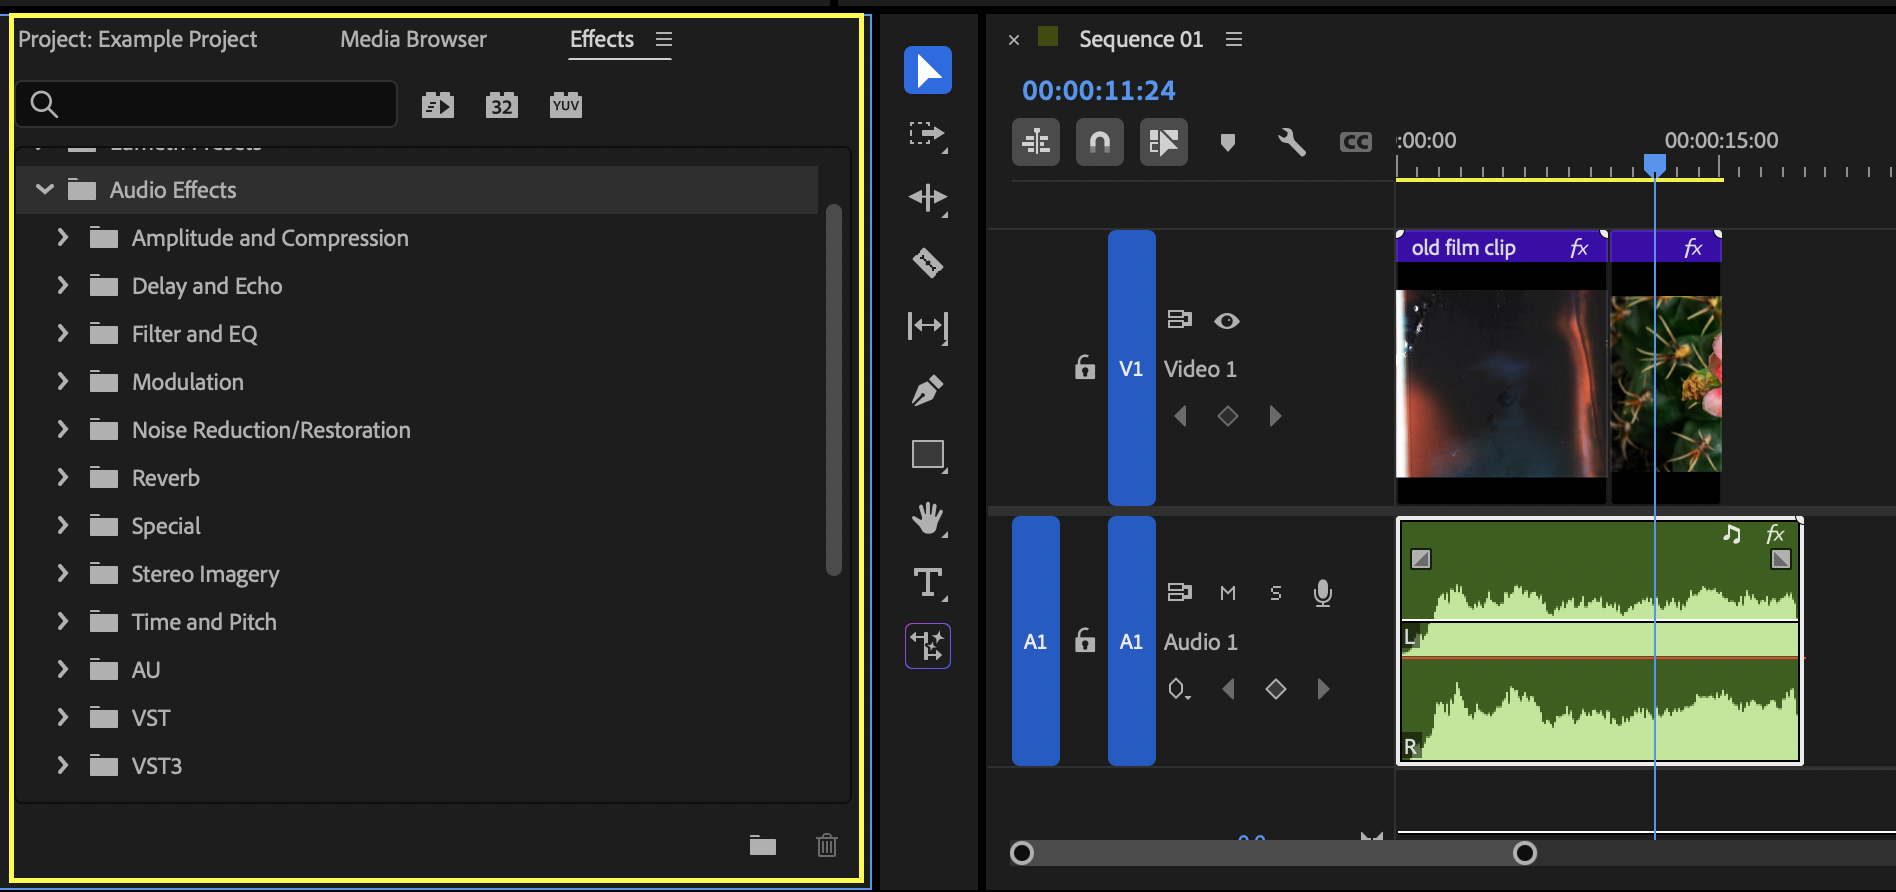
You can tweak effect settings in the Effect Controls panel, where each effect opens its own adjustable parameters.
This workflow is ideal for cleaning dialogue, enhancing sound effects, or shaping ambience.
Fading in audio helps smooth the start of a clip and avoids sudden or distracting entrances. To add a fade-in, apply the Constant Power transition from the Effects panel to the start of the audio clip.
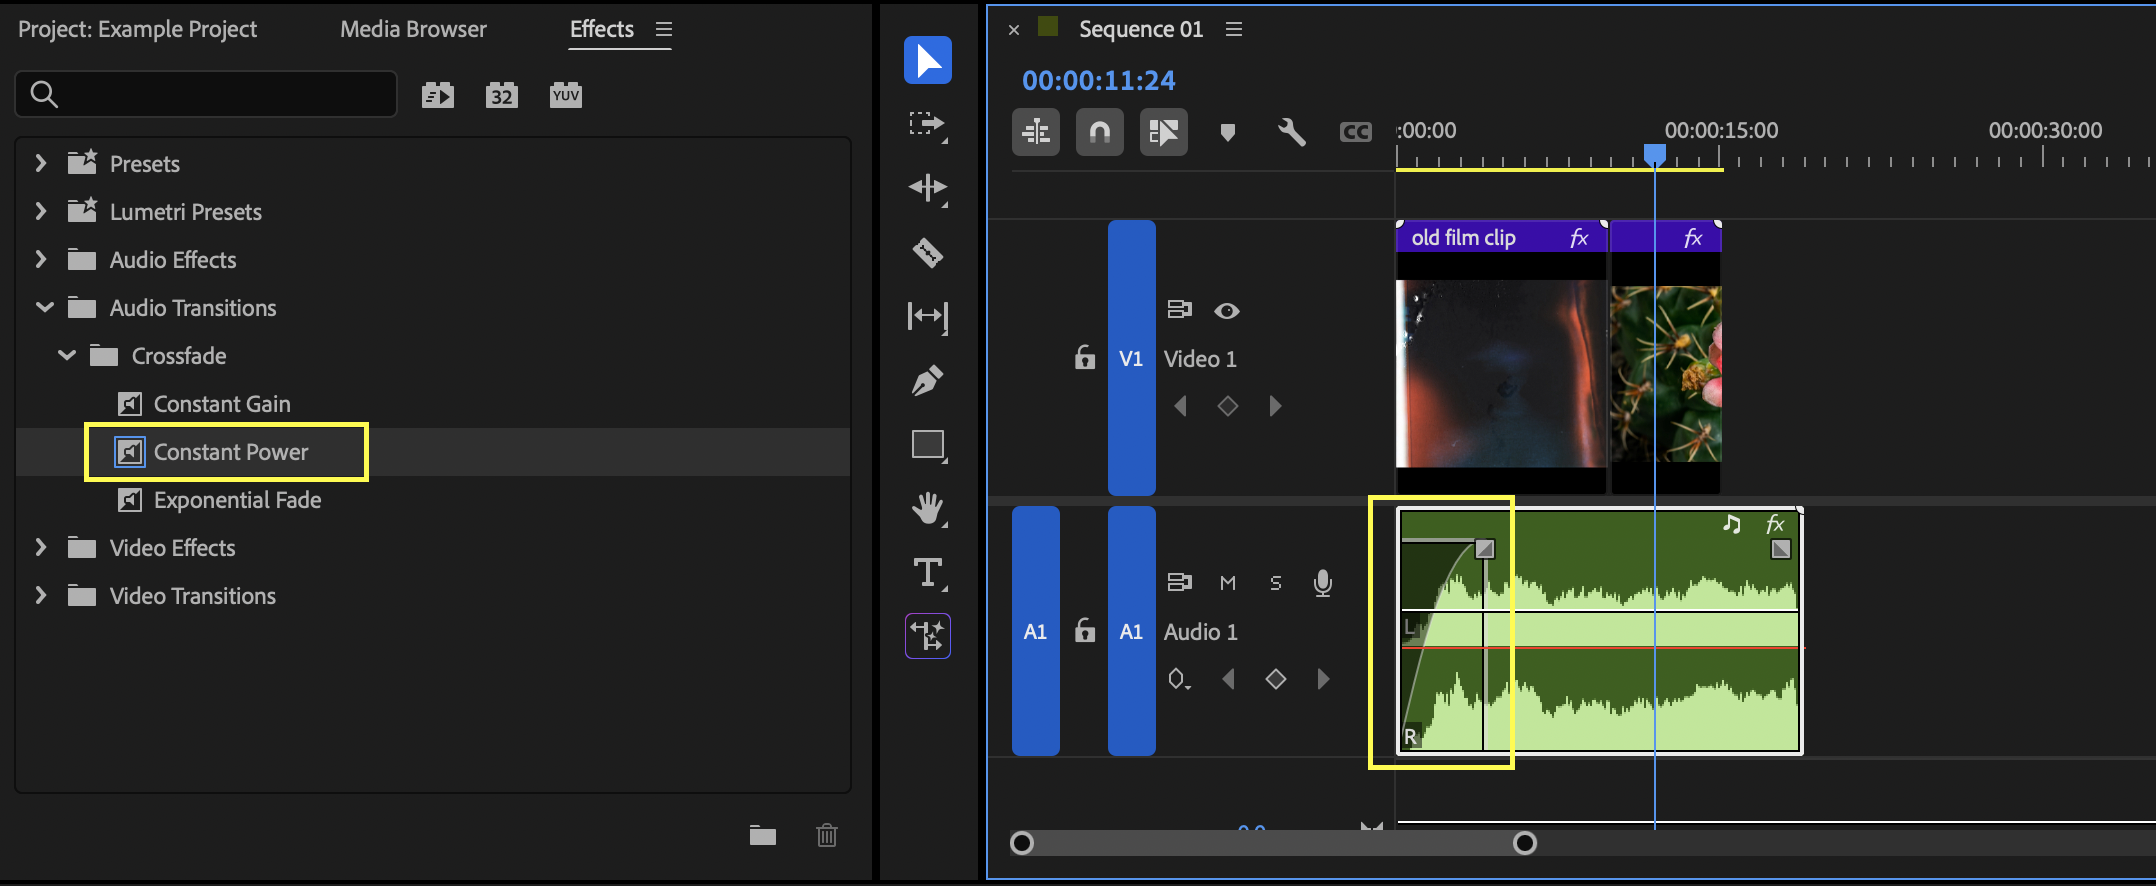
You can adjust the fade length by dragging the transition’s edges in the timeline.
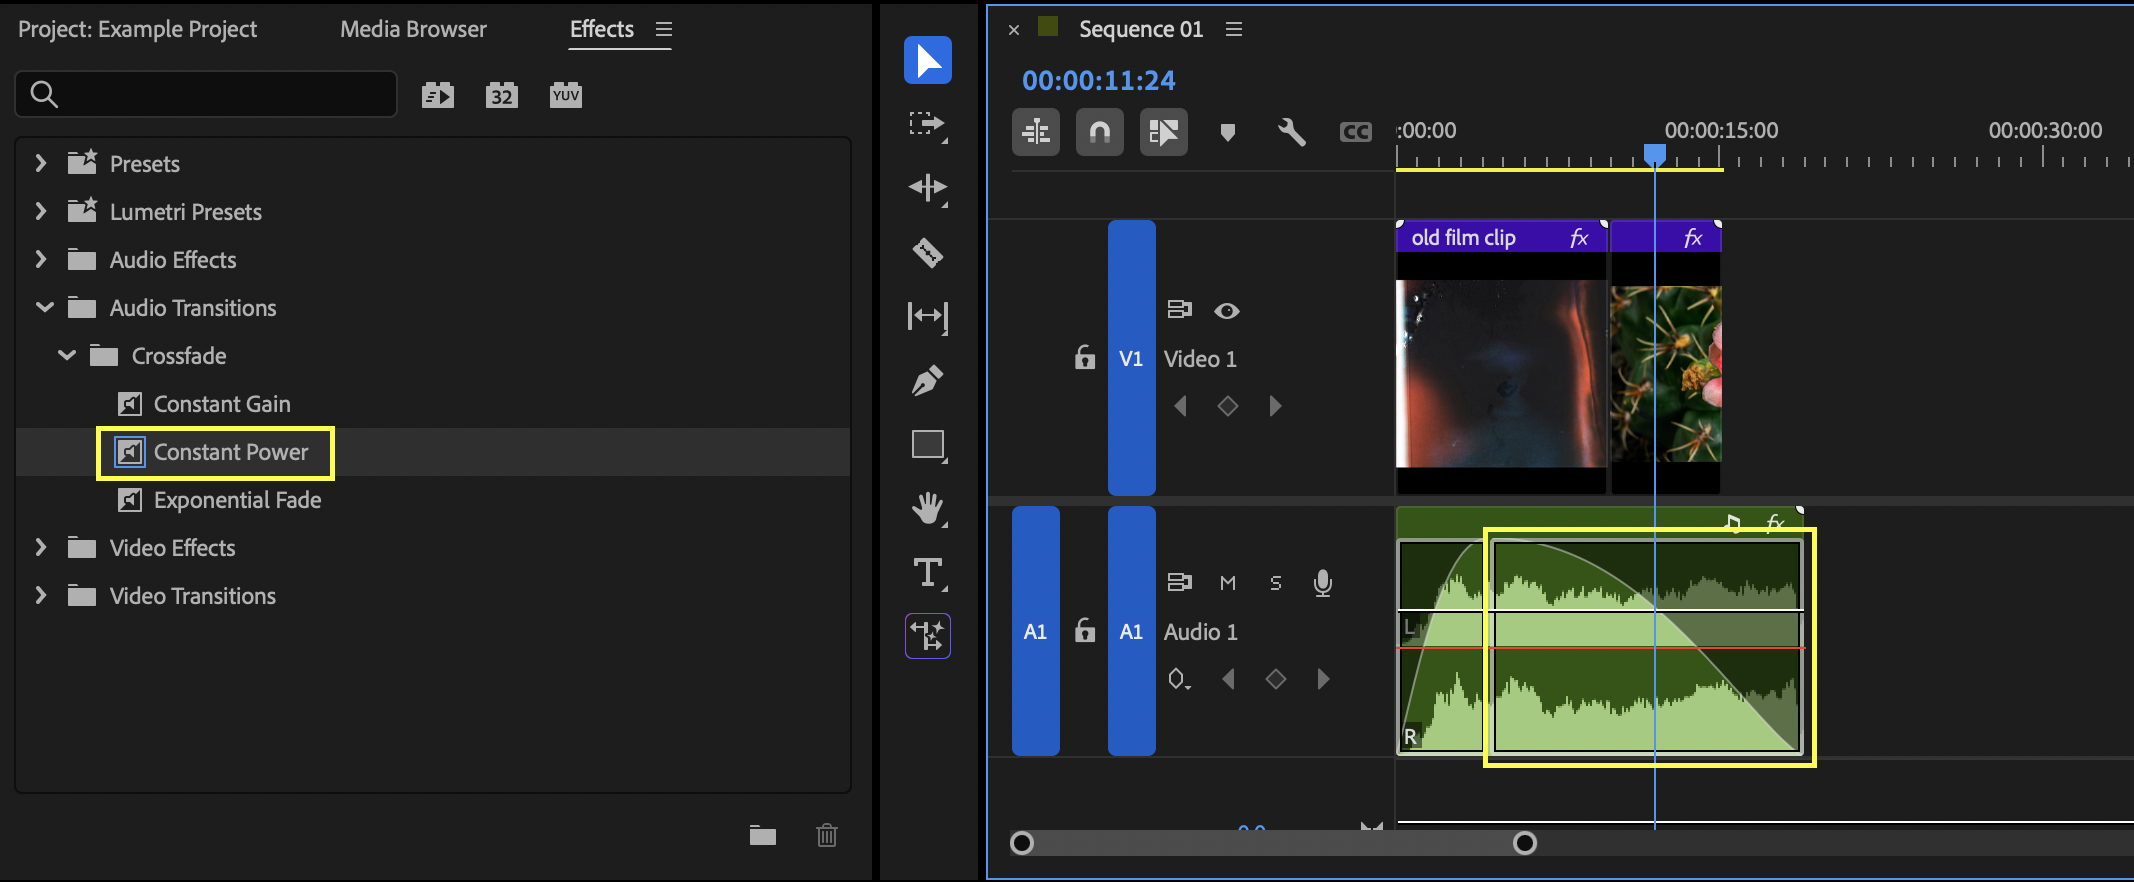
To create a fade-out, apply the Constant Power transition to the end of the audio clip. Adjust its duration to control how gradually the sound fades away.
This is particularly useful for music beds and ambience.
Top Tip:
Longer fade-outs help scenes feel more natural and less abruptly cut.
Crossfades help blend two audio clips smoothly. Overlap the end of one clip with the start of another on the timeline, then apply the Constant Power transition between them. You can also use Shift + D to apply the default audio transition to selected edits.

Crossfades are ideal for smoothing dialogue cuts or transitioning between ambience layers.
Top Tip:
If a crossfade sounds uneven, try balancing clip levels before applying the transition.