
Apple’s Final Cut Pro (FCP) is a comprehensive video editing suite with a vast range of features, capable of advanced and complex jobs, as well as all the basics. This guide focuses specifically on sound effect and audio clip editing within the software and aims to get you up to speed with this area of FCP in no time at all.
By the end of this read, you should be much more confident working with sound effects and audio clips in Final Cut Pro. We’ll be covering basic functions like muting, volume adjustment and rearranging audio clips, as well as reversing audio, adding crossfades, automation, looping and more.
For a more in-depth guide to all of Final Cut Pro’s audio functionality, beyond just audio clips and sound effects, check out Our Guide to Working with Audio in Final Cut Pro. It covers recording, adding media, and some other functions not included in this article. Likewise, for a headstart building a library of sounds, check out our Free Sound Effects collection, and learn How to Download Free Sound Effects and Use them in Your Projects.
Basic Audio Clip Editing in Final Cut Pro
Here are the simple editing features you should be able to grasp as a Final Cut Pro beginner who is looking to become an intermediate or expert user.
How to Move Audio Clips in Final Cut Pro
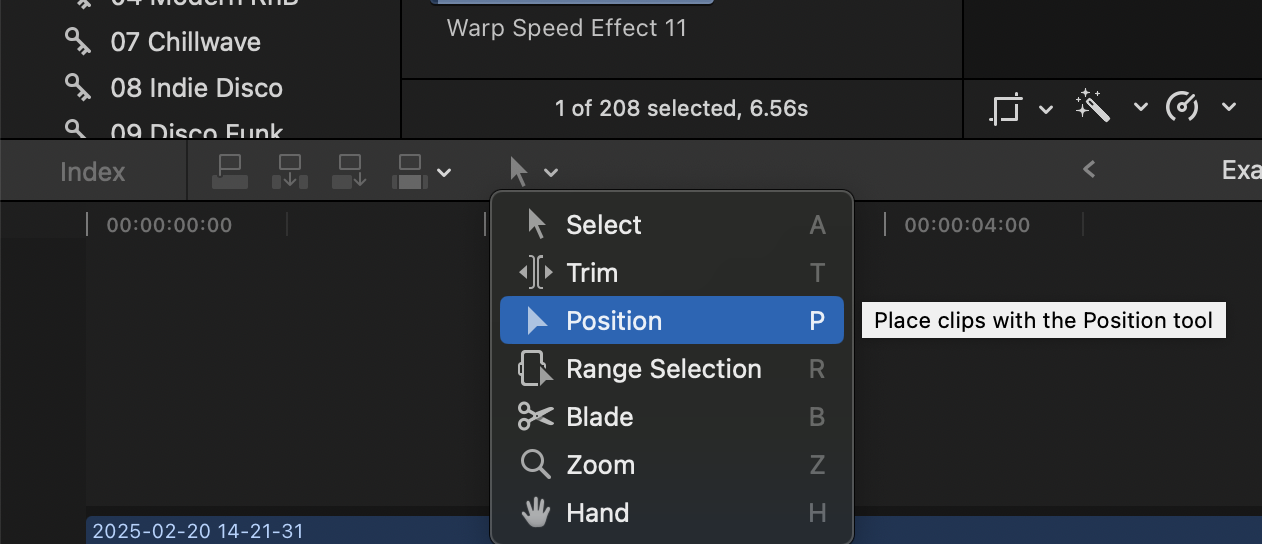
Moving audio clips in Final Cut Pro couldn’t be simpler, and you’ll likely do it constantly during any edit. Select the audio clip in the timeline, then drag it left or right to reposition it against your video. You can also drag it vertically to place it on a different audio lane if your timeline is busy.
For more precision, use the Position tool (P), which lets you move audio freely without rippling the surrounding clips.
How to Mute Audio Clips in Final Cut Pro
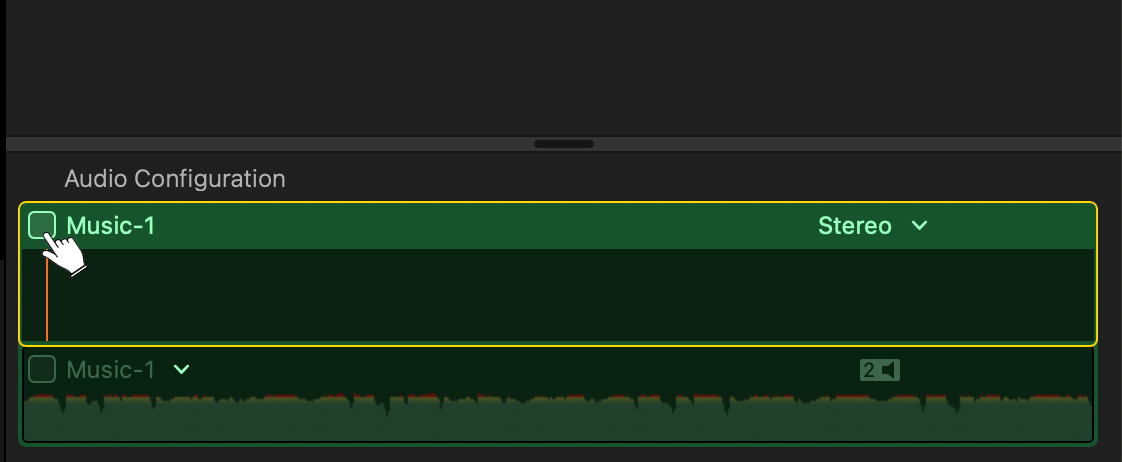
To mute audio in Final Cut Pro, select the clip and press V to disable it. This keeps the clip in place visually but silences it during playback and export.
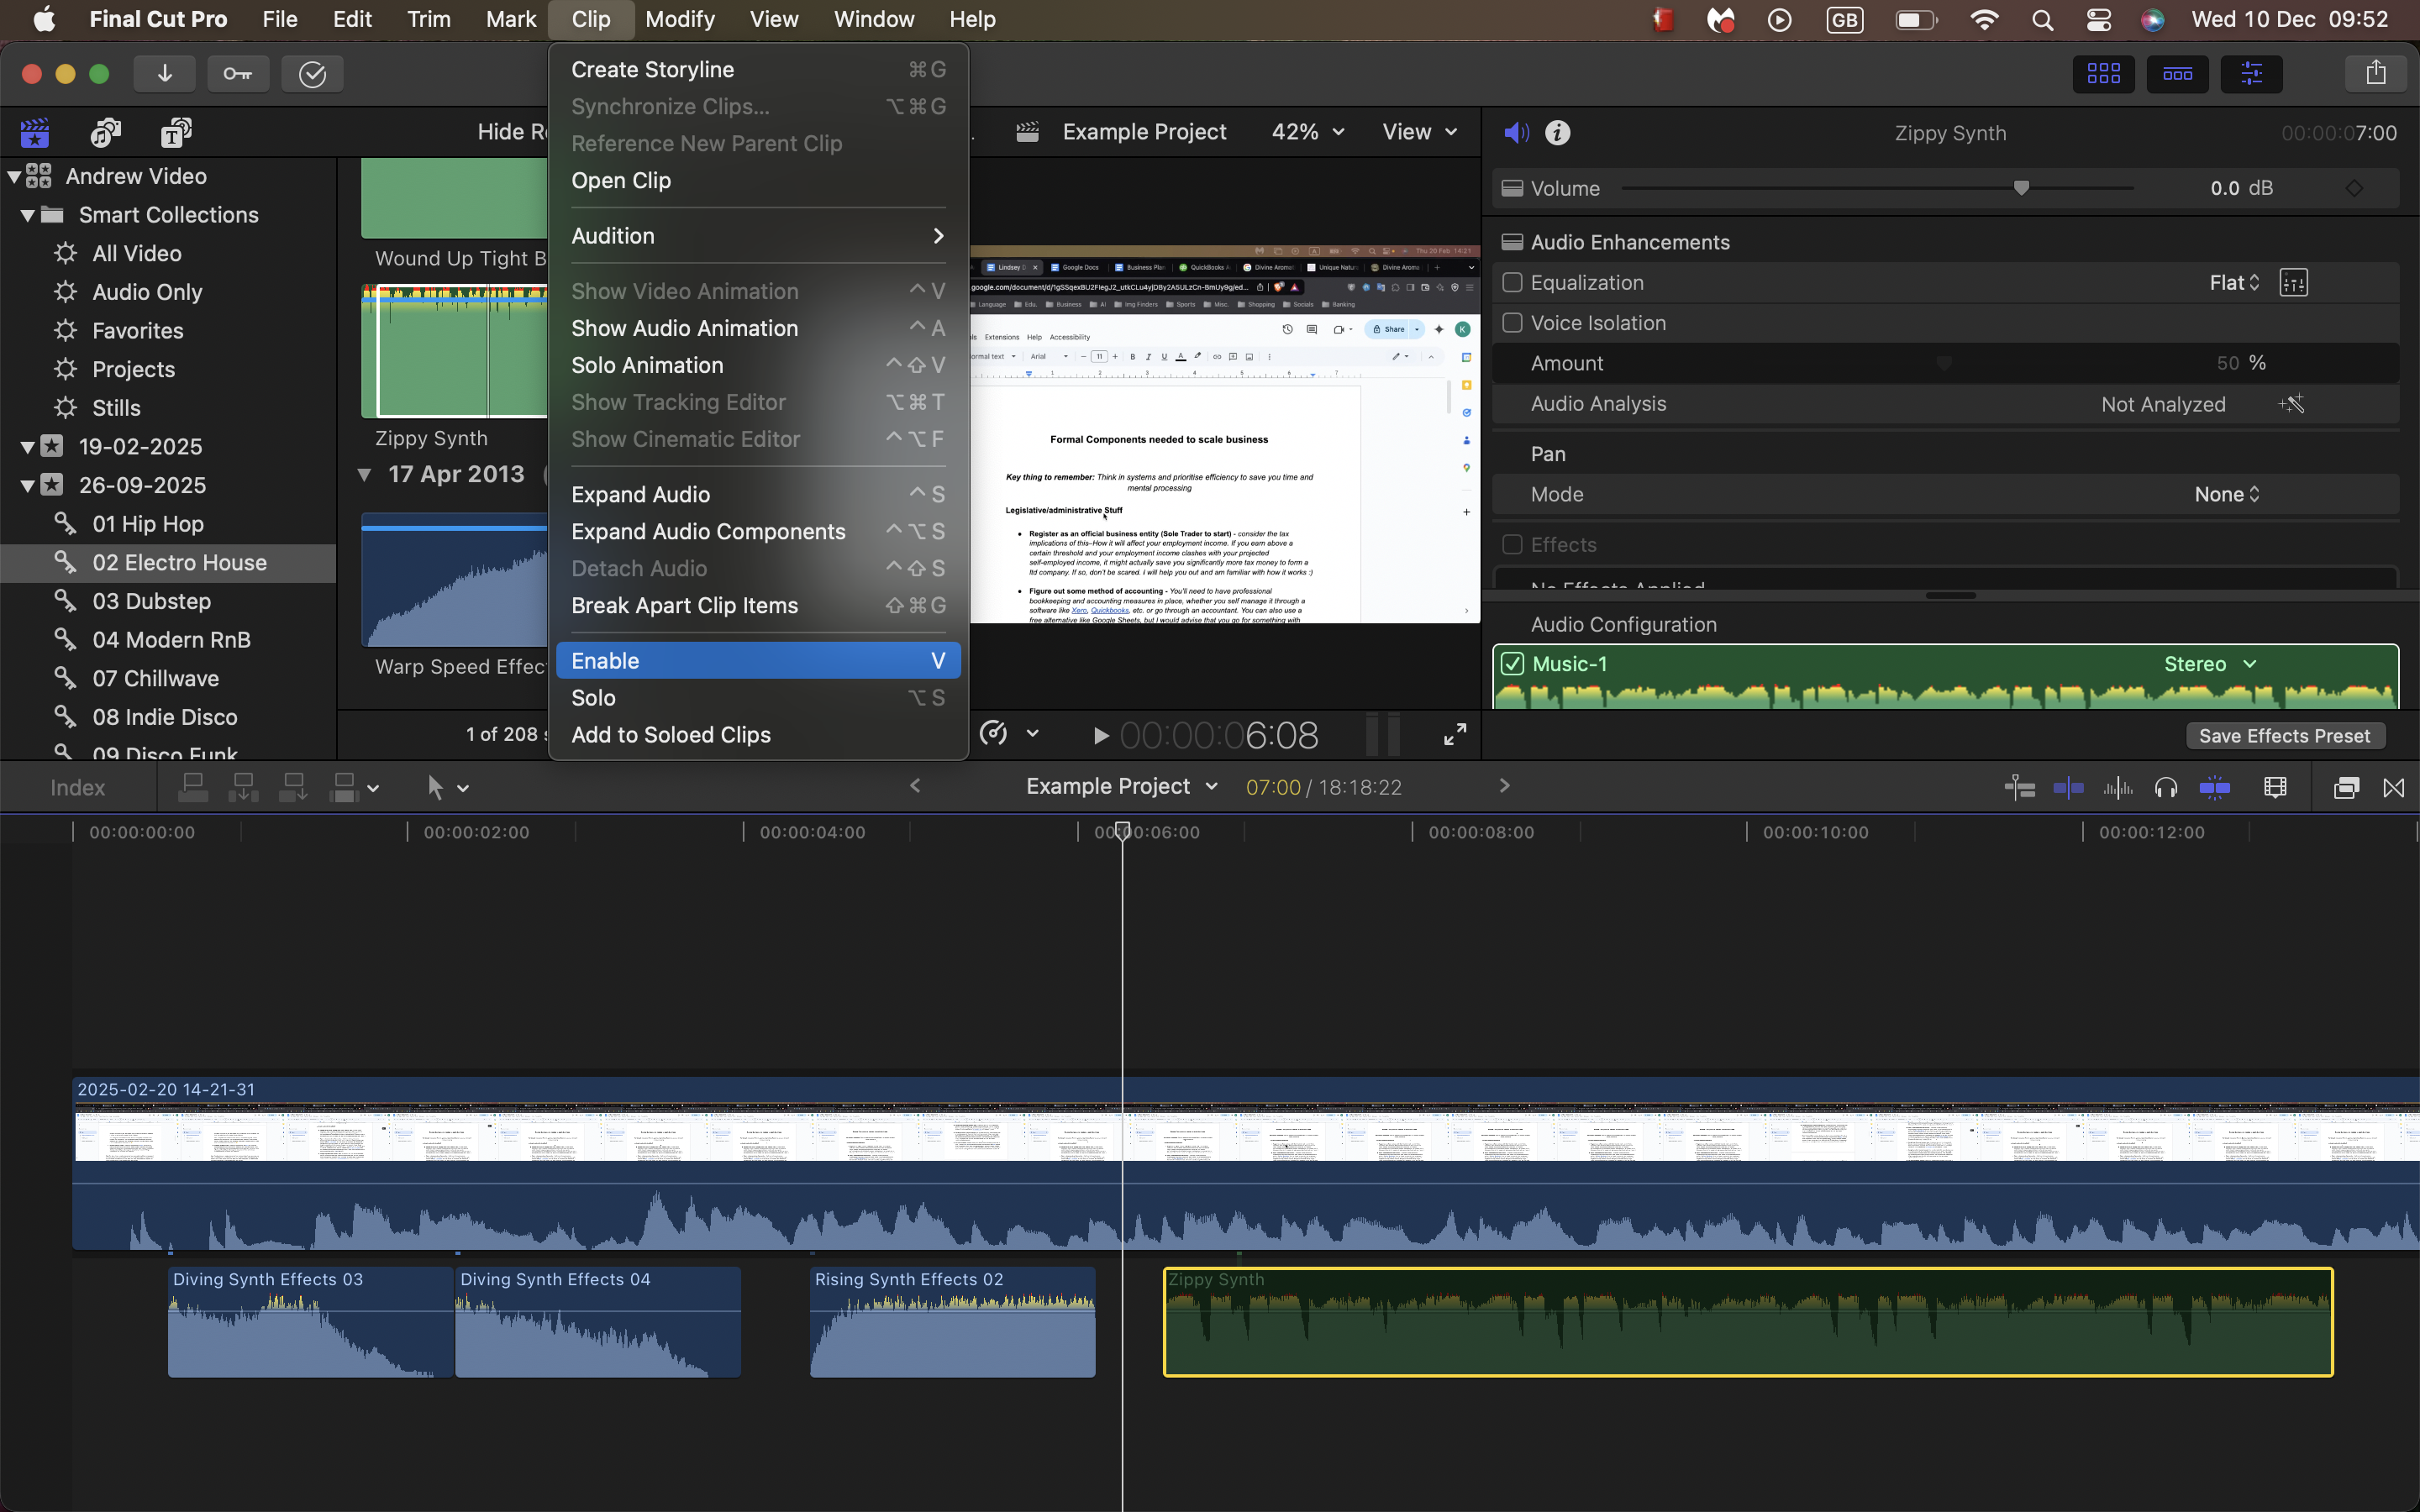
Alternatively, open the Audio Inspector and lower the Volume slider to –infinity dB. Muting is especially useful when testing variations of your sound design or comparing different takes.
If you need temporary silence while still monitoring waveforms, you can use the Mute button in the inspector instead.
How to Replace Audio Clips in Final Cut Pro
Replacing an audio clip allows you to keep timing while swapping out the sound itself. To do this quickly, select an existing audio clip, then drag a new audio file from the Browser onto it. You can then choose from one of the replacement options.
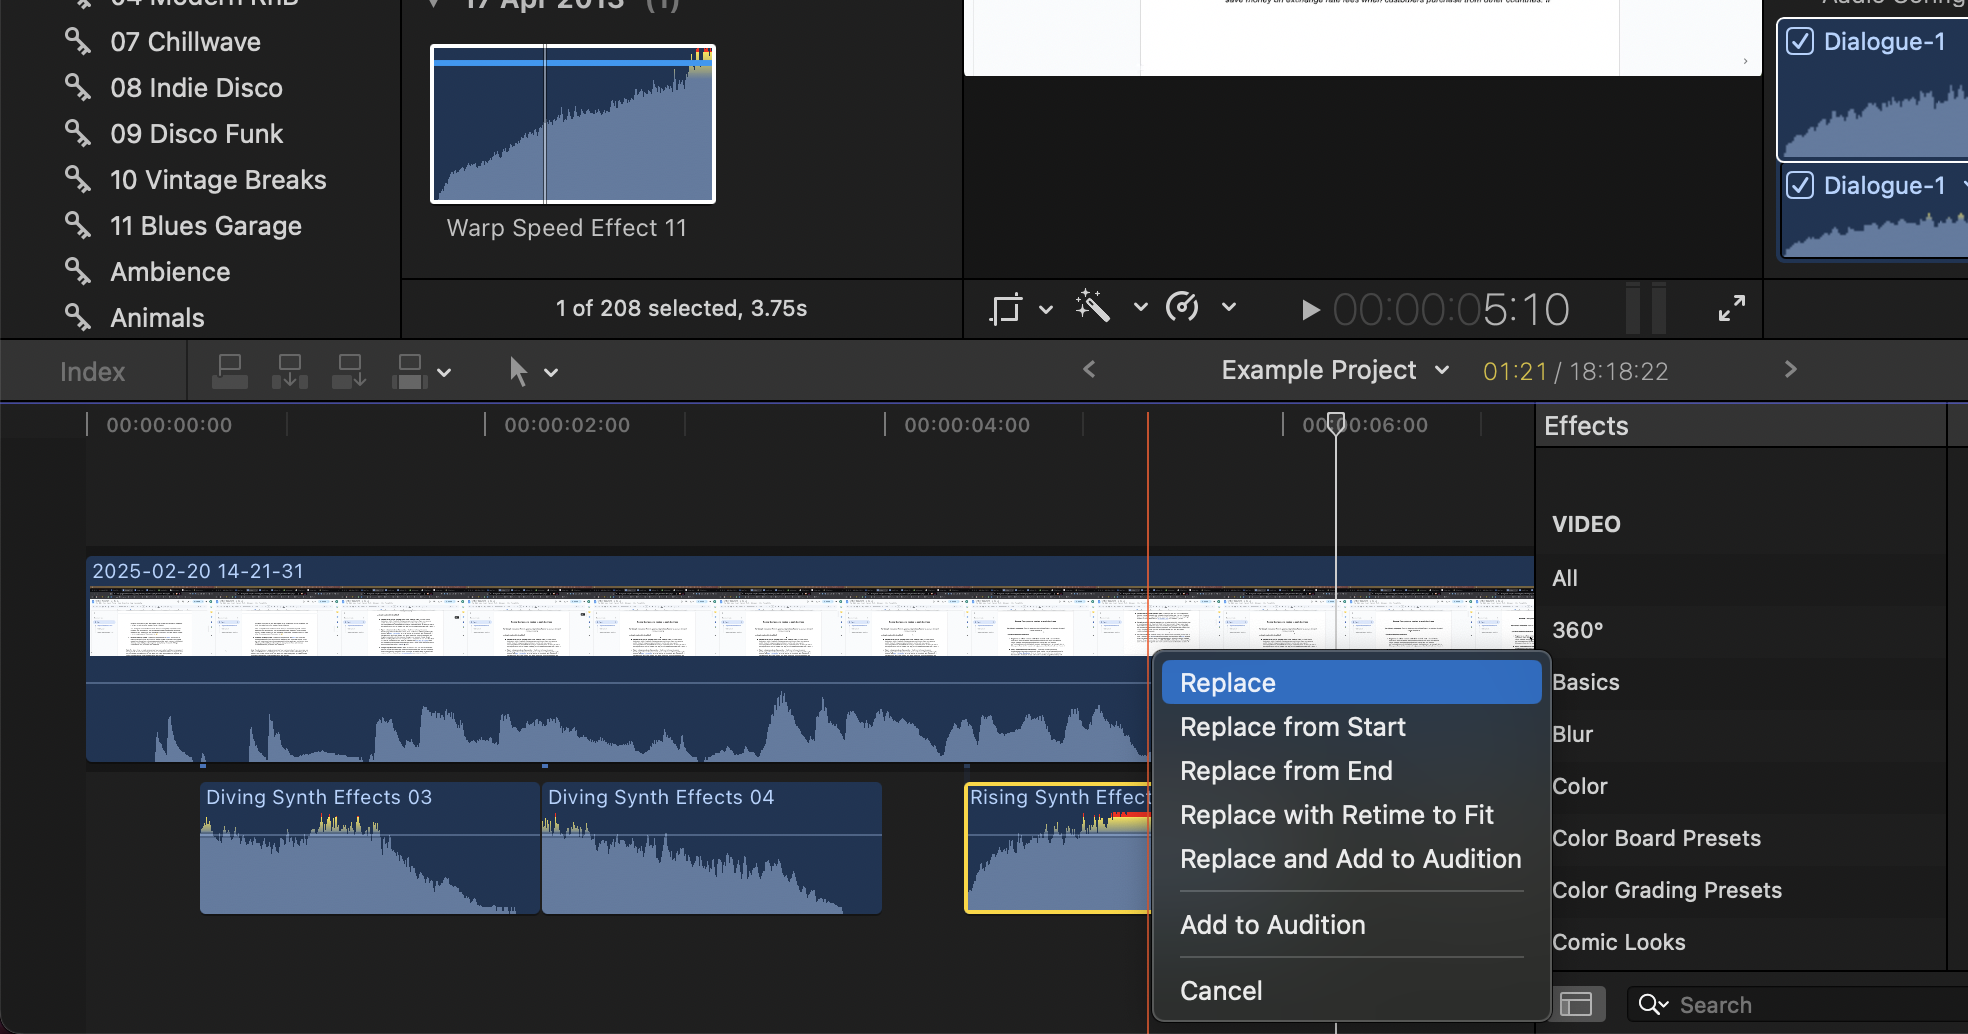
FCP will instantly update the clip while preserving its position in the timeline. This is perfect for refreshing temp sound effects or swapping out early draft recordings.
How to Trim Audio Clips in Final Cut Pro
Trimming audio clips is essential for fine adjustments; getting your audio clips just right. To trim a clip, hover your cursor over the start or end of it until you see the Trim handles, then click and drag inward to shorten the clip. You can also use the Trim tool by hitting T on your keyboard.
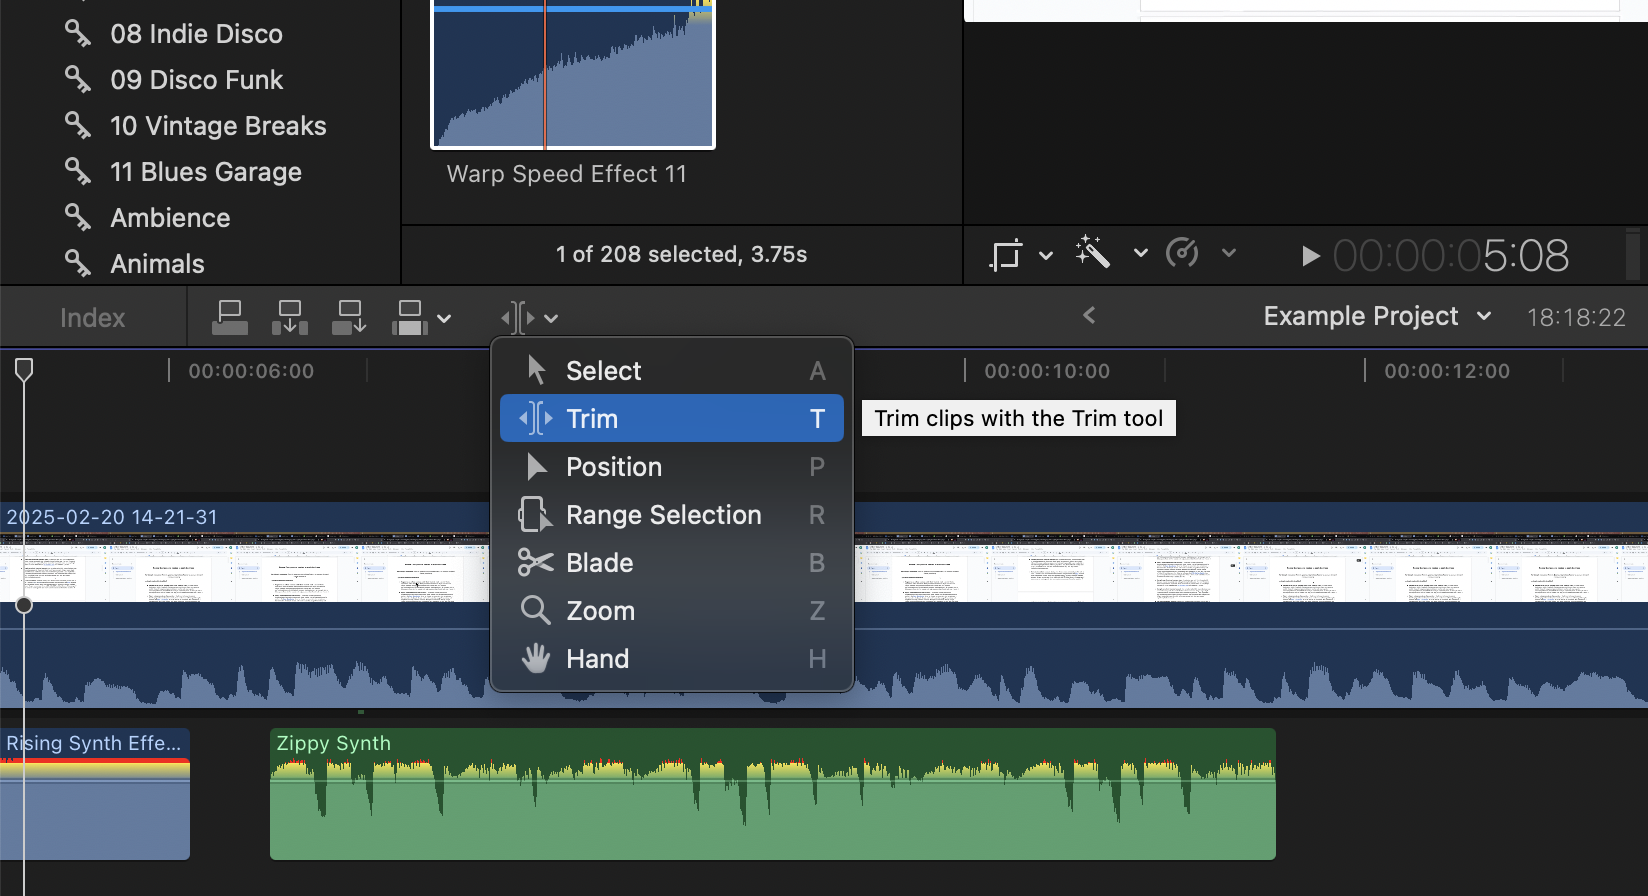
The waveform updates in real time, helping you trim to the exact transient you need. For precise edits, zoom in using Command + Plus. Trimming does not ripple other clips, so it’s ideal for localised adjustments.
How to Split Audio Clips in Final Cut Pro
Splitting an audio clip lets you isolate sections, remove mistakes, or apply different effects to each segment. Move the playhead to the exact frame where you want the cut, select the audio clip, and press Command + B to perform a blade cut. Or, use the Blade tool by hitting B on your keyboard.
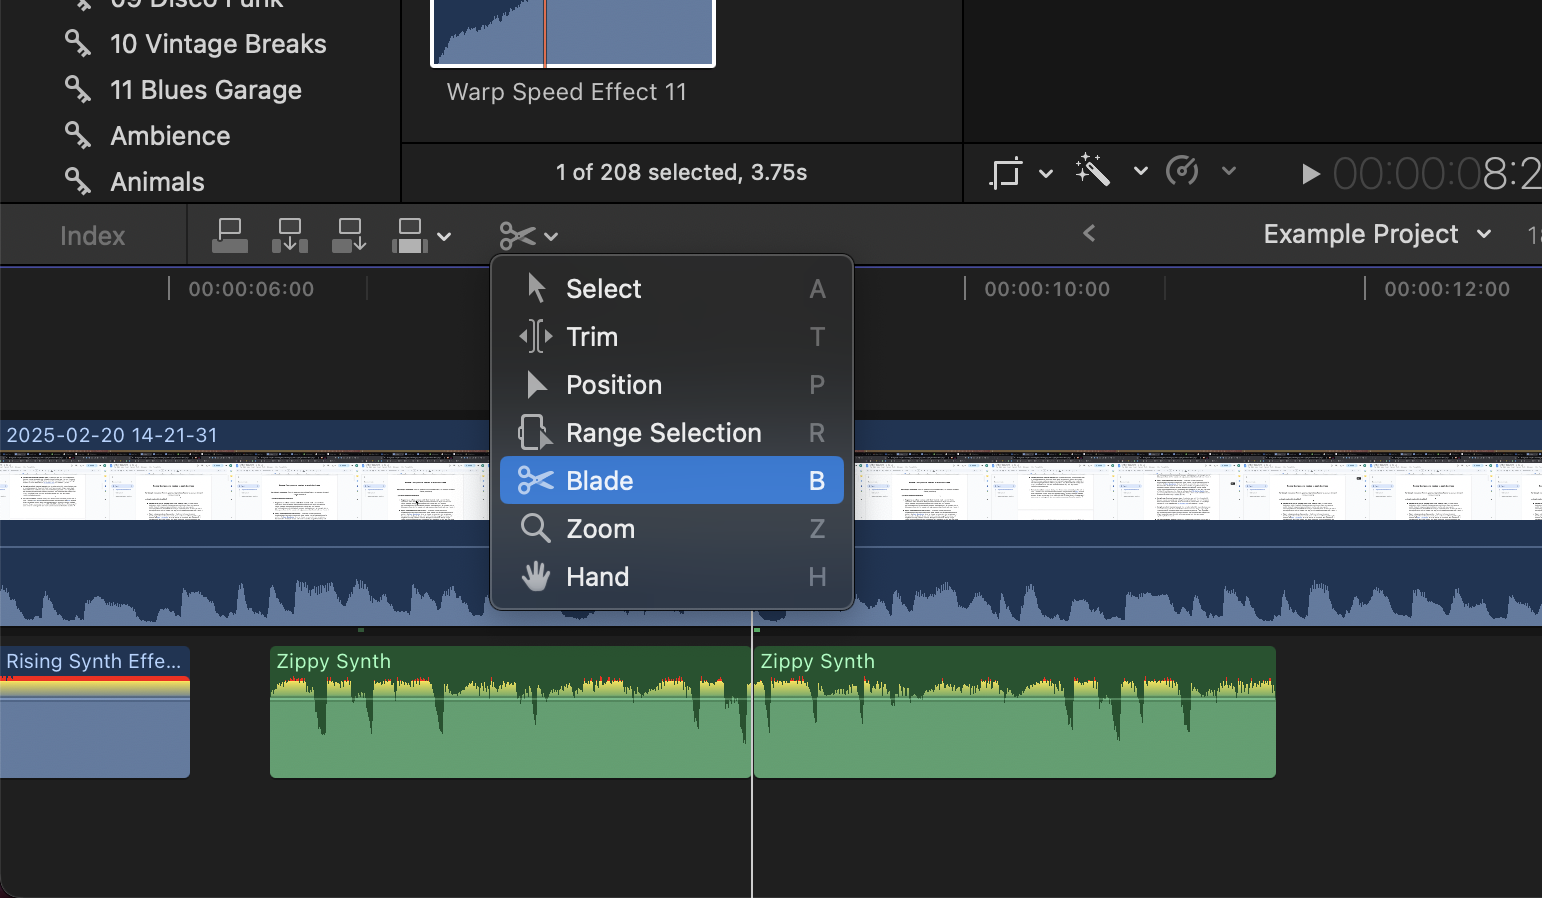
You’ll now have two independent audio segments you can move, trim, or process separately. This comes in handy when adding fades, correcting timing issues, or removing breaths from dialogue.
Advanced Audio Clip Editing in Final Cut Pro
Here are some of the essential audio tools you'll need to master for an expert-level, professional workflow with Final Cut Pro.
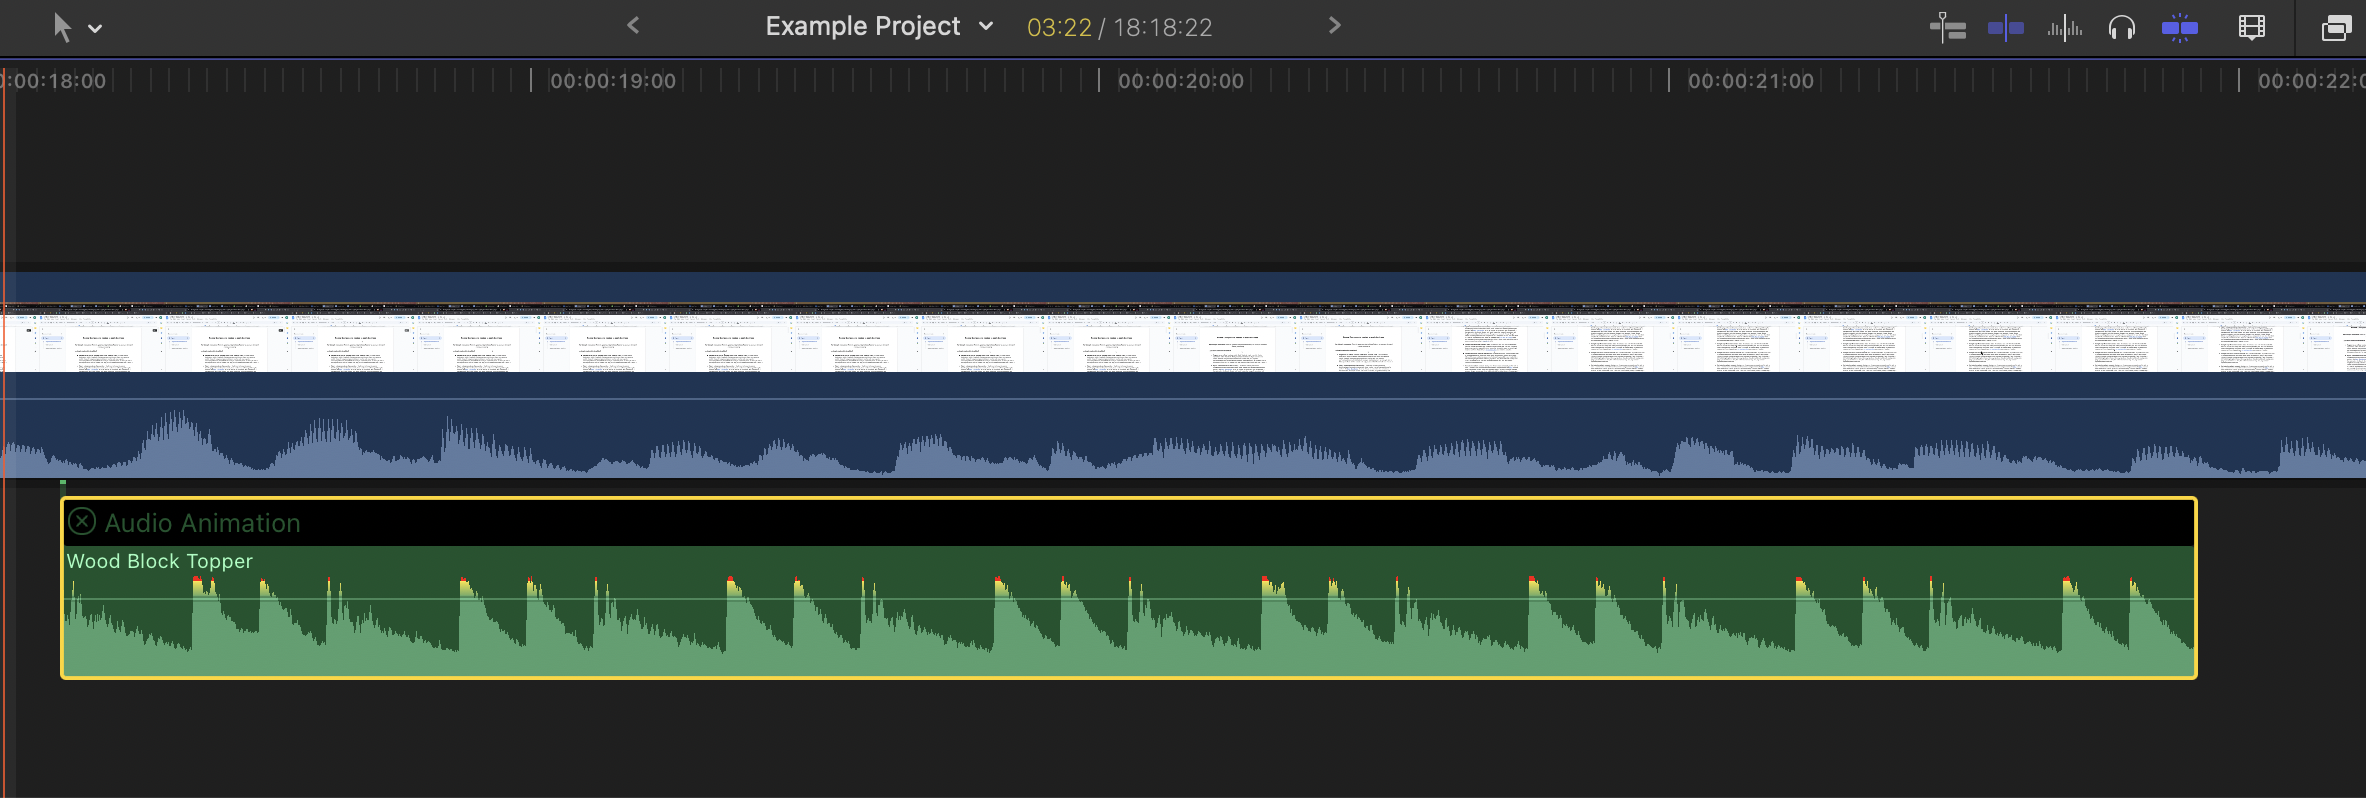
How to Automate Audio Clips in Final Cut Pro
Automation allows you to control volume changes across time. To automate a clip’s volume, first select your audio clip and press Control + A to toggle Show Audio Animation.
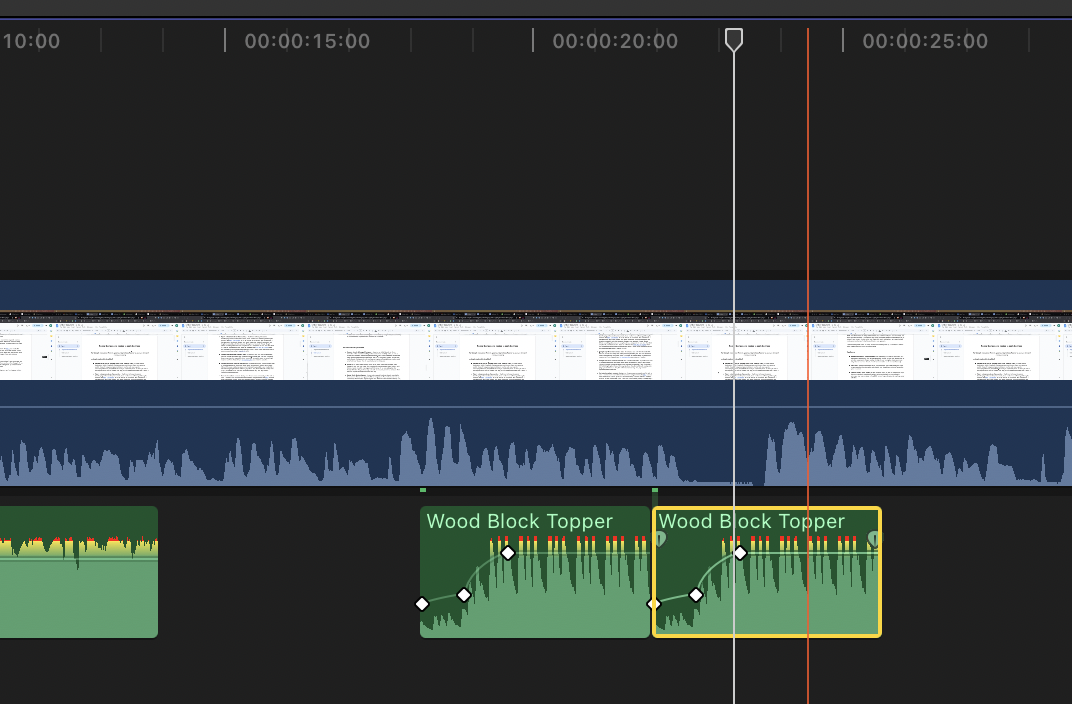
Then, click the Volume parameter, add keyframes by Option-clicking on the volume line. Drag keyframes up or down to boost or reduce levels at specific moments.
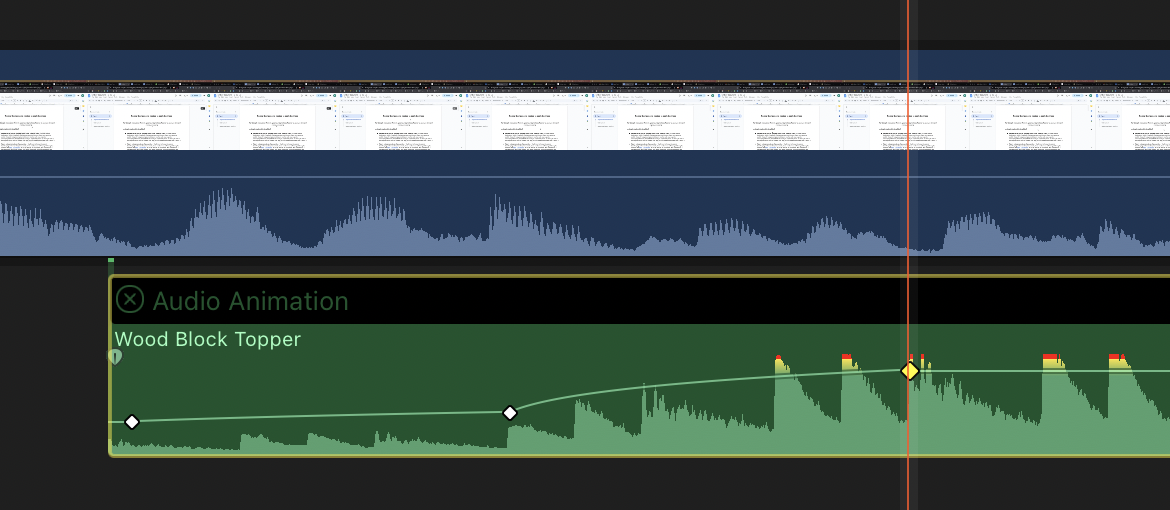
Automation is ideal for ducking music under dialogue or emphasising certain sound effects. You can animate pan or effect parameters here too. Overall, it’s an efficient way to add a wide range of complex effect changes over time. Mastering this skill is highly recommended.
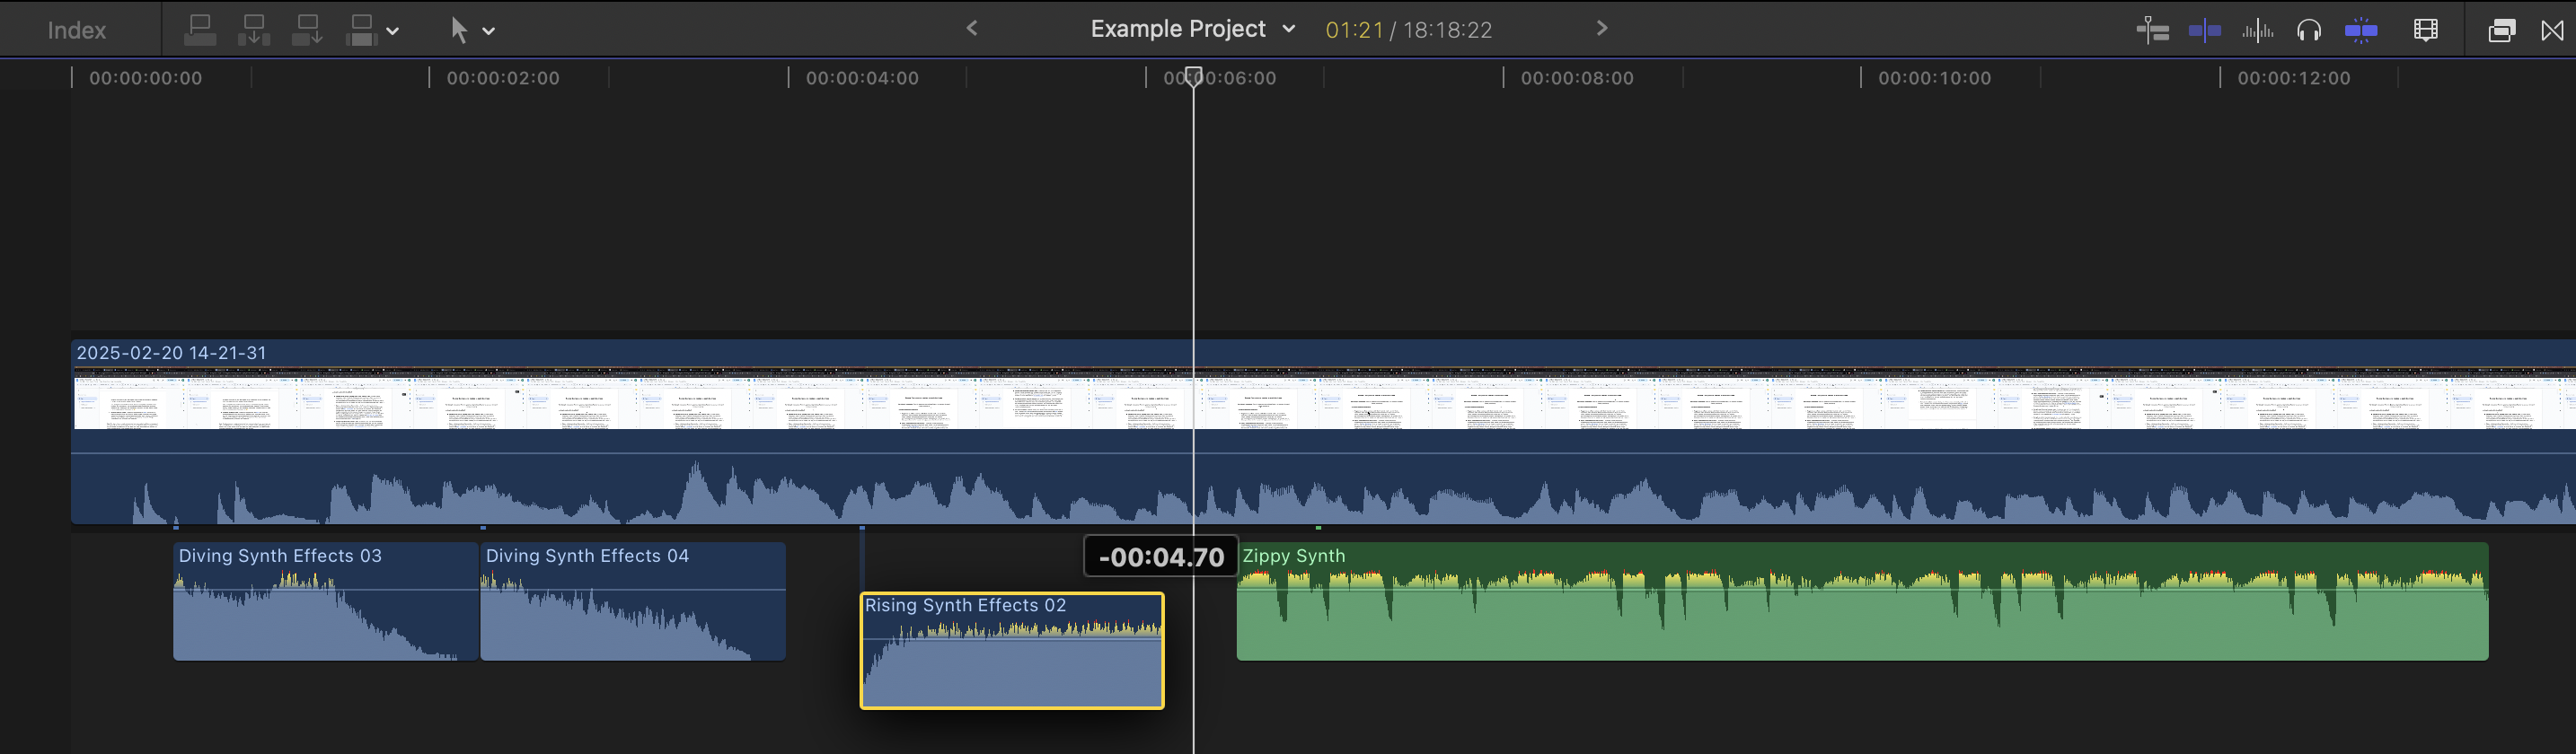
How to Loop Audio Clips in Final Cut Pro
Looping audio clips helps extend ambience, music beds, and repeating sound effects. Looping audio in FCP doesn’t work like many other softwares. We need to manually copy and paste an audio clip to repeat numerous times. To do this, click and drag your desired audio clip whilst holding the Option key. You can then drag a duplicate of the clip in front of your original, making a loop.
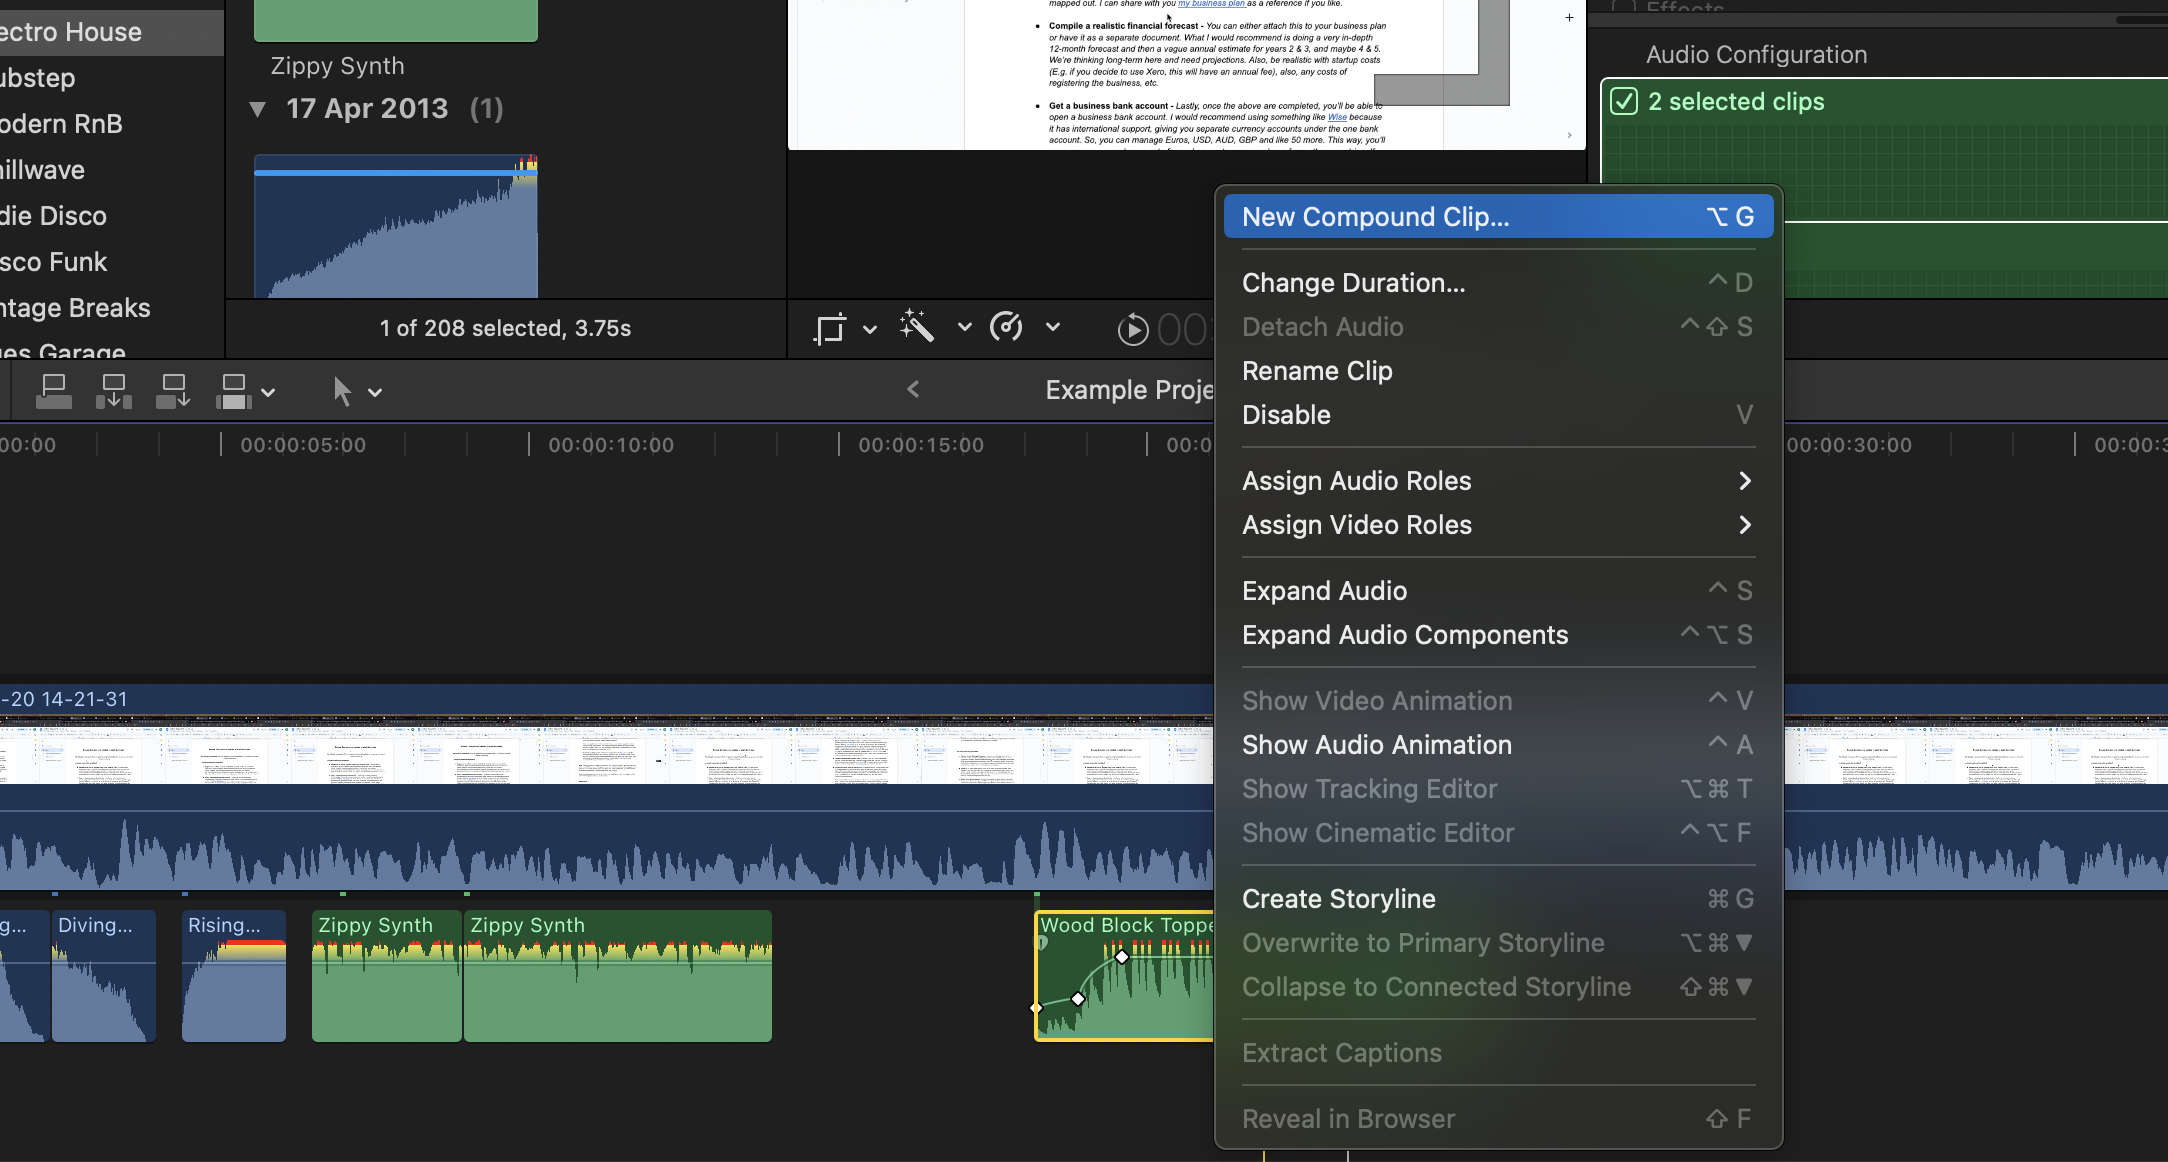
Lastly, if you wish to combine your newly duplicated clip to your original, you can consolidate them into a single clip by selecting both and hitting Option + G, or by selecting New Compound Clip from the drop-down menu after Ctrl+clicking the selected clips.
How to Reverse Audio Clips in Final Cut Pro
Reversing audio is great for creative sound design, transitions, and accent moments. First, select the audio clip, open the Retiming menu (via the speed dropdown above the timeline), and choose Reverse Clip.
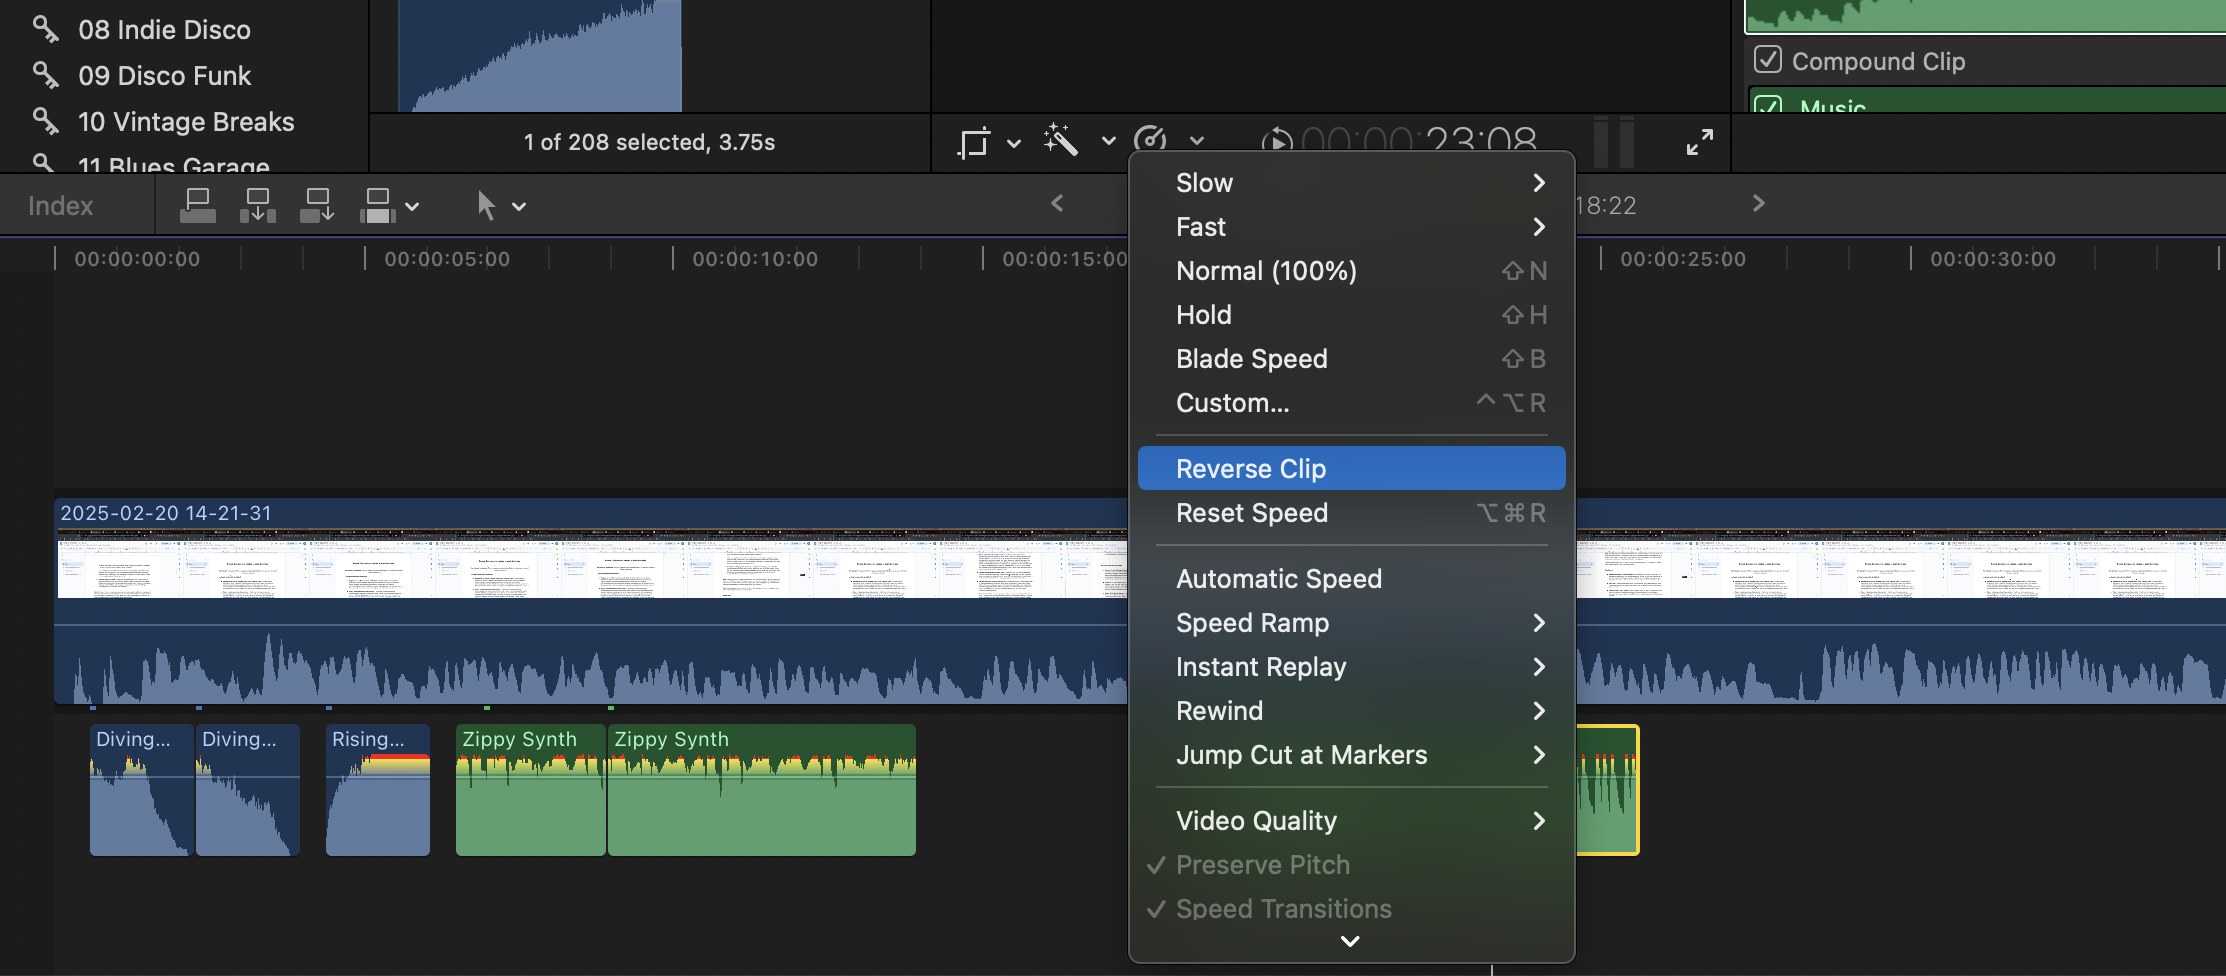
FCP processes the audio instantly, and the waveform flips horizontally to reflect the reversed direction. This works particularly well on impacts, risers, breaths, and whooshes.
How to Normalise Audio Clips in Final Cut Pro
Normalising helps you correct inconsistent loudness by raising overall gain to an ideal level. To do this, select your audio clip and open the Audio Inspector, then click the Loudness checkbox under Audio Enhancements.
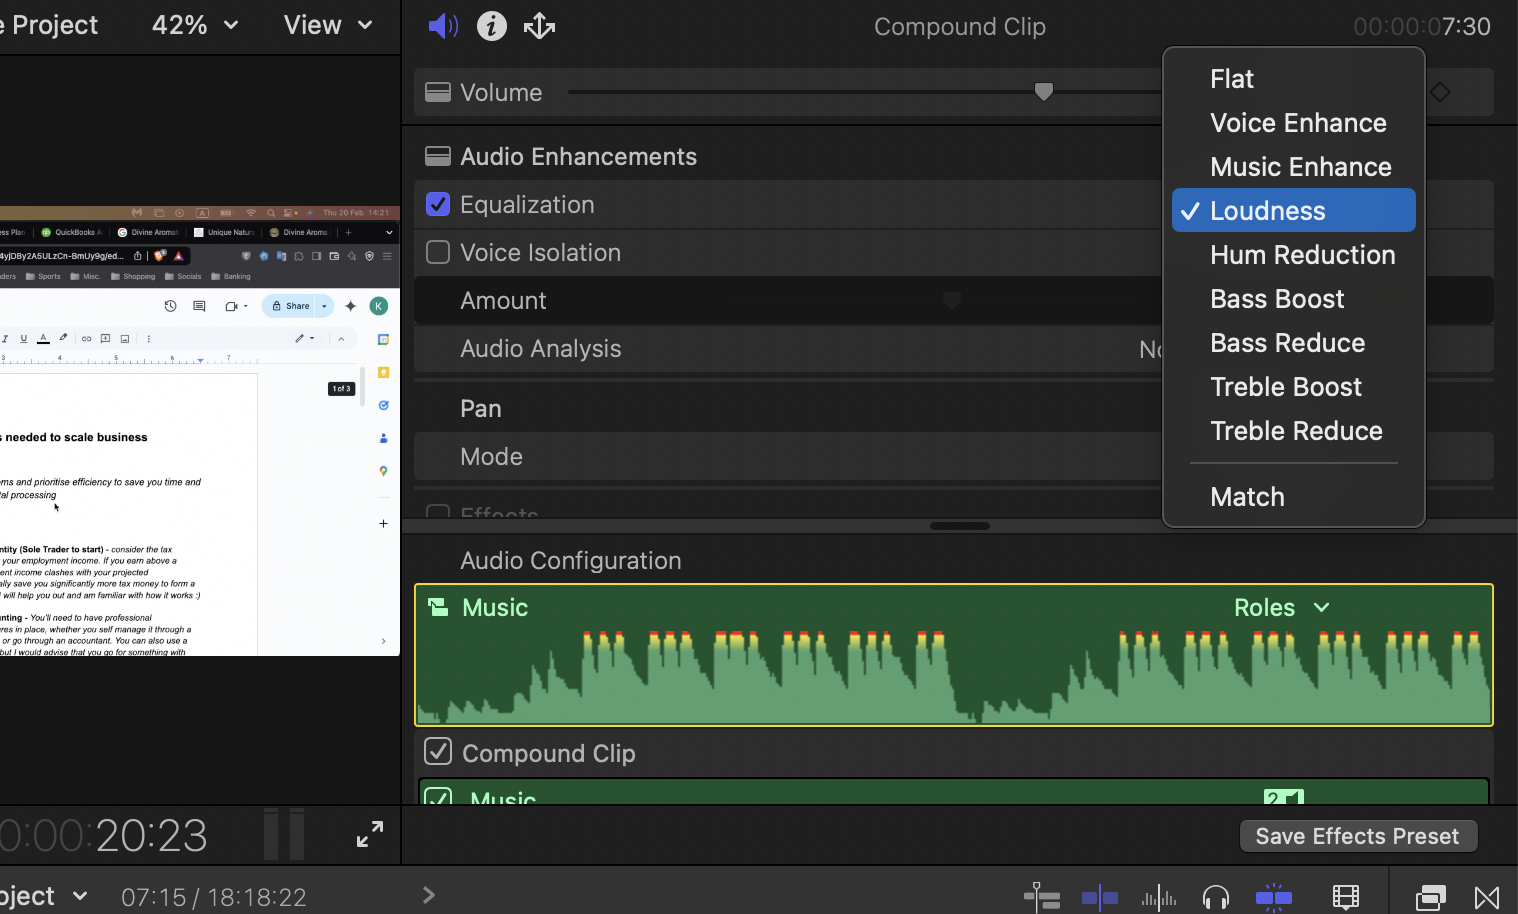
The Loudness slider automatically boosts quieter sections and controls peaks for more balanced playback. Normalisation is helpful for dialogue recorded at uneven levels or inconsistent sound effects. You can combine this with compression for even better dynamic control.
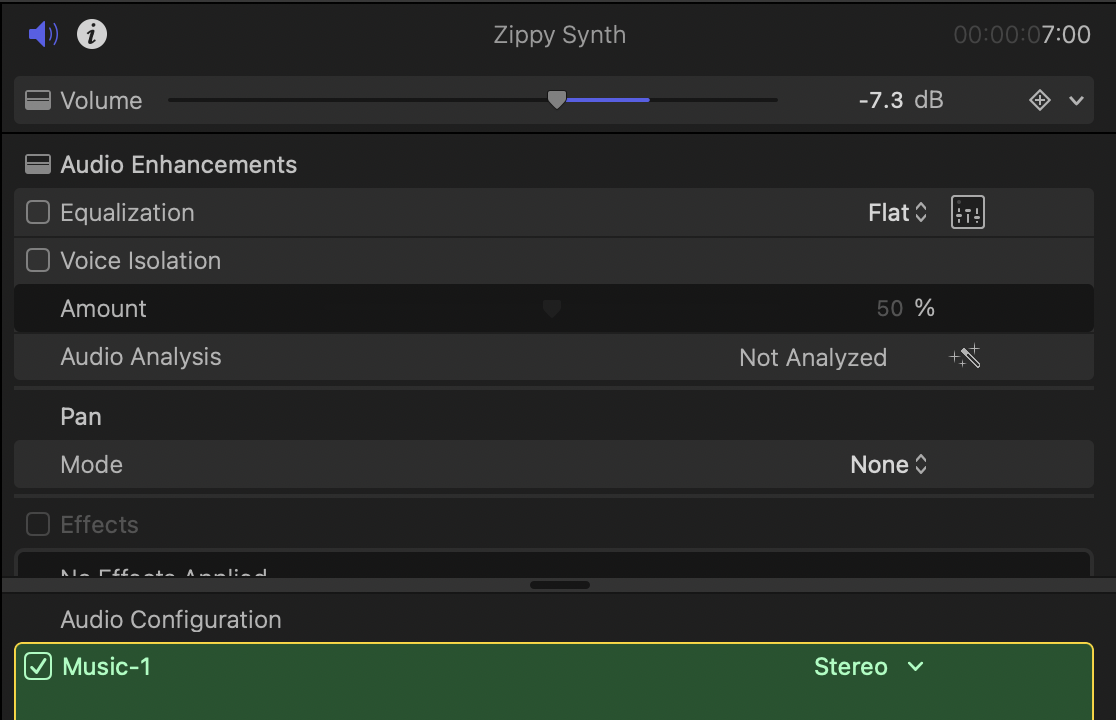
How to Pan Audio Clips in Final Cut Pro
Panning lets you place audio across the stereo field (left and right). This is ideal for immersive sound effects or more expressive spatial mixing. Firstly, select your clip, open the Audio Inspector, and locate the Pan Mode dropdown. Choose options like Stereo Left/Right, Basic Surround, or Dialogue. Then adjust the Pan slider to move the sound between speakers.
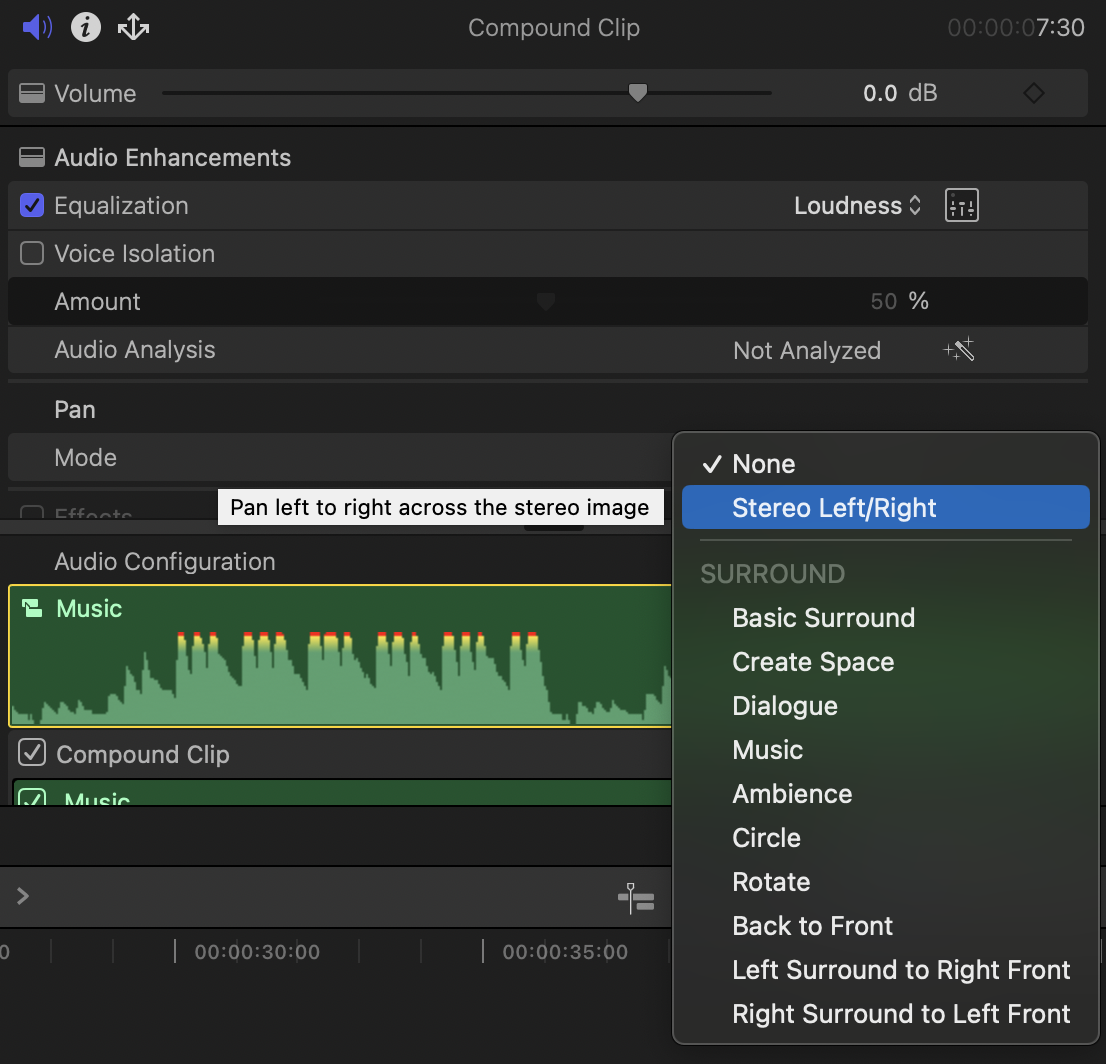
This is great for matching on-screen action or widening your final mix.
Using Audio Clip Effects in Final Cut Pro
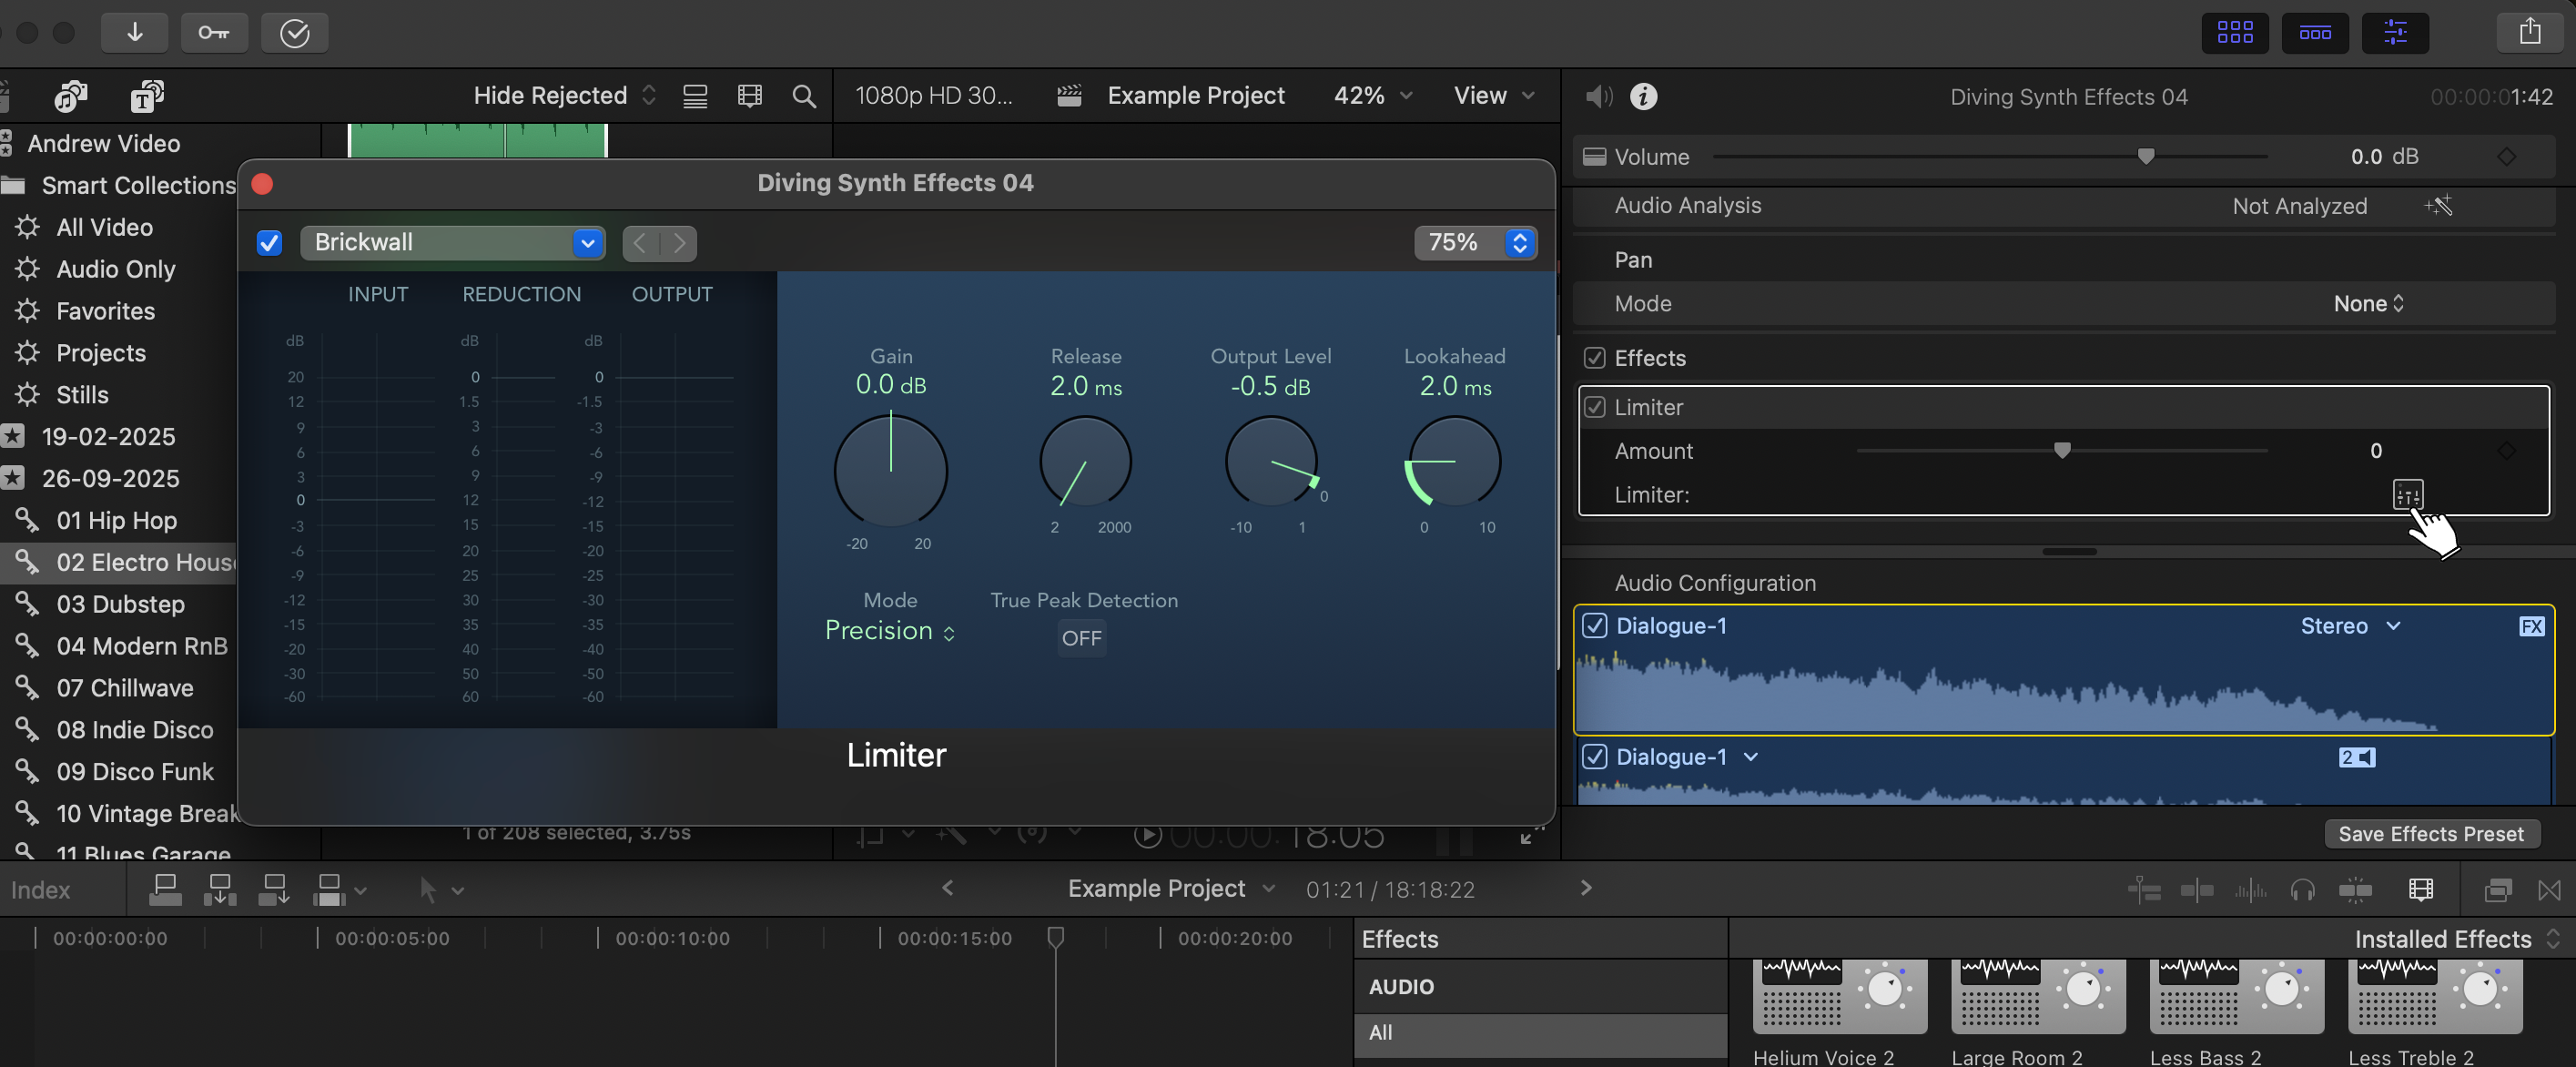
Final Cut Pro includes built-in audio effects such as EQ, Hum Removal, Noise Gate, and Reverb. To apply one, open the Effects Browser, select the Audio category, and drag your chosen effect onto the clip.
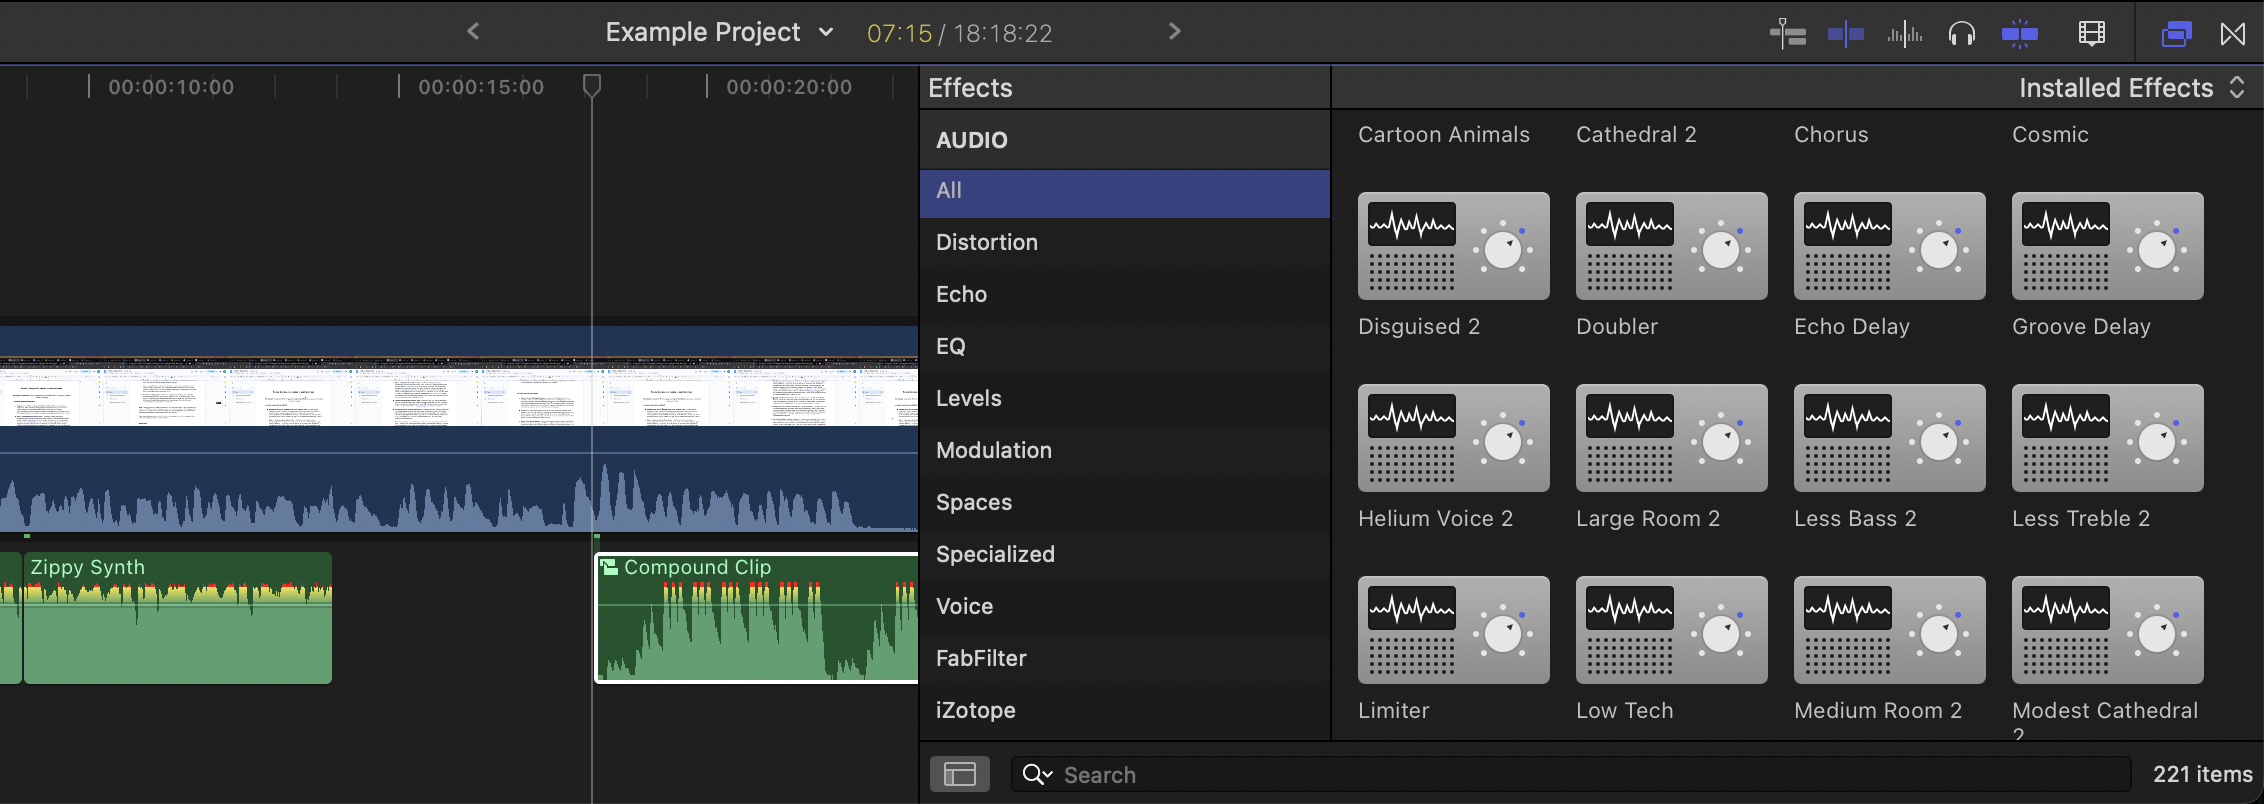
You can tweak effect settings inside the Audio Inspector, where each effect opens up its own adjustable panel. This workflow is ideal for sweetening dialogue, enhancing sound effects, or shaping ambience.
Using Audio Clip Transitions in Final Cut Pro
Here are a few handy features for Final Cut Pro users to transition in and out of different audio clips, and therefore sections in the wider project.
How to Fade In Audio Clips in Final Cut Pro
Fading in helps smooth the start of an audio clip and avoids sudden or distracting entrances. To fade in audio in FCP, hover your cursor over the start of the clip until you see the Fade Handle, then drag it to the right.
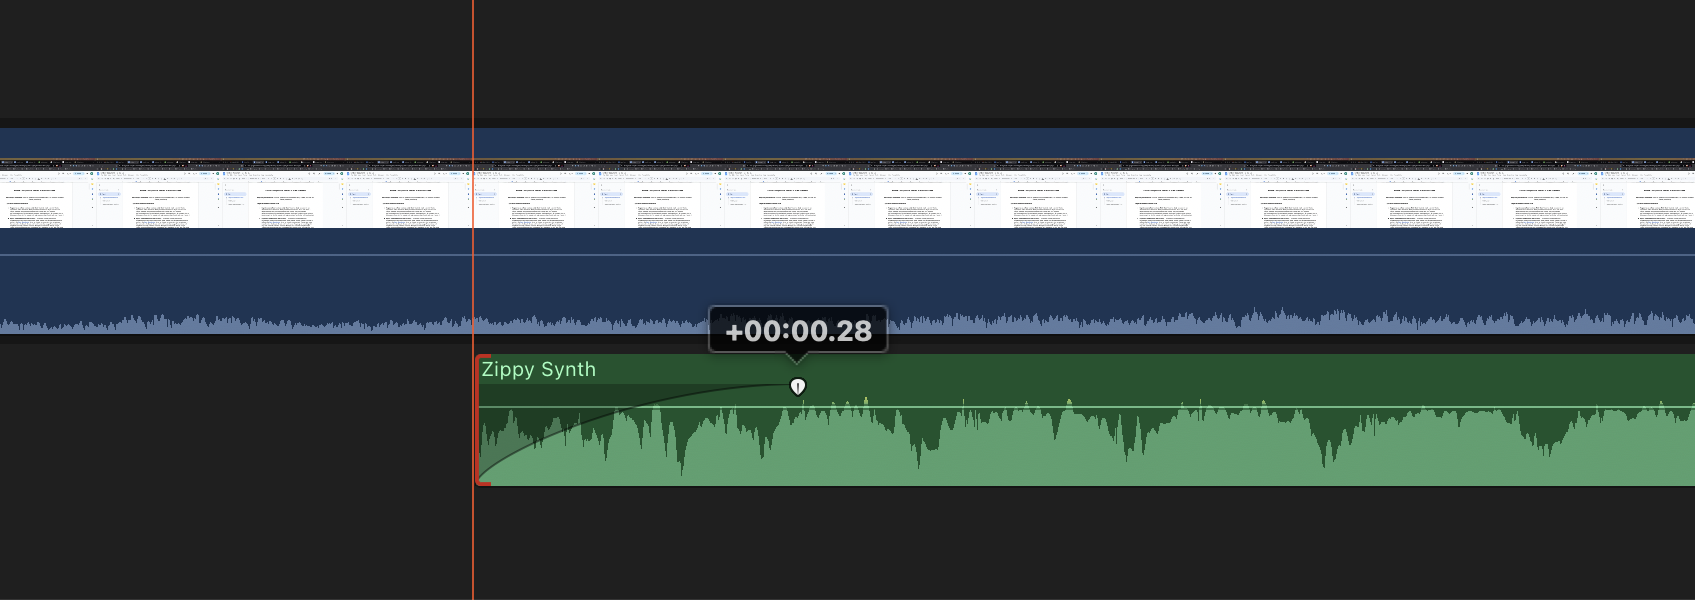
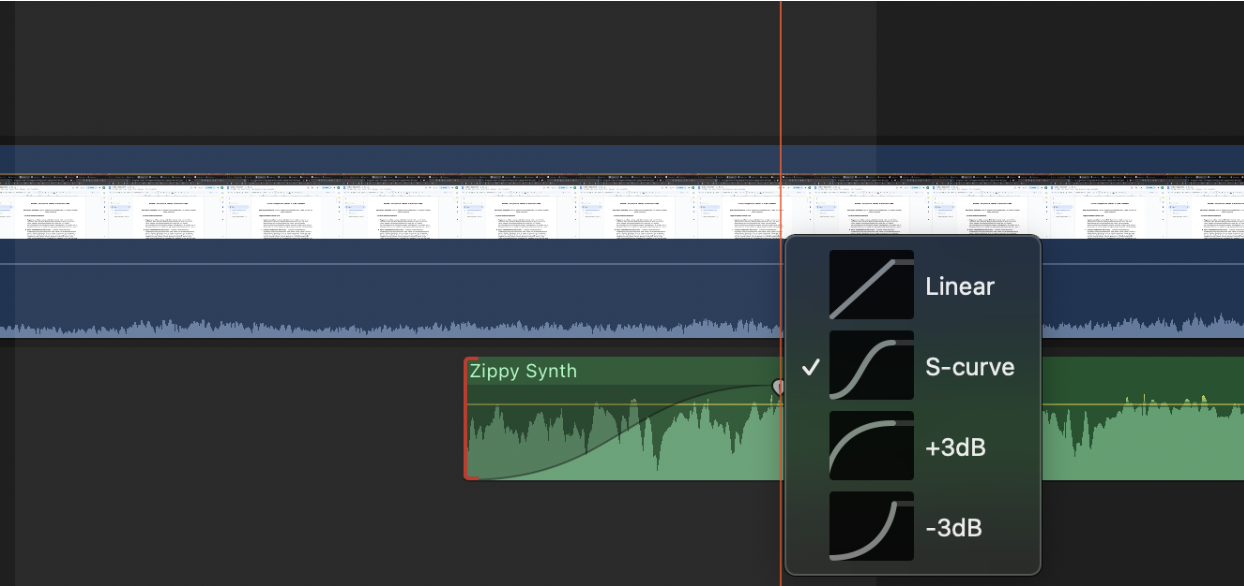
You can adjust the curve shape by Control-clicking the fade icon to choose Linear, S-curve, or +3dB fades. This gives you finer control over how gradually the sound emerges.
How to Fade Out Audio Clips in Final Cut Pro
Creating a fade-out ensures your audio ends smoothly. To add an audio clip fade out, hover your cursor near the end of the clip until the Fade Handle appears, then drag leftwards to create a fade-out region. Curve options (Linear, S-curve, +3dB), once again allow for different styles of volume decay, especially useful for music or ambience.

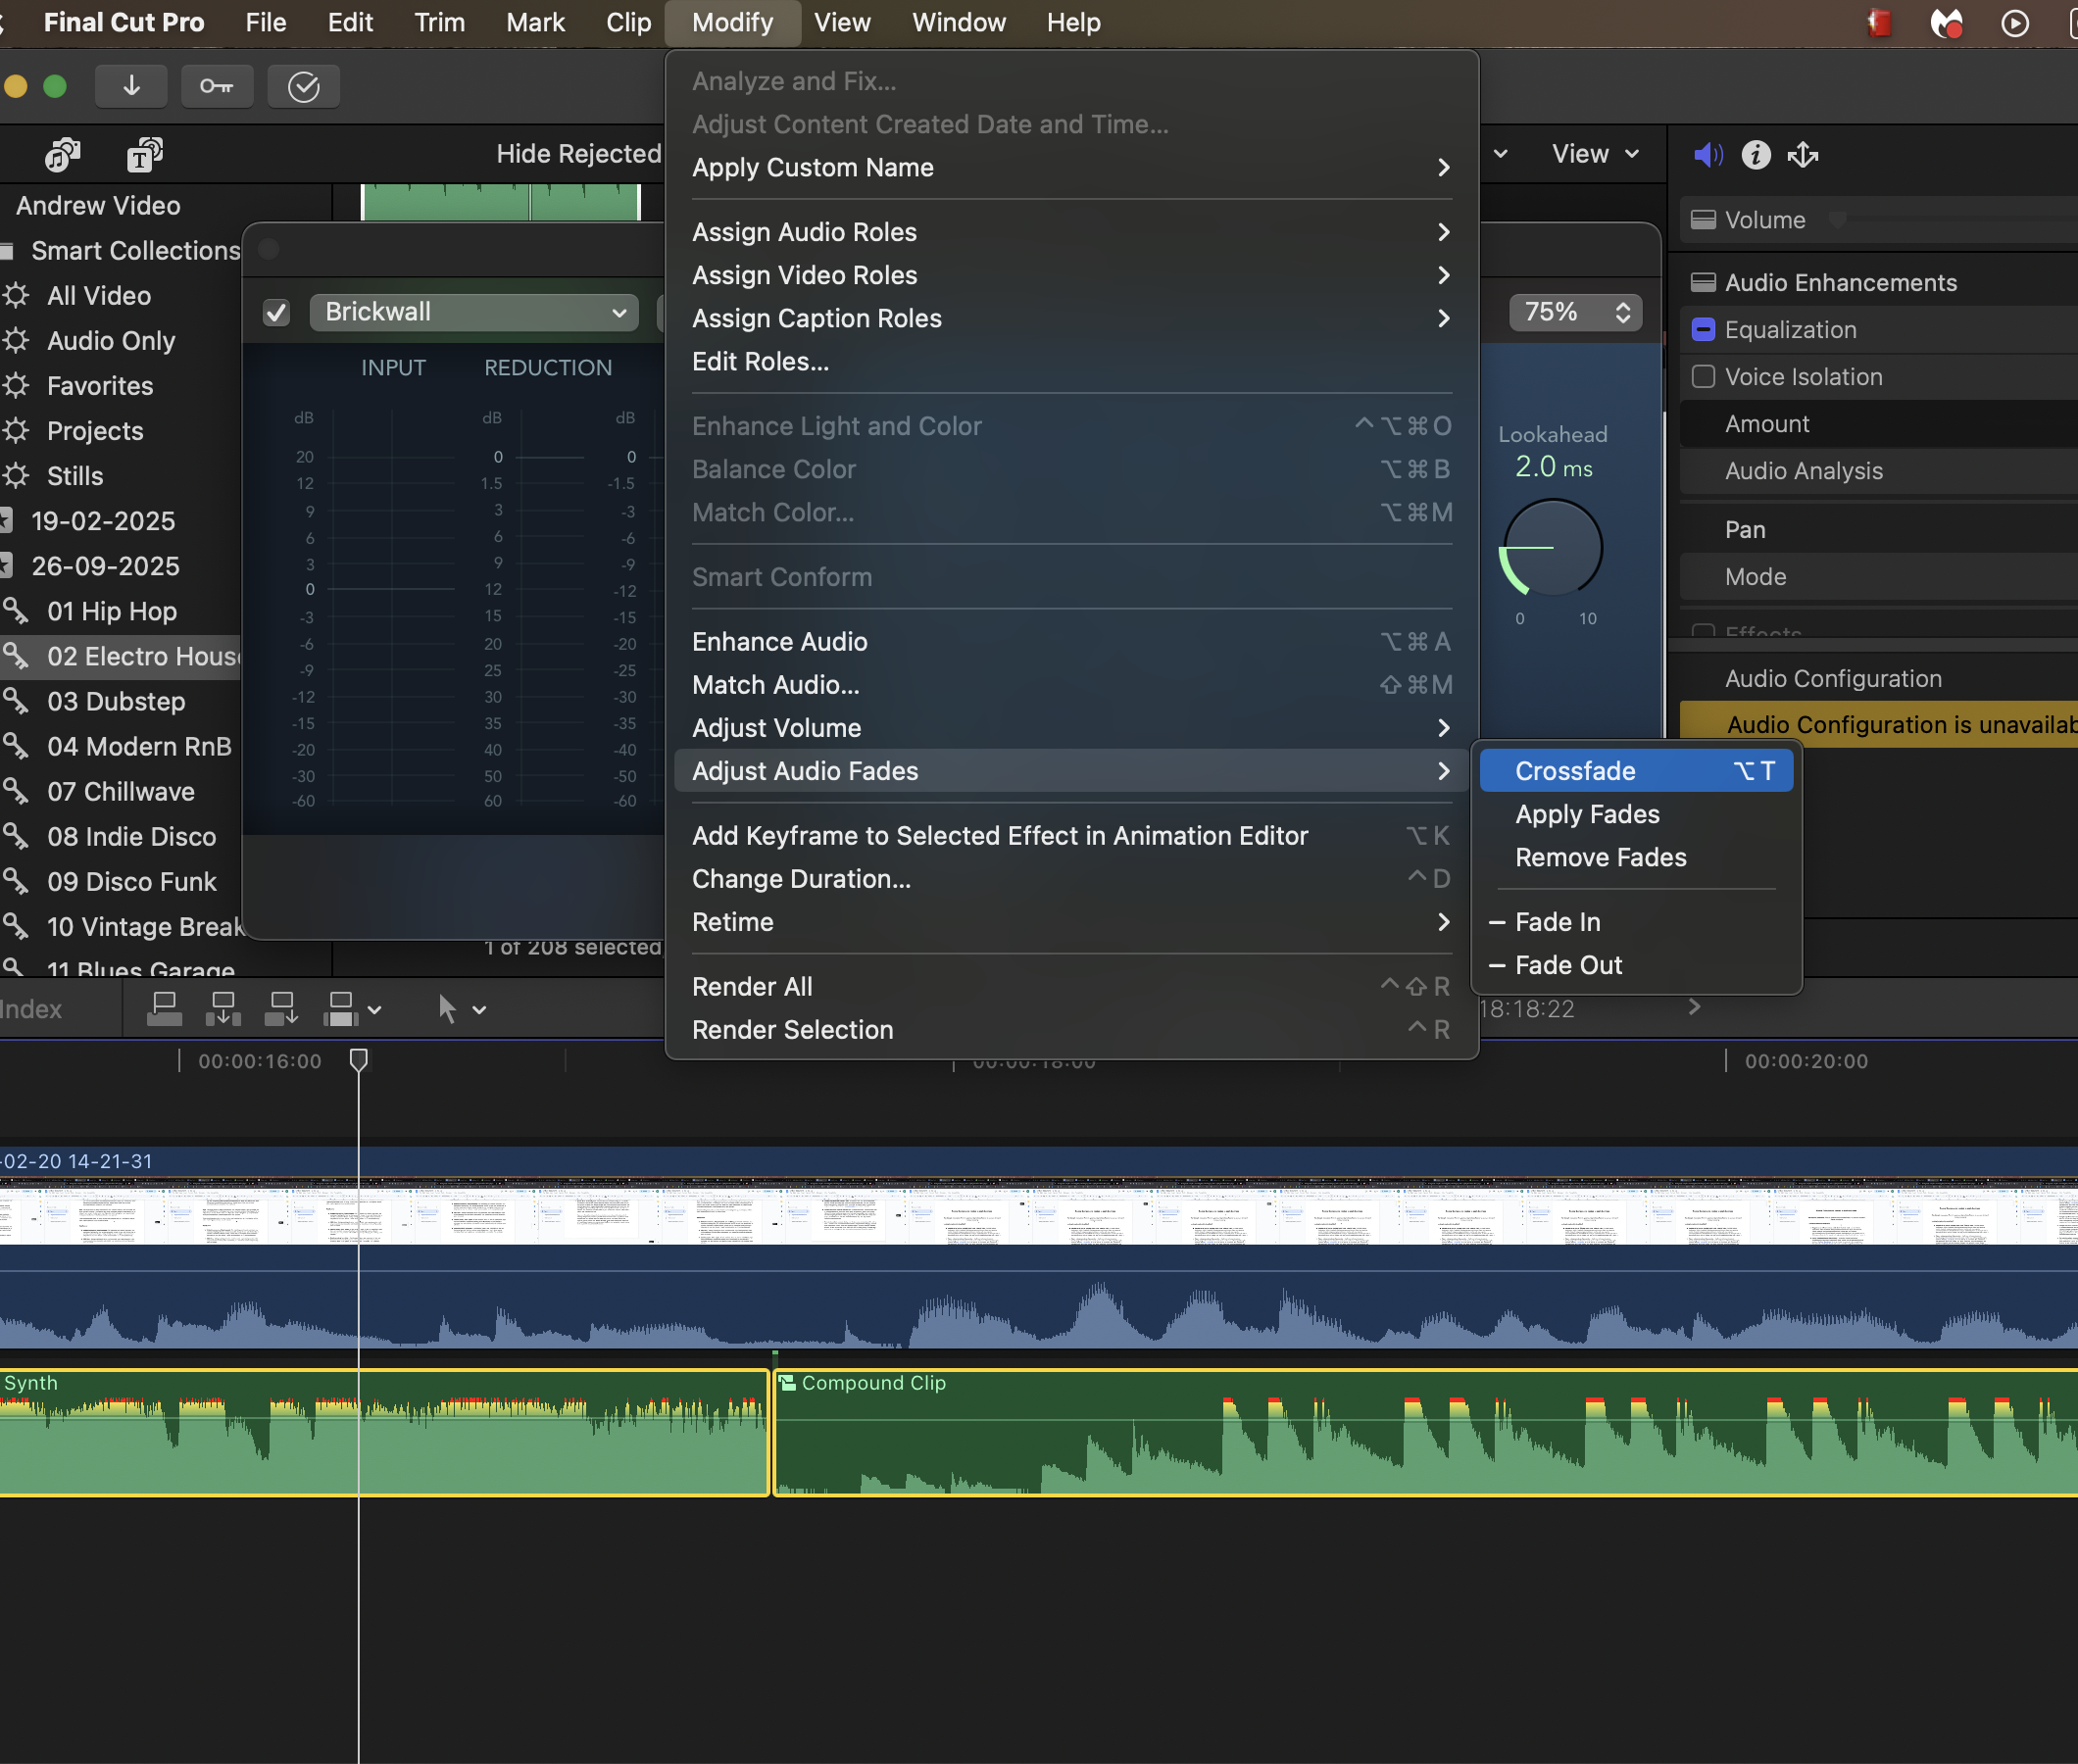
How to Crossfade Audio Clips in Final Cut Pro
Crossfades help blend two audio clips by smoothing the transition between them. Overlap the end of one clip with the start of another on the timeline. Then select both clips, open the Modify menu, and choose Adjust Audio Fades > Apply Crossfade.