Final Cut Pro is an industry staple video-editing software for those who work on Mac systems. And, like many other Apple native applications, it approaches things in a unique way that can be tricky to get the hang of initially. This includes its audio functionality.
This guide will focus on Final Cut Pro’s audio editing capabilities to get you up to speed with its workflow in no time at all. By the end, you should have a firm grip on the audio functions and can always refer back to this page if needed.
To start working with audio in Final Cut Pro, you need to import some media into a project. Project management works uniquely in Final Cut Pro. You first need to create a Library, which will act as your primary parent folder. Inside a Library, you can create separate Events. Finally, inside of any event, you can create a project, where you can edit content.

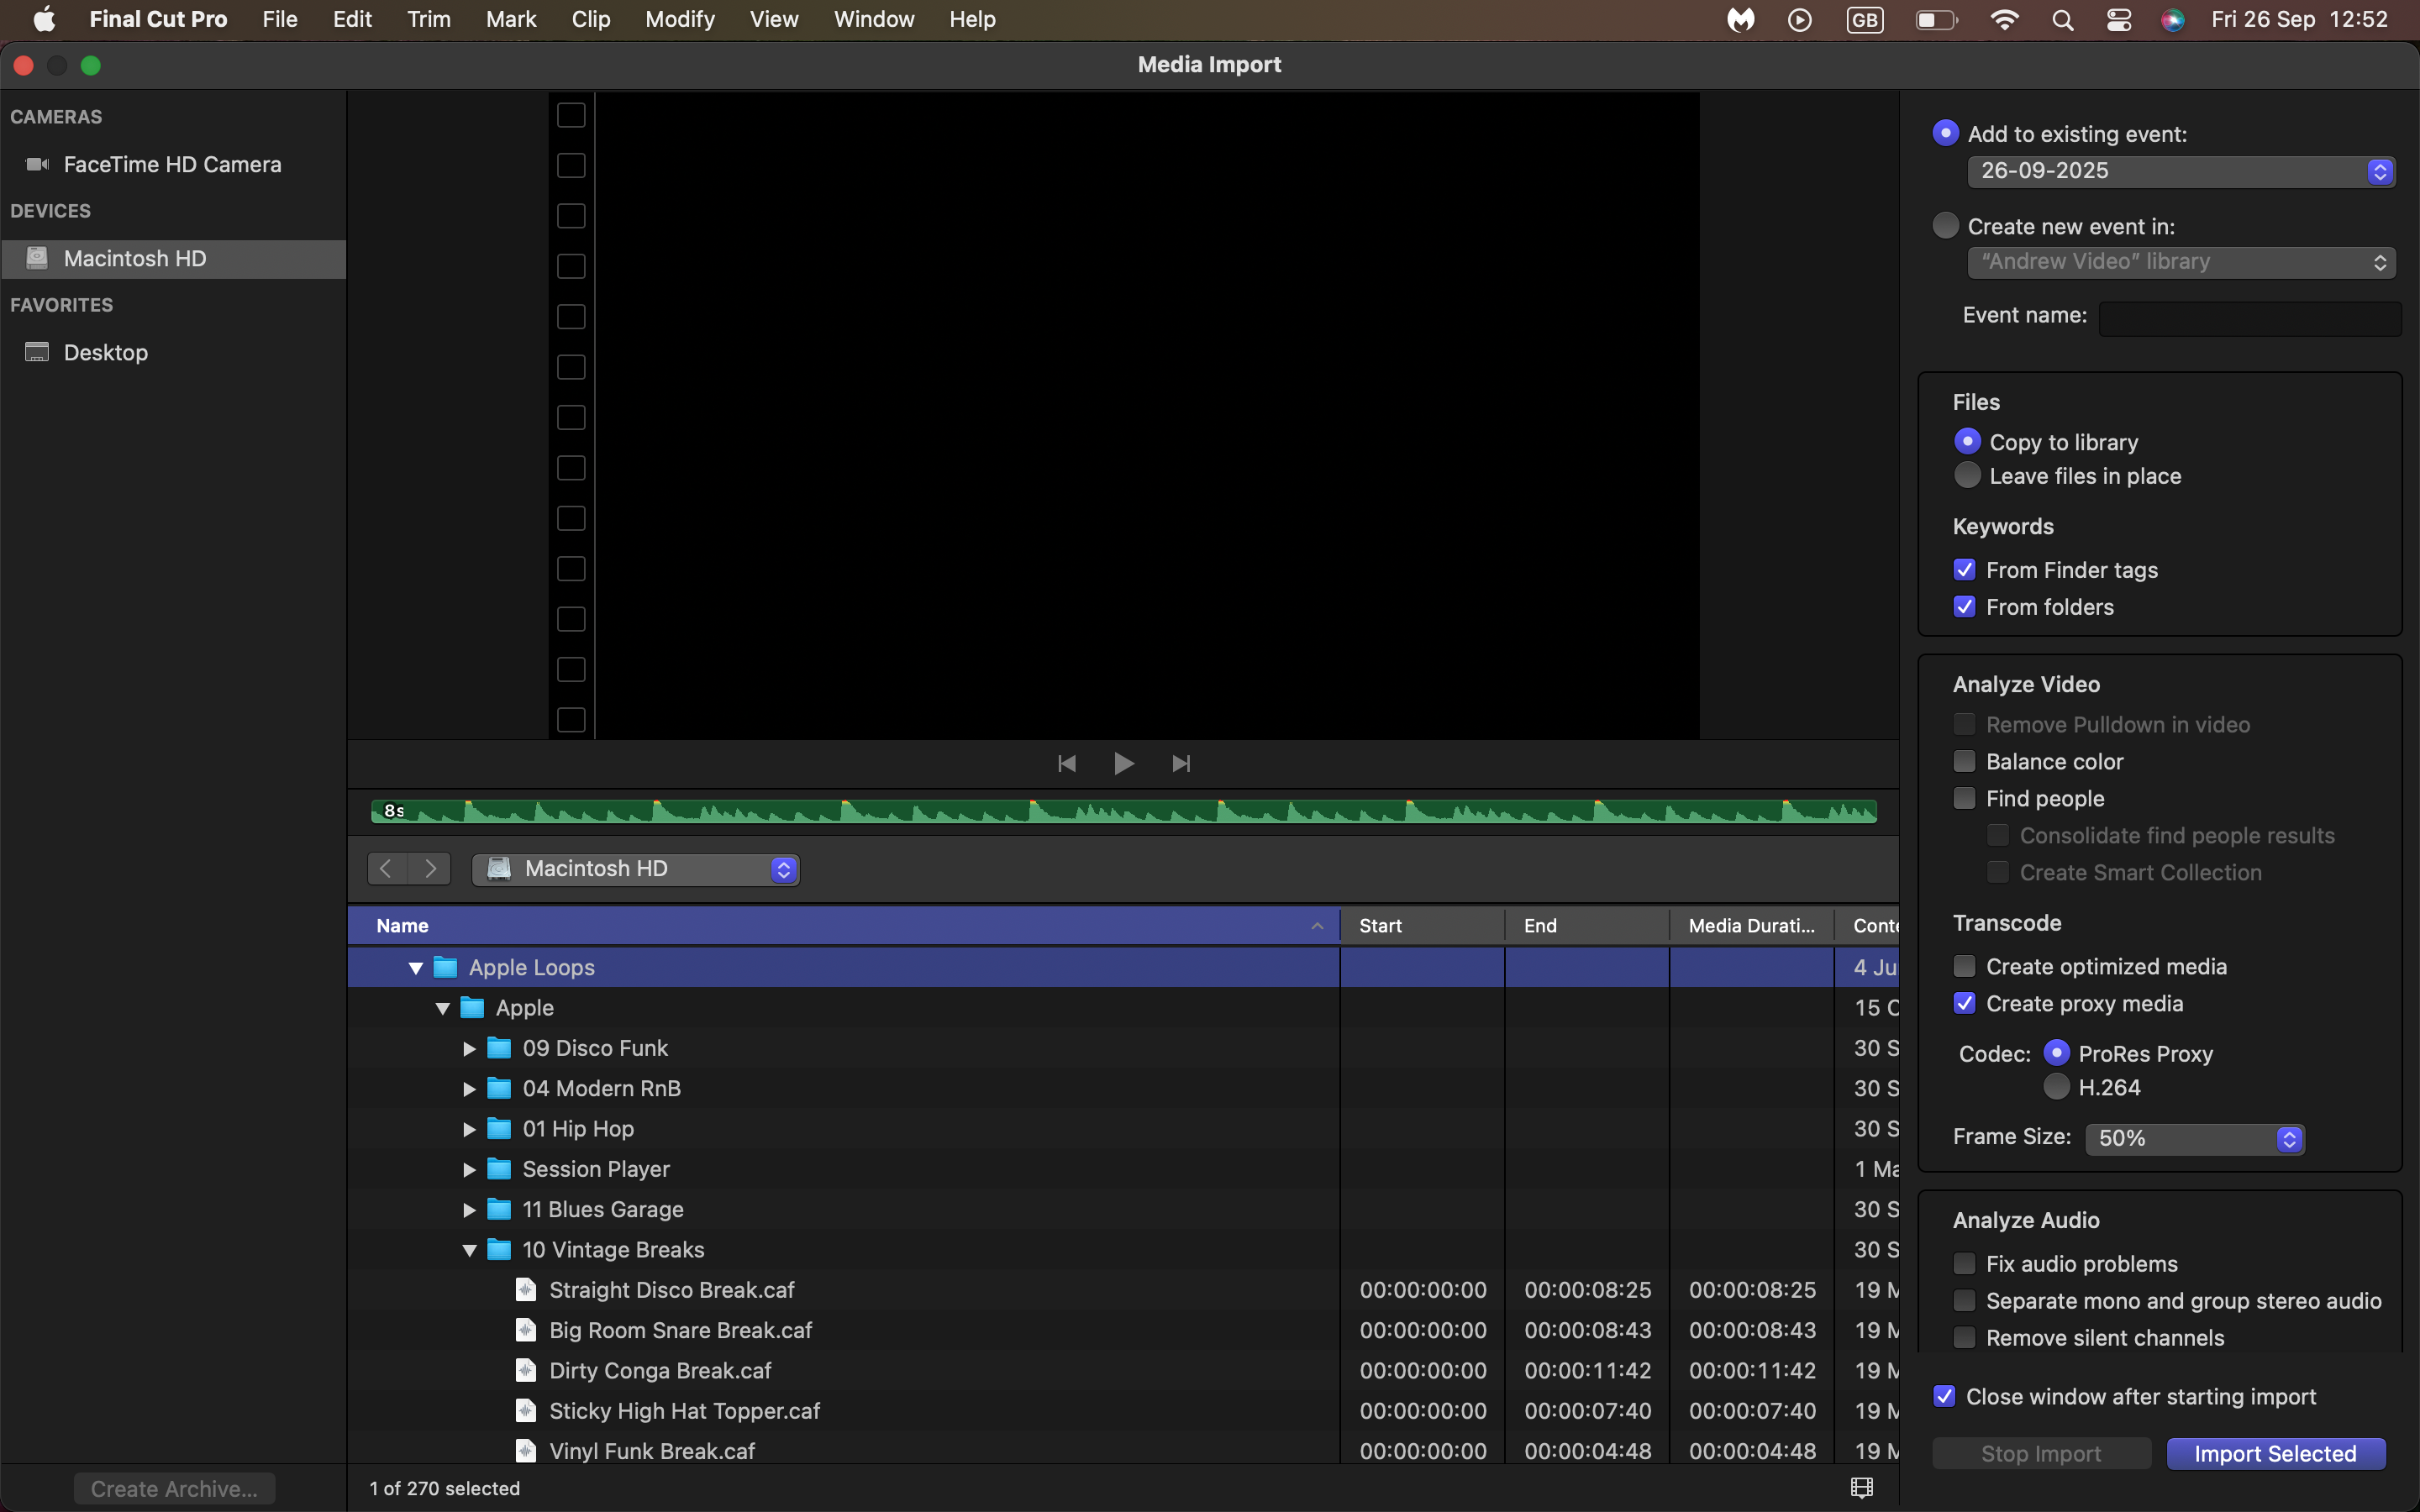
Once you’ve got a project set up, importing media (including audio) is easy. Head to File>Import>Media (or hit Command+I). You’ll then be met with the Media Import window, where you can select a folder directory for Final Cut Pro to locate media. If you have some audio files ready to work with, you can point Final Cut Pro to them here and then select Import All
Once the import is complete, all audio files should appear in your Browser panel. If your Browser panel isn’t visible for whatever reason, you can navigate to Window>Show in Workspace>Browser (or hit Shift+Command+1). Audio can now be dragged onto the Magnetic Timeline at your leisure.
If you don’t have any pre-existing audio to work with, you can record your own as a Voiceover. And in Final Cut Pro, it couldn’t be easier! With your Playhead in the desired starting position on the Magnetic Timeline, simply navigate to Window>Record Voiceover (or hit Shift+V).

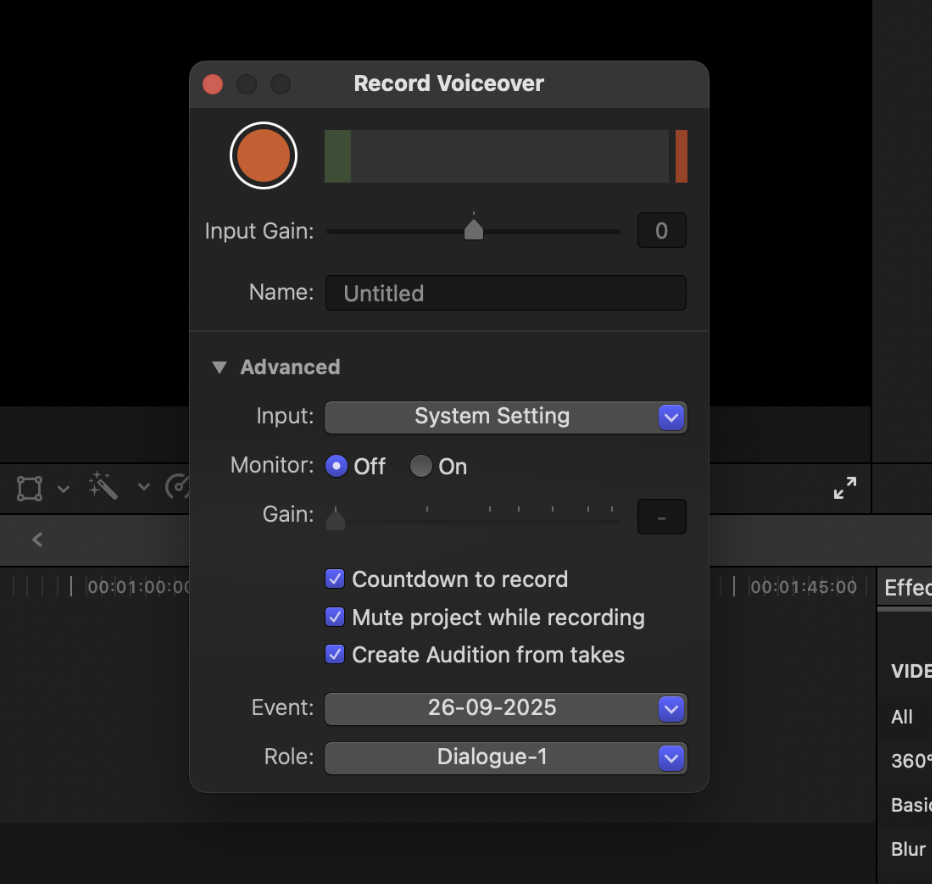
Once the Record Voiceover command has been selected, you’ll be met with a settings panel, showing your microphone input level, the Input Gain amount, a text field to enter a Name for your Voiceover, as well as an expanded Advanced Settings menu if desired.
Before we record, it’s important to get the input levels of your microphone set appropriately. If your microphone is working and active, you should see the Input Level meter fill up green when you speak.
Do a quick test, speaking naturally - how you would if recording an actual Voiceover - and adjust the Input Gain amount until your signal is averaging at a nice level. It shouldn’t be too quiet, but also shouldn’t be reaching maximum. If it reaches the max, the clipping indicator will light red. This should be avoided at all costs. It’s always better to increase audio volume later, than try to reduce it after the signal’s already clipped.

Once you’ve set up your levels, you can choose the Event location, where recorded files will be saved, from the Advanced Settings panel. Then, you’re ready to hit the record button. Upon hitting record, Final Cut Pro will give you a 3 second countdown before recording commences. To stop recording, simply hit the Stop button. Then, voiceover takes will be saved onto the Timeline for further editing.
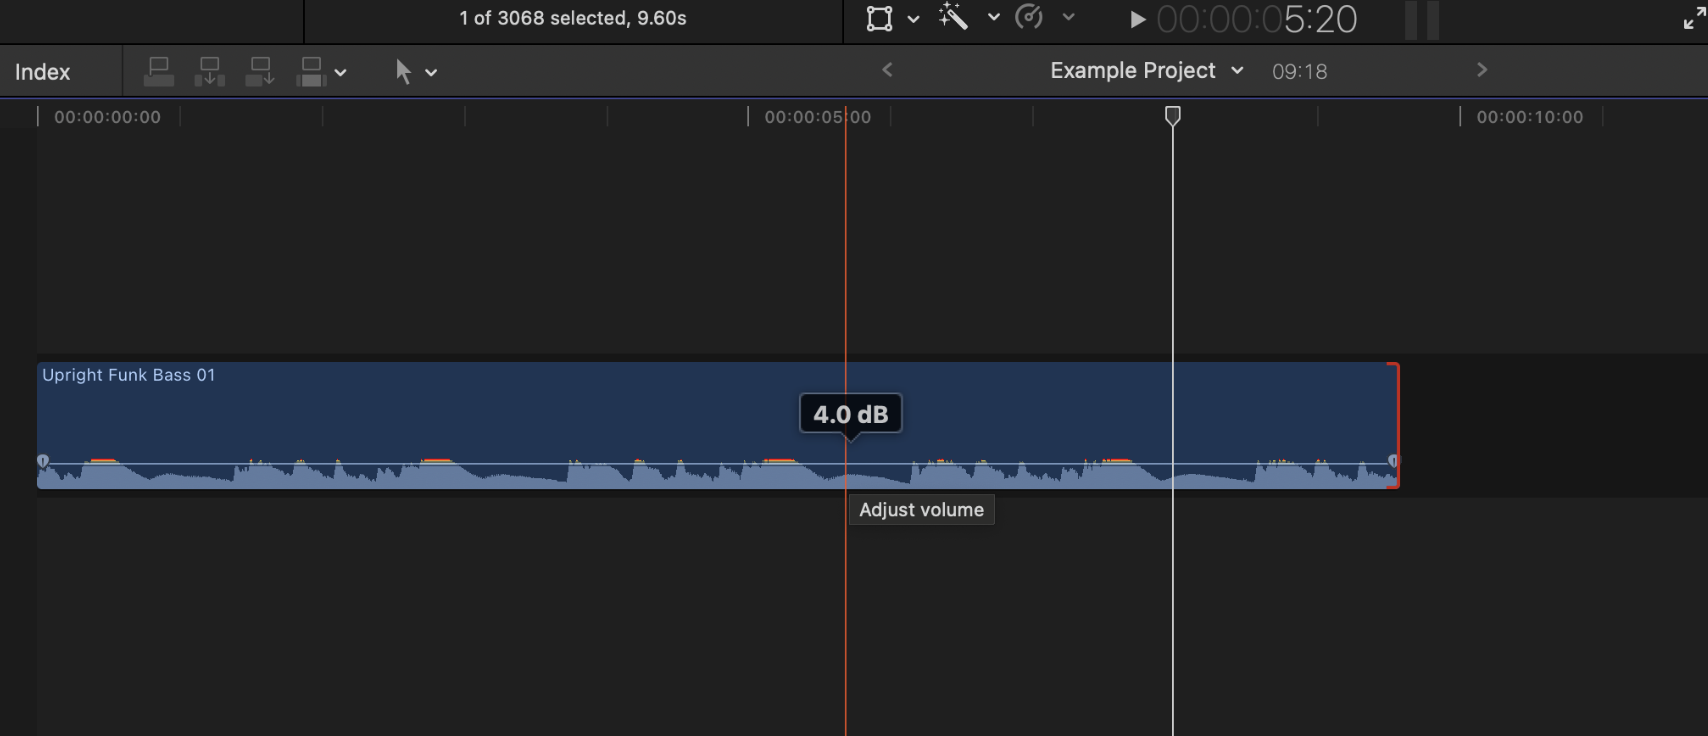
Once you have audio on Final Cut Pro’s Magnetic Timeline, you can begin editing it. The most immediate editing option is to either increase or decrease an audio clip’s volume by clicking and dragging its volume control up or down. This will essentially apply audio effects to the entire track.
You’ll also see the audio waveform change according to your adjustments. If any area of the waveform appears red, it means the signal is clipping. Try to avoid this.
Alternatively, with an audio clip selected, you should see further settings in the Inspector panel (upper right corner). You can also adjust the Volume of audio here. If your Inspector panel isn’t open for some reason, navigate to Window>Show in Workspace>Inspector (or hit Command+4).
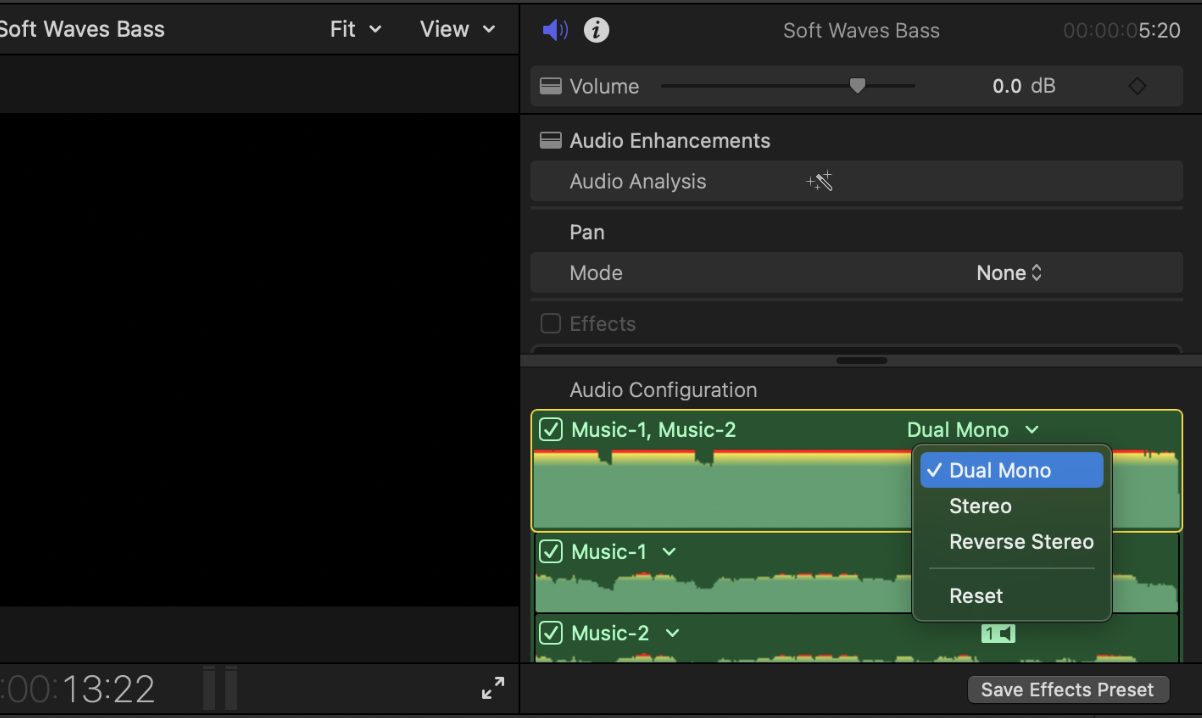
If working with multi-channel audio clips, or you’d like to adjust the left and right stereo signal separately, you can also do so through the same Inspector panel with the desired audio clip selected. If it’s multichannel, the channels should list separately under the Audio Configuration tab. If you’d like to split a stereo track, find it in the Audio Configuration tab, and set it to Dual Mono, instead of Stereo.
Audio fade in, audio fade out, or audio crossfade are commonly sought-after audio effects when editing a project. Luckily Final Cut Pro has built-in audio-fading functions like other NLEs, and they’re super easy to use.
To perform an audio fade in, you can zoom to the start point of your desired clip, then hover your mouse over the audio fade marker. Next, simply click and drag inward to the clip to adjust your fade.

To add an audio fade out effect in Final Cut Pro, you can simply repeat the same process outlined for the audio fade in, except this time, you’ll want to zoom in on the end point of your audio clip and drag the audio fade marker from the opposite direction.

To apply an audio crossfade effect in Final Cut Pro, you need to have two adjacent audio clips you want to fade together next to each other on your timeline. With both clips selected, you can navigate to Modify>Adjust Audio Fades>Crossfade (or press Option+T)

Sometimes you might want to duck an audio clip’s volume only for a specific section. This can be to make way for an overlapping audio clip, or just to gain tighter control over your audio. You can do this in Final Cut Pro as well.
To duck audio for a certain amount of time, first select the Range Selection tool from the Tool menu (or hit R on your keyboard).
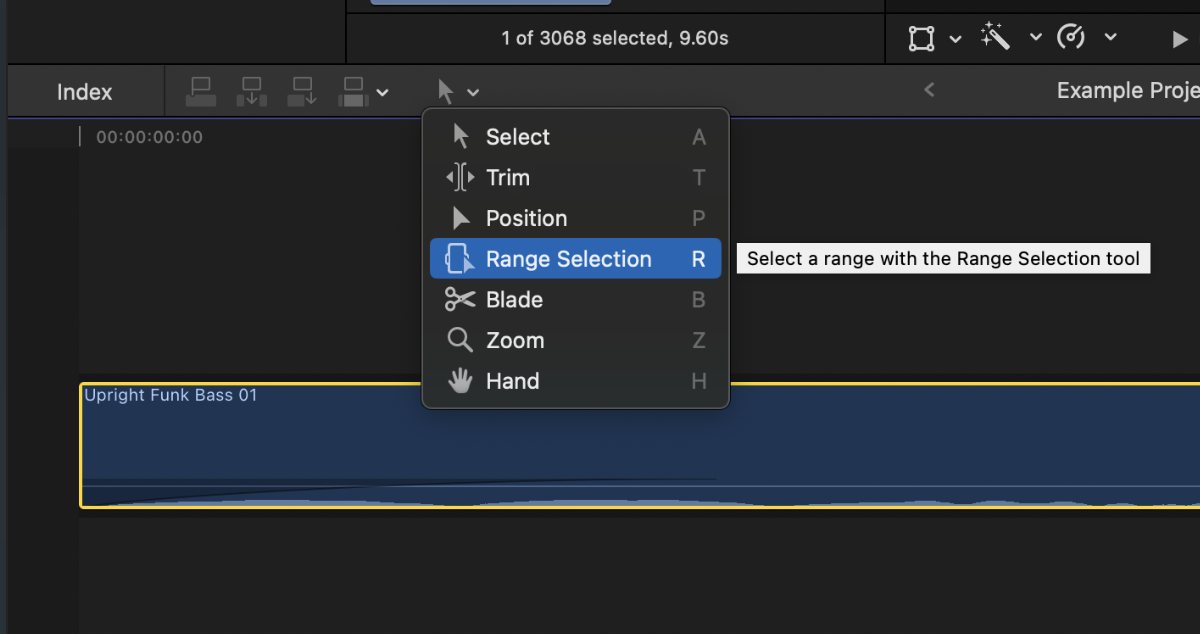
From there, all you need to do is click and drag from your desired start and end points on an audio clip to set a specified range. Finally, you can click and drag the volume controller of the selected range to adjust its volume independently from the rest of the clip.

There may be instances when ducking audio, or using an audio fade in, or audio fade out, in certain ways doesn’t suffice. Perhaps you need greater precision control over the ducking range, or over the fade during the start and end of the duck. Or it could be you want to adjust a completely separate audio parameter across time, like using an EQ or third-party plugin. That’s when Keyframes come in handy.
A keyframe allows you to set custom start and end points, where you can change a parameter (e.g. Volume) across time. Once keyframes are set, and the start and end values are adjusted, Final Cut Pro will automatically adjust the value from point A to point B across time. So, if you set your first keyframe value to -4dB at 0:10 seconds, and your second keyframe at 0dB at 0:25 seconds, Final Cut Pro will automatically adjust the volume values from -4dB to 0dB between that range of time.
To add keyframes, navigate to your inspector window with a clip selected. Then, next to any parameter that allows for keyframe control, with your mouse hovered over it, you should see a little diamond-shaped icon with a ‘+’ inside it on the right-hand side. We’ll be using the Volume parameter for our example. See the below screenshot for reference.
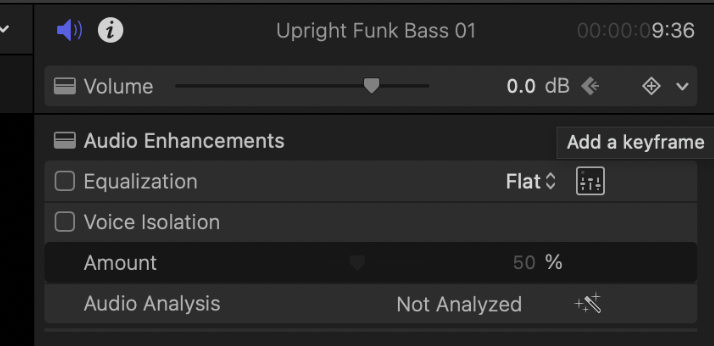
To add a keyframe, you can simply click this icon. Just make sure your Playhead is already in the desired location on the Timeline beforehand. You can then adjust the desired value of a keyframe when the Playhead is in the respective position.
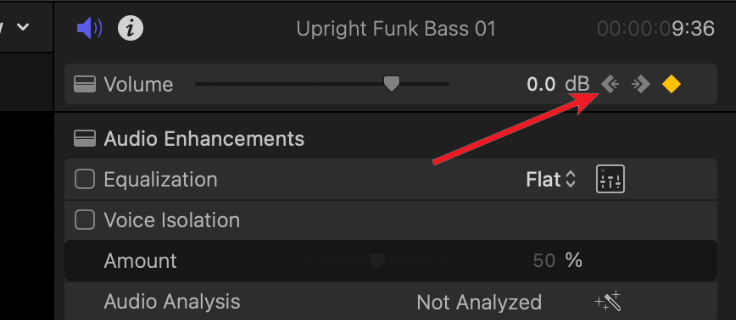
For easier navigation between keyframe locations you can simply jump from each keyframe to the next (backwards and forwards) using the corresponding buttons in the Inspector panel. These appear next to the diamond-shaped keyframe button once two or more keyframes have been placed on your clip.
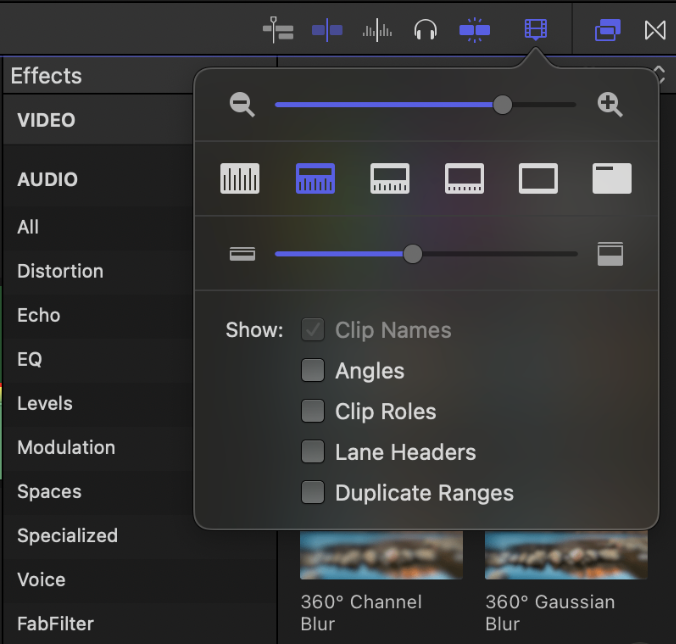
Final Cut Pro has a few different settings to adjust the audio visualizer information any given clip displays, and this includes modifying the audio waveform display. Sometimes you may want to increase the thickness of a clip and its respective waveform to get a better look at what’s going on. If for some reason your Final Cut Pro isn’t displaying the waveform at all, this is also how you enable it.
Simply click the Toolbar icon demonstrated in the below screenshot and you’ll be met with a settings panel to customise the appearance of your clips. You can enable/disable the waveform audio visualizer, adjust the waveform thickness, adjust the overall clip thickness, and enable/disable additional clip information.
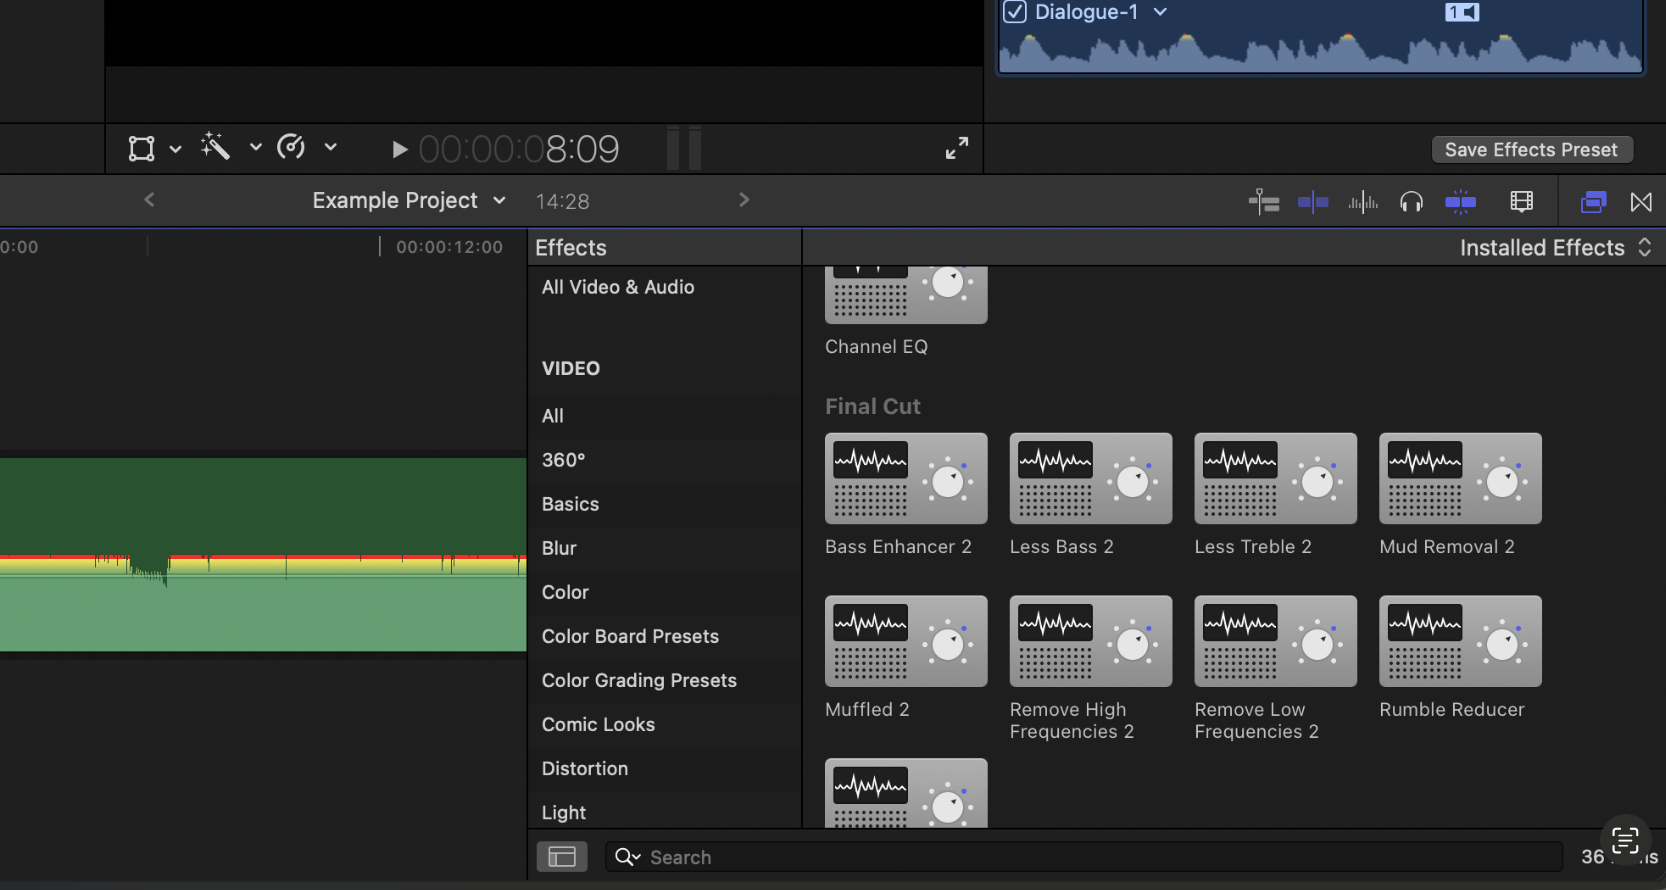
Final Cut Pro has a wide range of stock audio effect plugins available for use, ranging from compressors to equalisers, to saturators, and beyond. To access these, simply navigate to the Effects menu from the toolbar and scroll down to the Audio section. From there you can click and drag any effect onto a clip and modify the settings in the Inspector panel.
EQ is one of many fundamental audio editing tools we can use to polish up an audio clip. Shape the tonal character of the audio by adjusting the bass, mid, and treble frequencies individually. If you’re using a microphone that sounds a bit muffled, or perhaps a bit too tinny, we can correct this using EQ.

To EQ audio in Final Cut Pro, simply click and drag one of the EQ effects from the Effects menu onto an audio clip. You can then open the effect from the Inspector panel and make changes accordingly. If your audio sounds too muffled or bass-heavy, try reducing the low-end. If it sounds too sharp and tinny, try reducing the high end. Over time, practice using EQ to master how to shape audio’s tonal qualities.
Compression is another go-to audio processing technique allowing us to shape the dynamic range of an audio signal. That means the range between the highest and lowest volumes. If you have a recording where one part is really loud, and the other really quiet, compression can help to even them out.
To apply some all-round gentle compression to your audio, follow these steps (although you may need to educate yourself a bit on compression for more advanced jobs). First, you can add a compressor to an audio by clicking and dragging one from the Effects menu onto an audio clip. Then, open the compressor’s advanced settings through the Inspector panel.
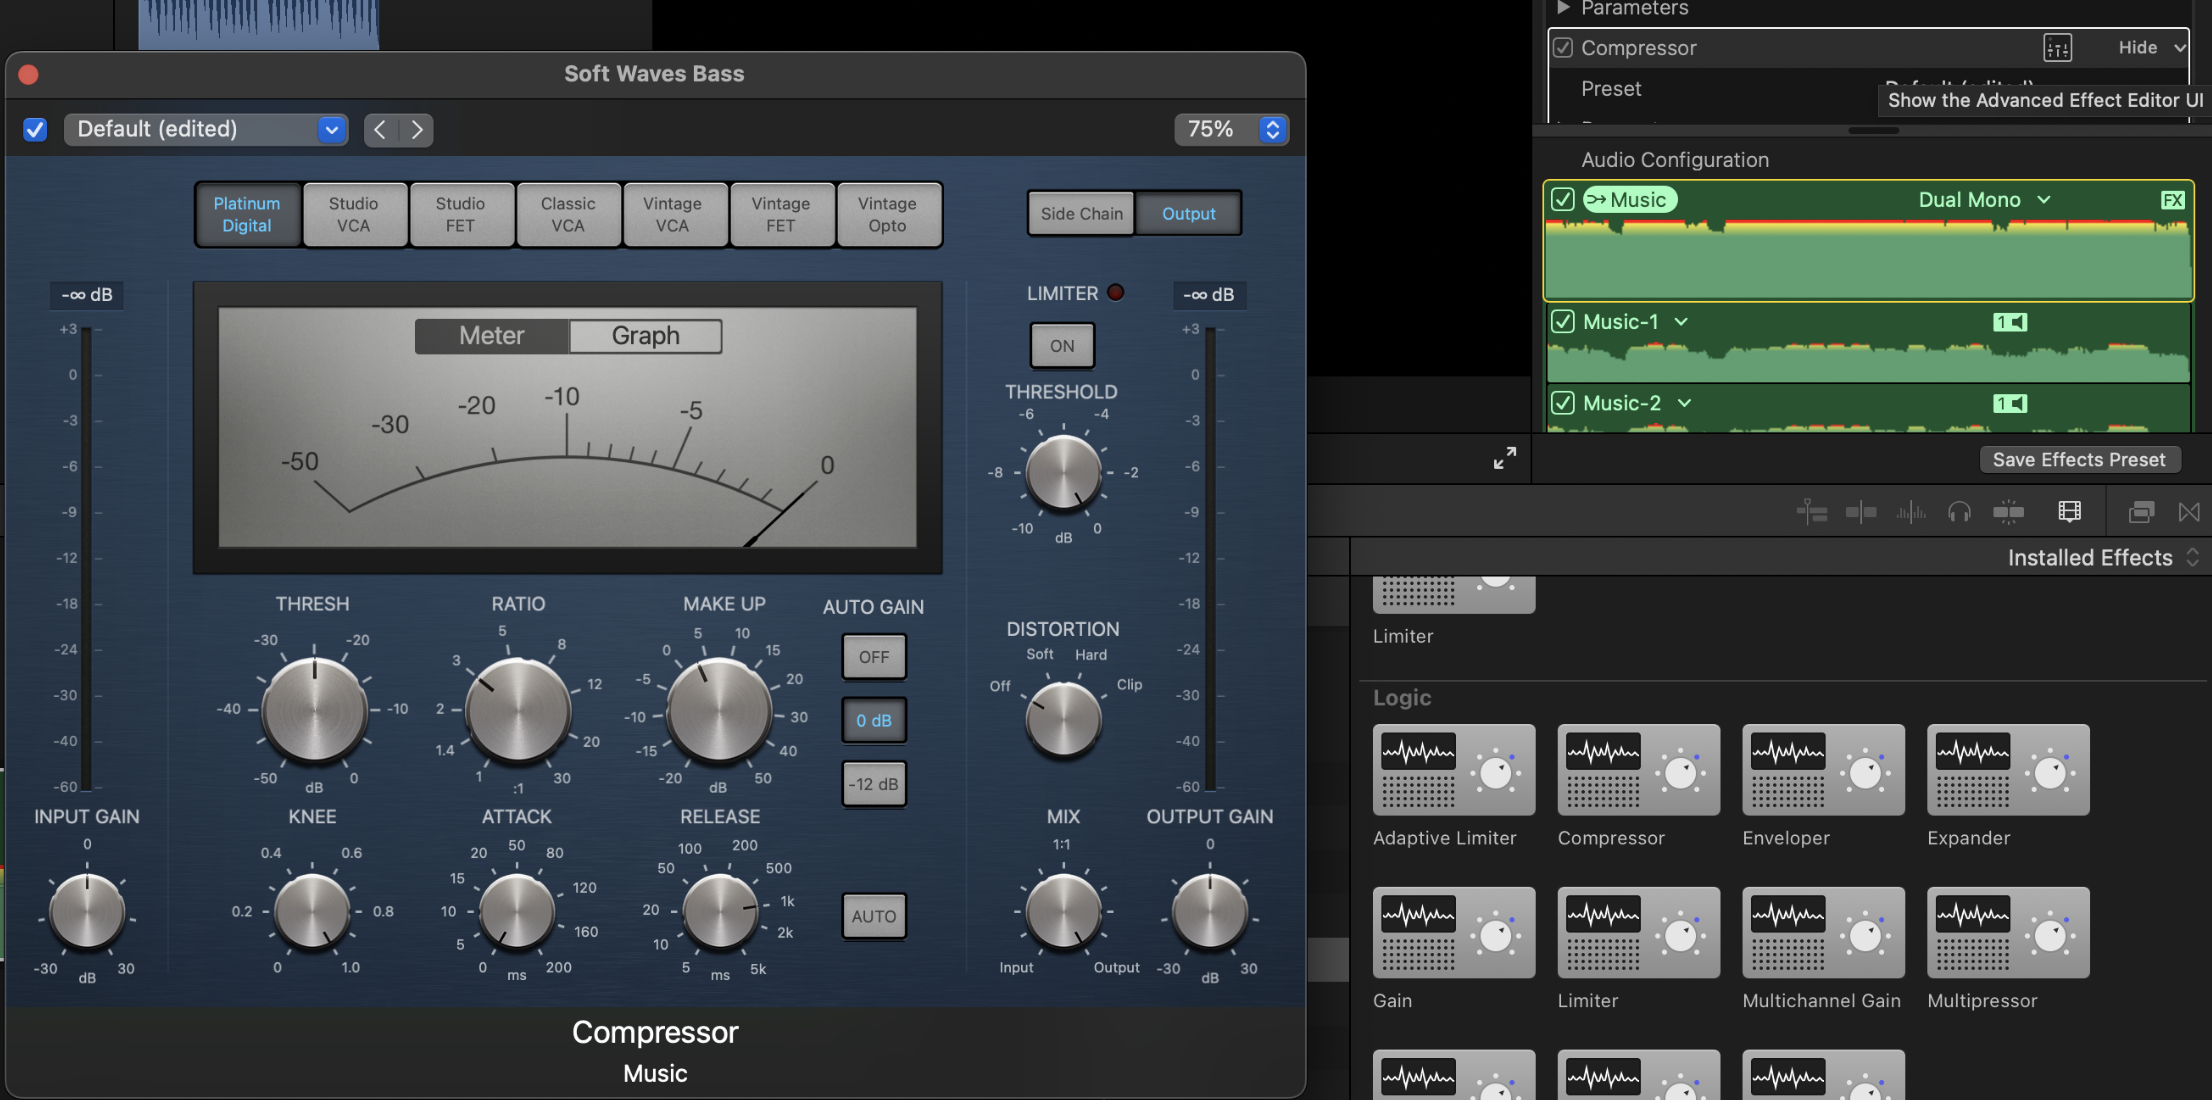
Finally, you can reduce the Threshold to around -25.0dB, set the Ratio to approximately 3:1, and adjust the Make Up gain to about +3dB. This should serve as a good starting point which you can alter incrementally to experiment with the sound.
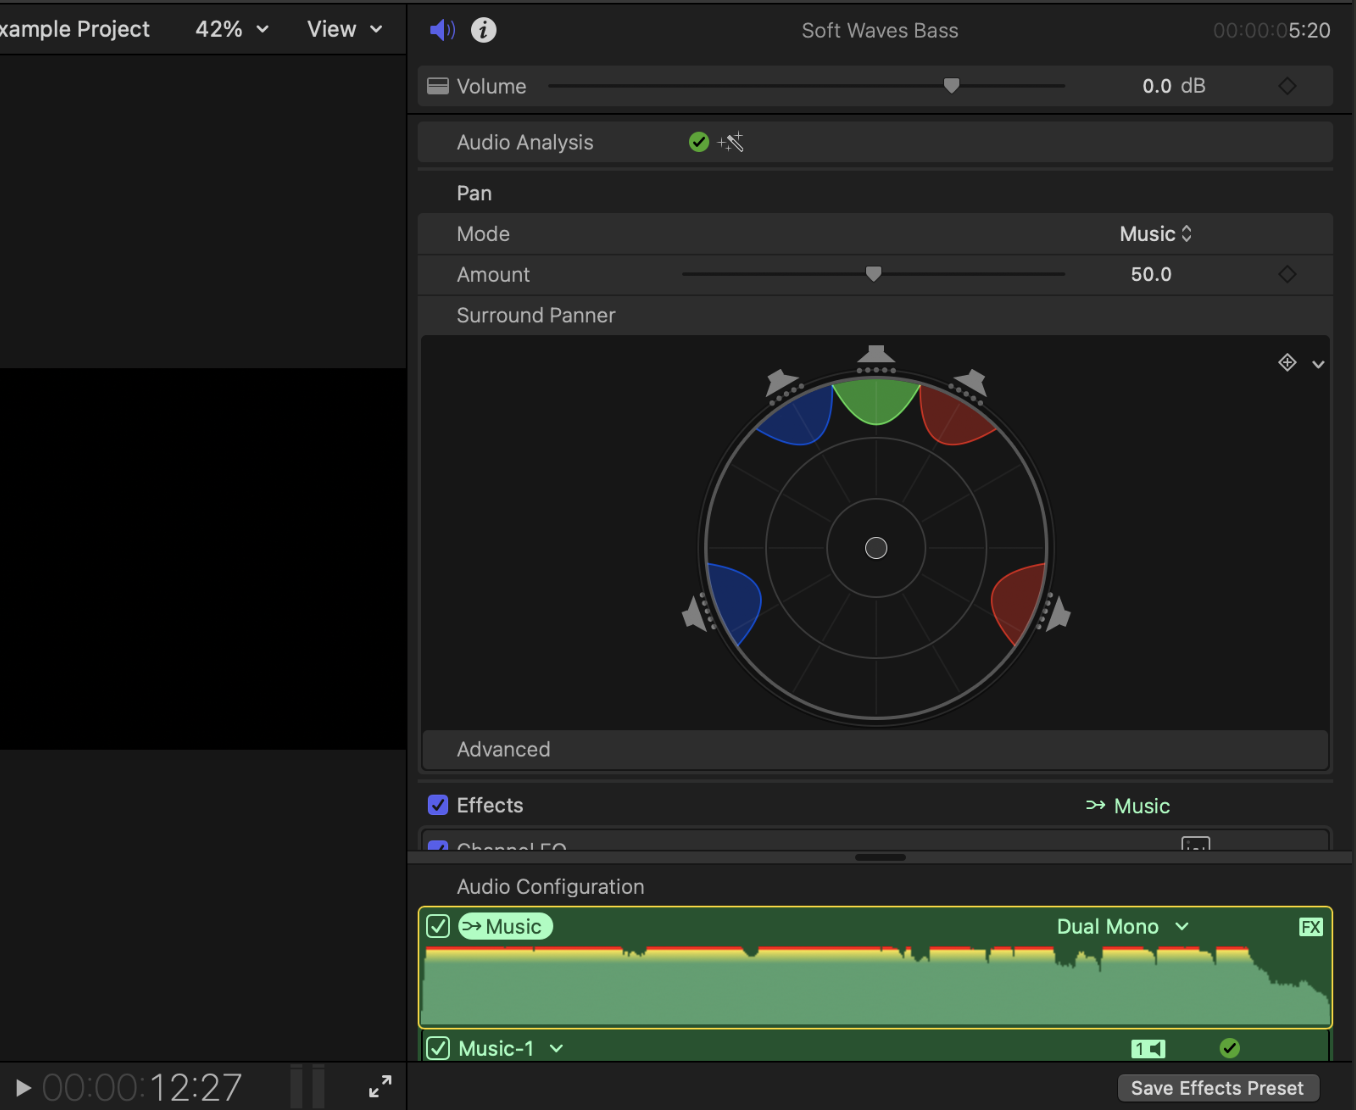
We can alter our audio’s behaviour across the spatial field by using the Pan tab in the Inspector menu. Simply open the drop-down Mode menu in the Pan tab, select a mode, and then corresponding settings will appear, allowing you to pan audio from left to right (if Stereo Left/Right is selected) or place audio sources within an entire surround sound field, depending on the Mode selected. There are a few Modes here to play with so feel free to take a look.
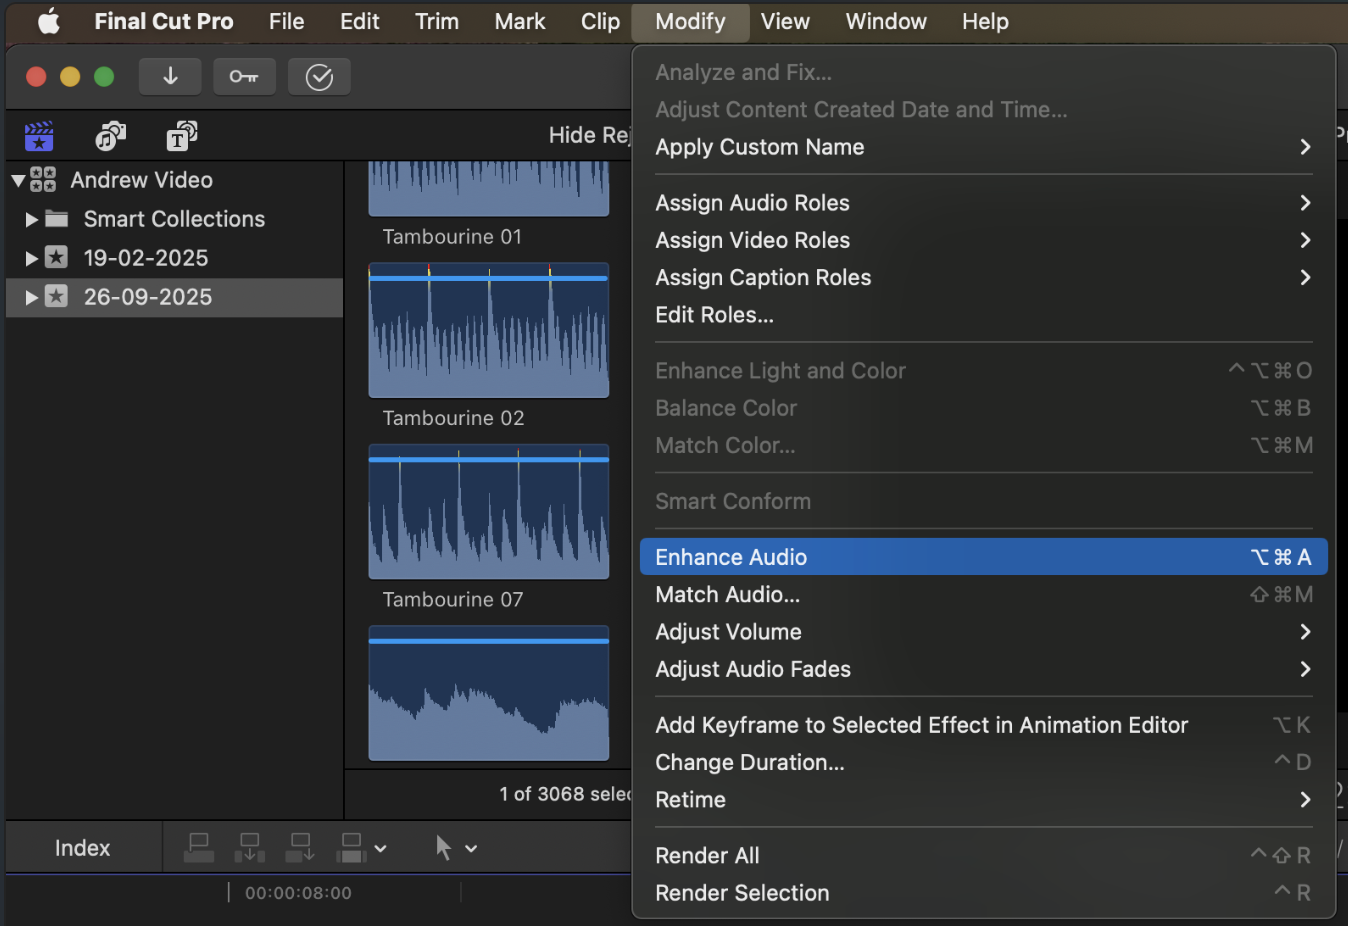
Did you know you can attempt to automatically clear up any background noise, as well as perform a general audio cleanup using Final Cut Pro’s built-in Enhance Audio function, and it’s super simple to use too. With a desired audio clip selected, simply navigate to Modify>Enhance Audio (or hit Option+Command+A). And voila, using AI, Final Cut Pro should’ve automatically targeted any background noise and other commonly occurring audio problems within your clip.