
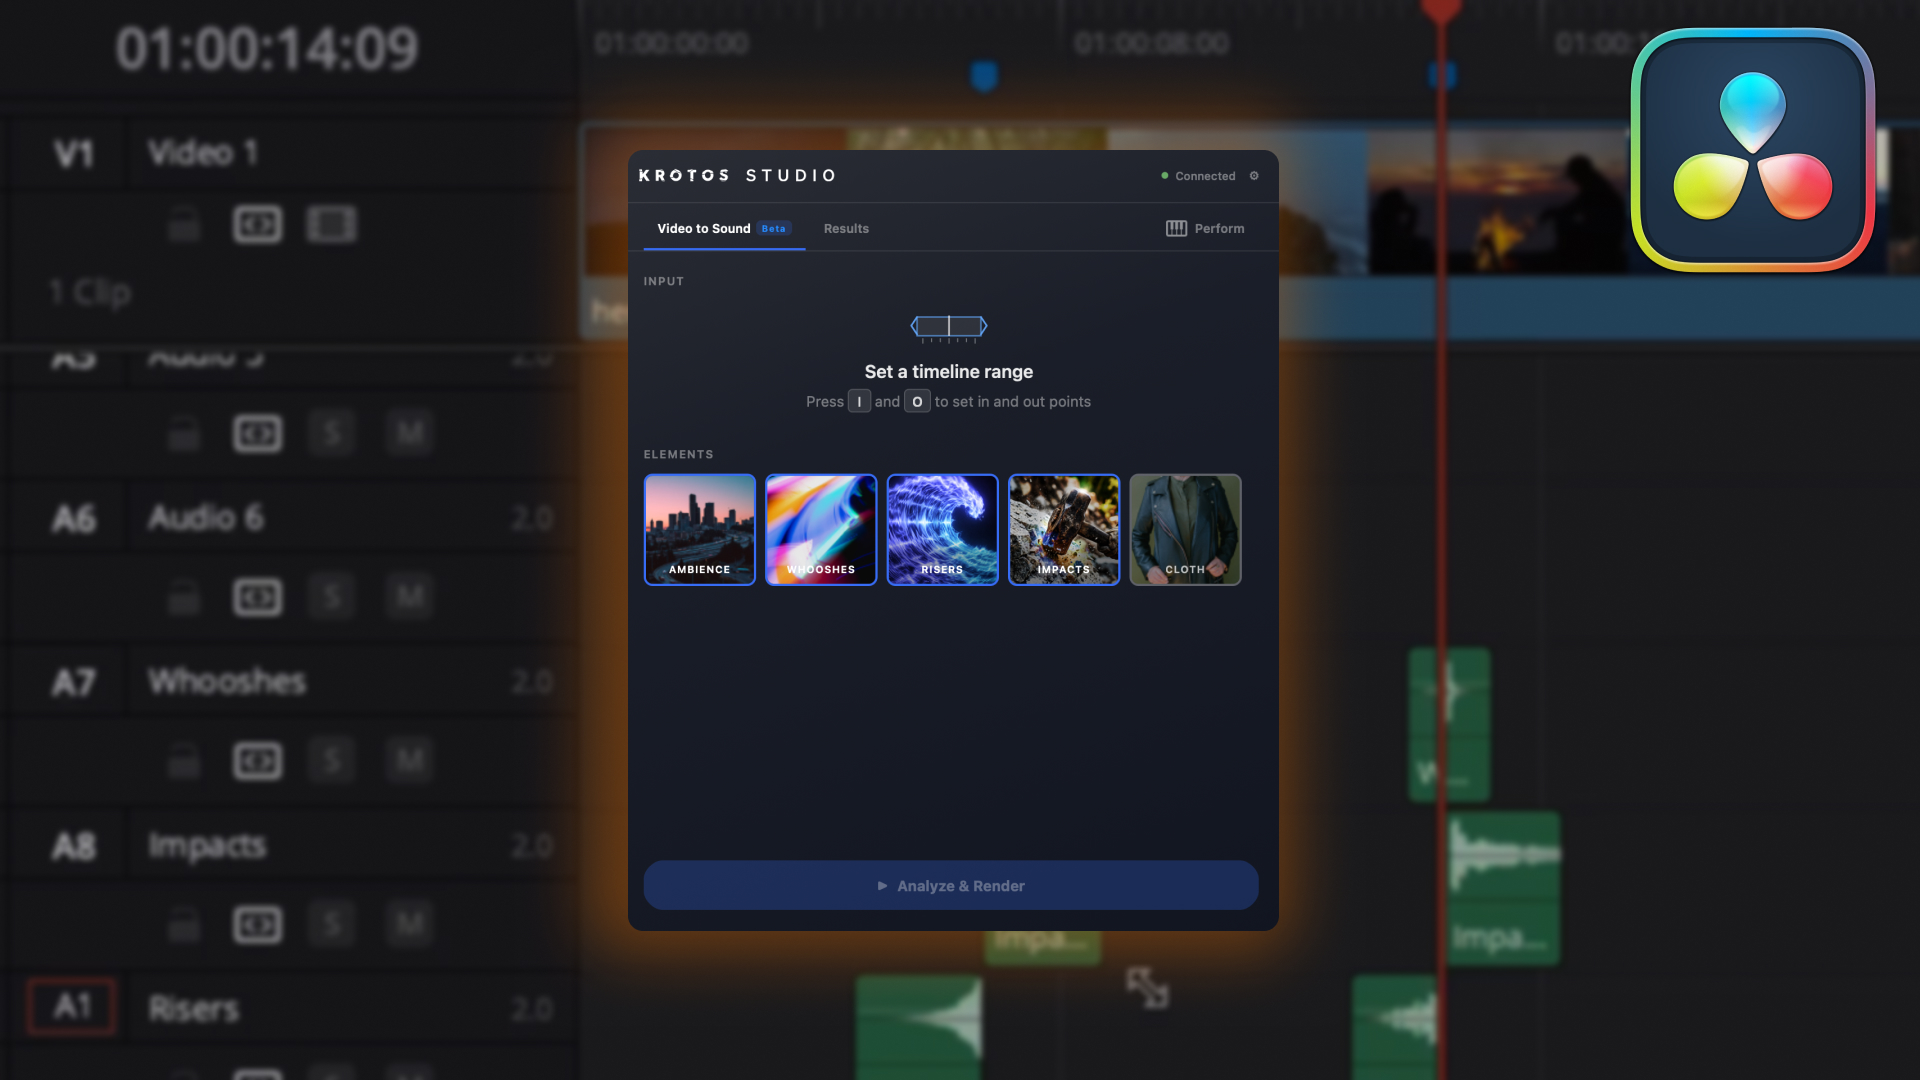
Video to Sound now runs inside DaVinci Resolve. You select a region of your timeline, choose the kinds of sound you want, and the plugin analyses the footage and places synced sound effects onto your tracks. If something does not fit the scene, you swap it for an alternative and it stays in sync.
This guide covers the whole process: what you need, how to install it, how to run your first analysis, and how to adjust the results afterwards.
Before you start
Two requirements.
DaVinci Resolve Studio. This is the paid version from Blackmagic Design. Workflow integrations are not supported in free Resolve, so the plugin will not appear there. We also recommend updating to the latest version of Resolve before installing.
A Krotos Studio account. Video to Sound is part of the Krotos Studio platform. It is free to try, then available on a subscription with three tiers: Studio, Pro and Max.
Installing the plugin
- Go to krotos.studio and create an account.
- Sign up for a trial.
- Download the latest installer.
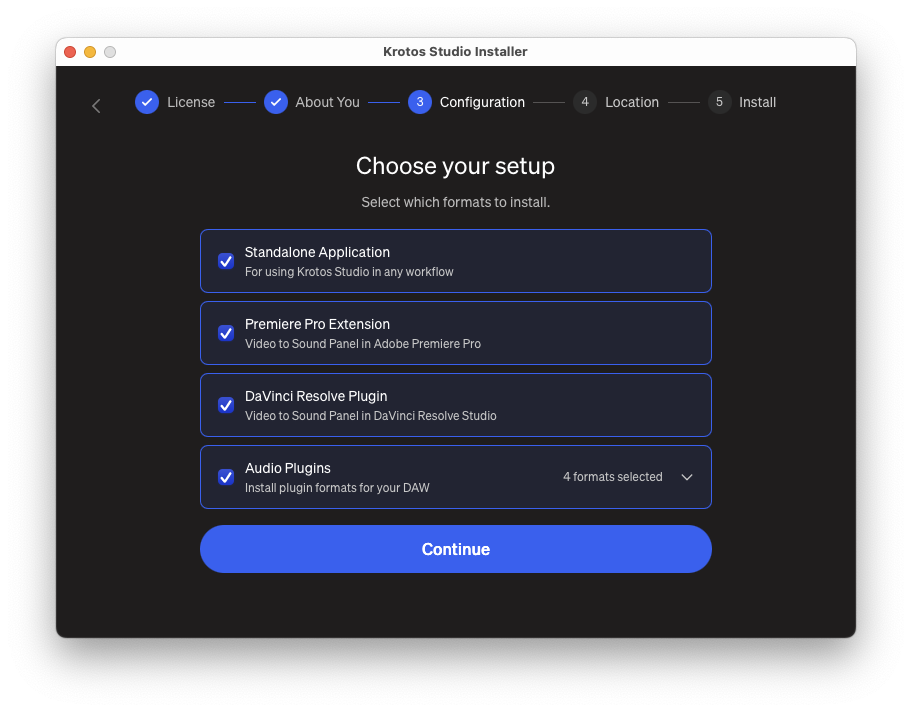
- Run the installer. When you reach the components step, make sure the DaVinci Resolve integration is ticked before you continue.
- Open Resolve and go to Workspace > Workspace Integrations > Krotos Studio.
- Log in with your krotos.studio account details.
If you signed up with Google Sign-in, you will need to set a password before you can log in to the plugin, because Google Sign-in is not supported there yet. Click Forgot password on the plugin login screen, follow the email, and create a new password. Then go back to the plugin and log in with it.
Running your first analysis
The core loop is three steps.
1. Choose your elements. In the plugin, click the elements you want to add to the scene. Click again to deselect. You can currently choose from:
- Ambiences
- Whooshes
- Transitions
- Risers
- Impacts
- Cloth
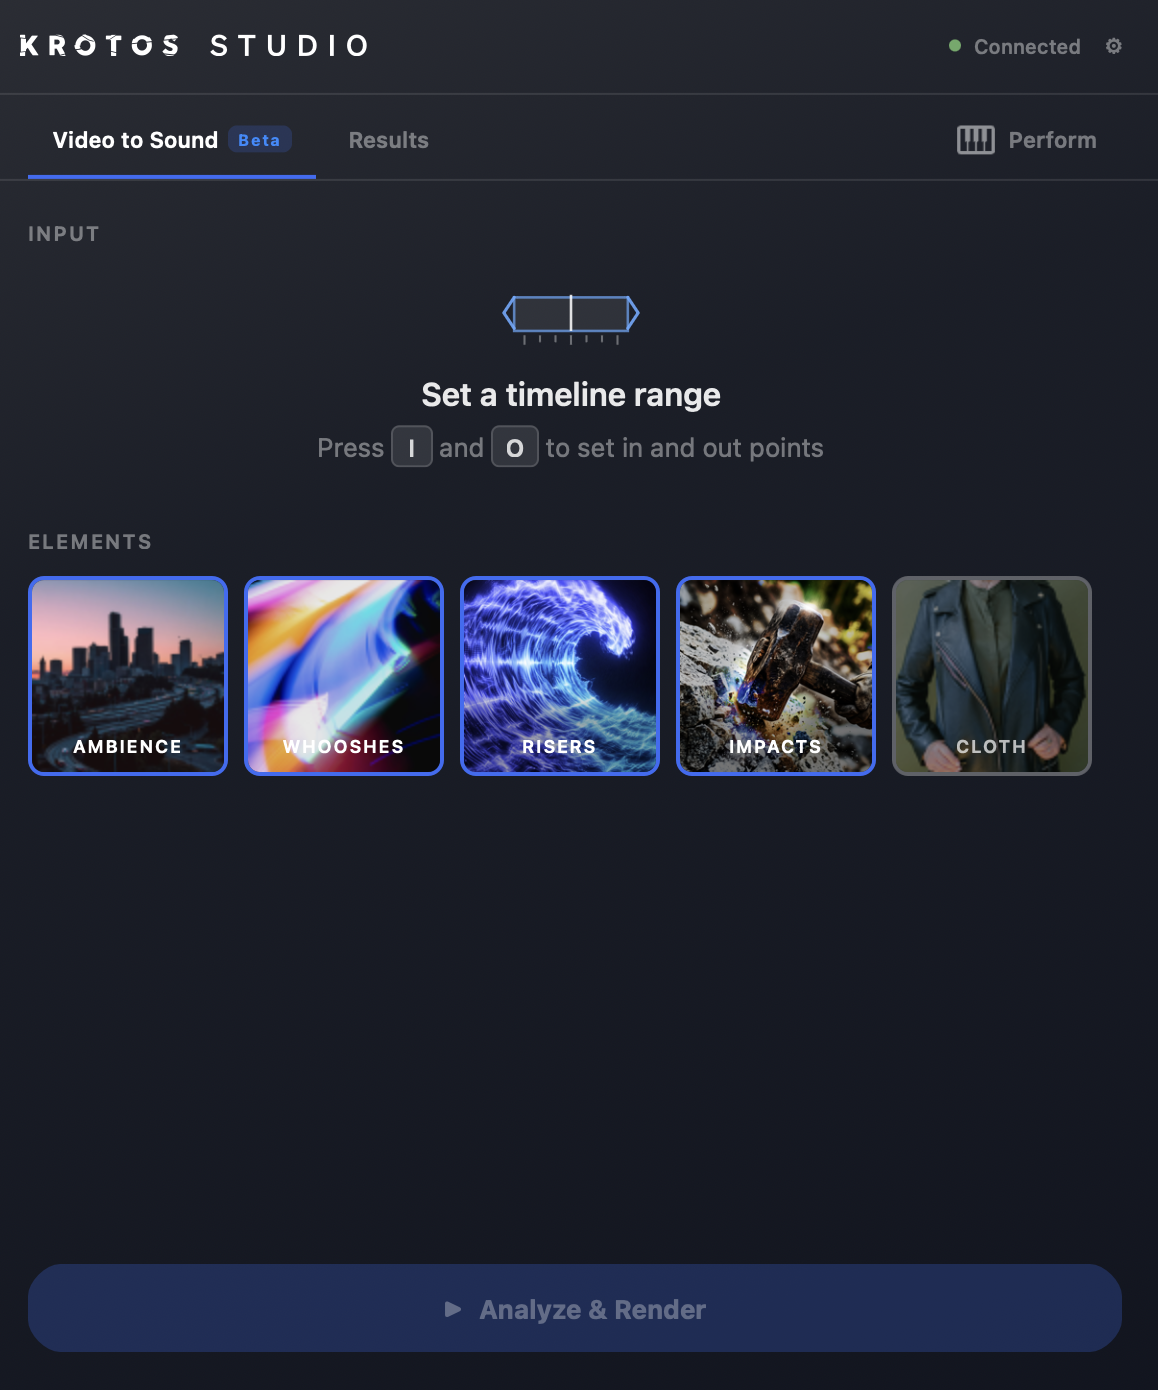
Only pick the ones the scene actually needs. Footsteps and spot effects are coming to the plugin soon and will be included in your subscription when they arrive.
2. Select a region on your timeline. Press I to set your in point and O for your out point, or right-click to set them. You can drag either point to adjust it. Video to Sound only analyses what sits between those two markers, so this selection decides how much gets scored.
3. Hit Analyse and Render. The plugin reads the region, chooses sound effects to match it, downloads them, and places them on tracks in your project, already in sync with the picture.
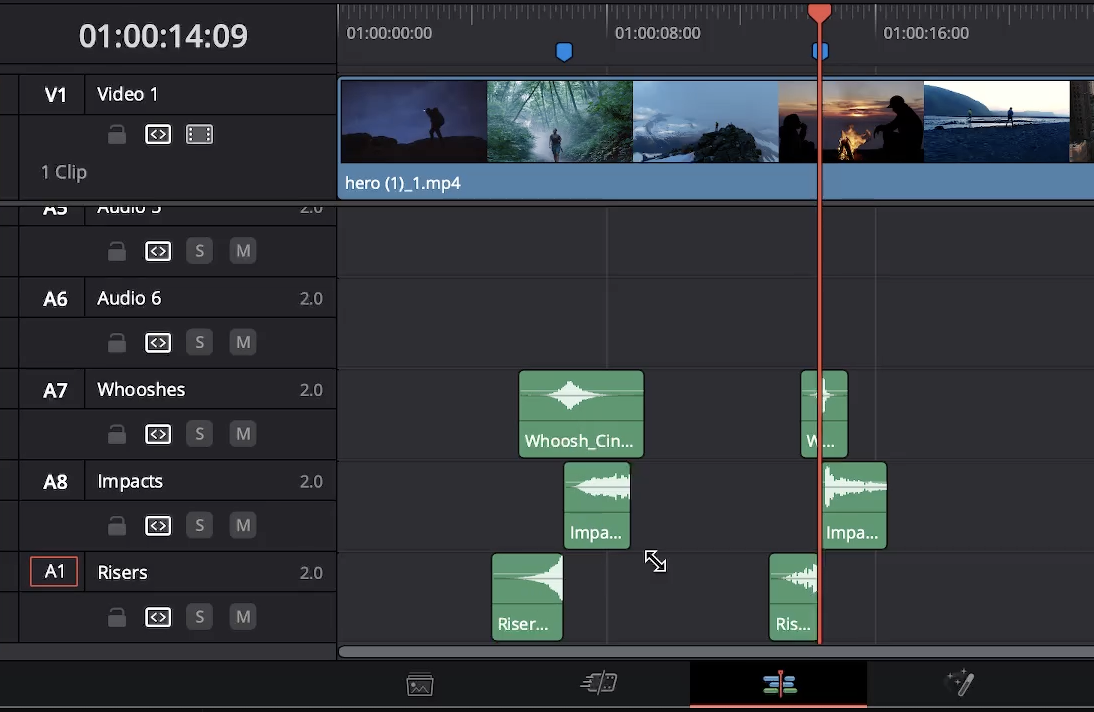
That is your first pass done. Everything after this is refinement.
Adjusting the mix
Every clip Video to Sound places behaves like any other clip on your timeline. Click one to change its level, or delete it if you do not want it. That applies to all of them, so you can thin out a busy section without going back to the plugin.
Swapping a sound effect
If an effect lands that does not suit the scene, you do not need to hunt for a replacement by hand. The plugin can swap it while keeping it in sync.
Swapping happens in the Results tab, which opens automatically once analysis finishes. It is available for every element except Cloth.
How you do it depends on the element.
Ambiences
Ambiences use a grid showing each clip added to the timeline.
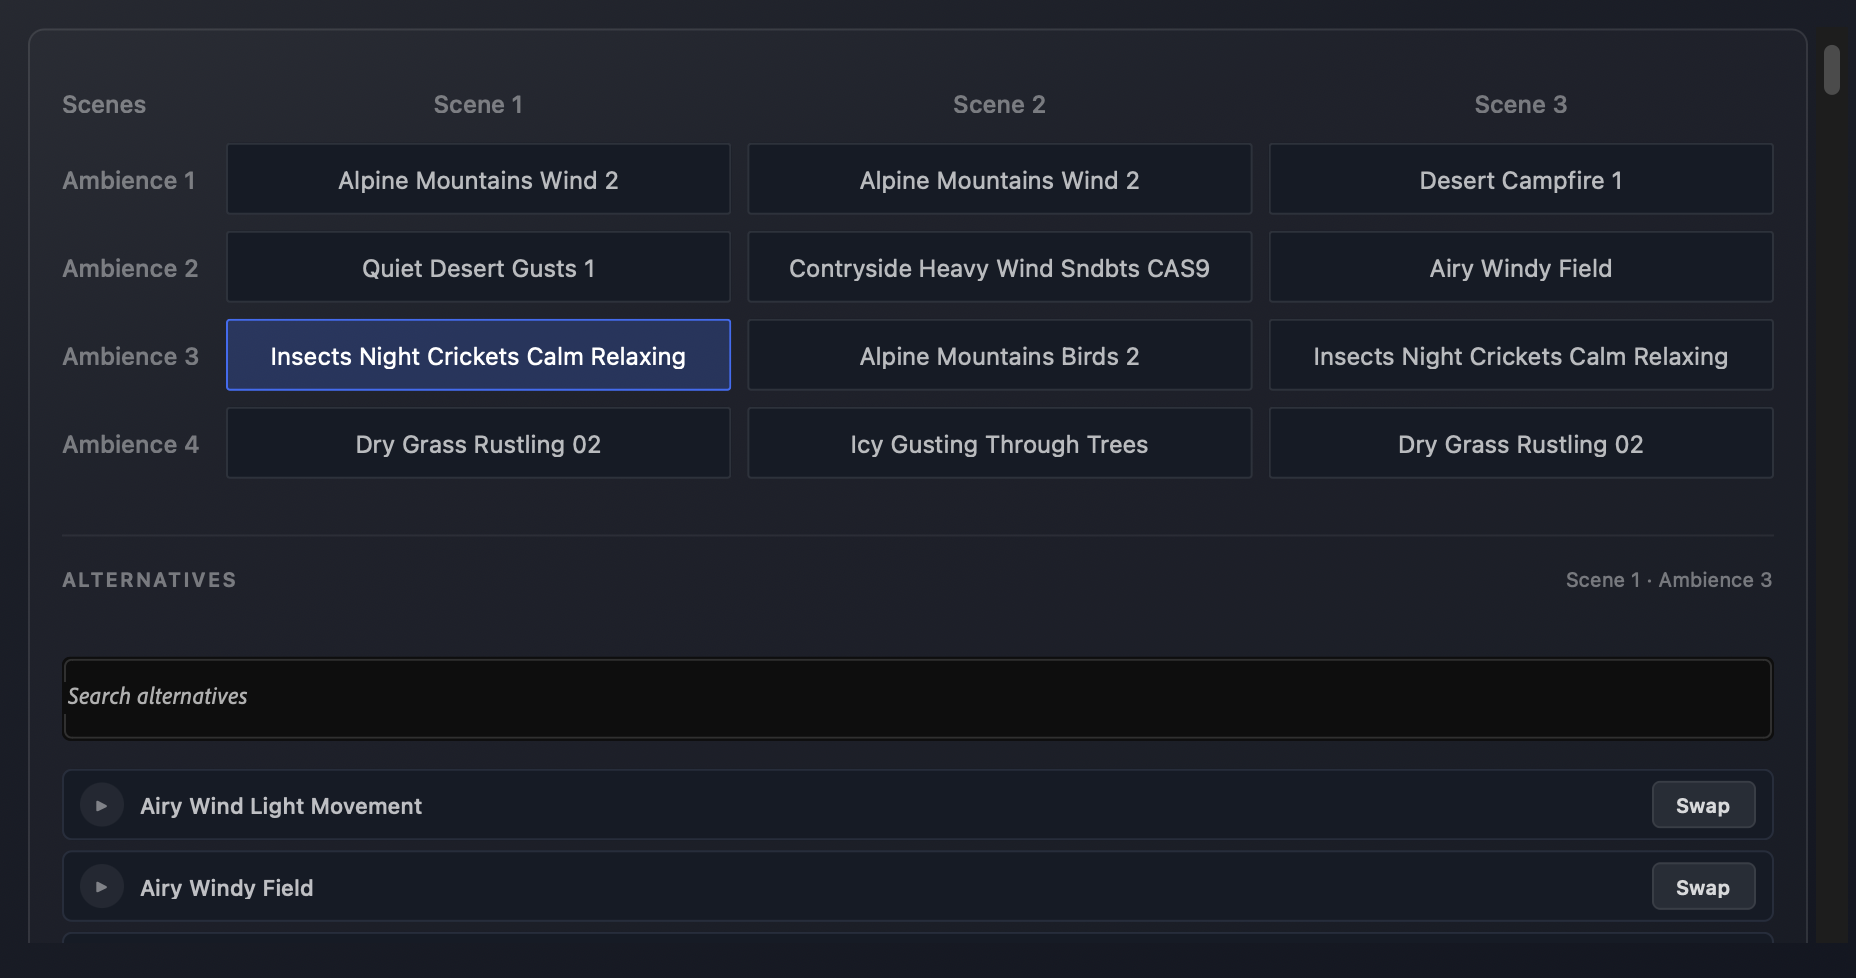
- Click a cell in the grid to select a clip. You can also click the clip on the Resolve timeline itself and the matching cell will be selected for you.
- Browse the list of alternatives, or use the search to narrow it down.
- Click the play button on the left of any result to preview it.
- When you find one you want, click Swap on the right. The clip is replaced on the timeline straight away.
Whooshes, Risers and Impacts
These three have two modes.
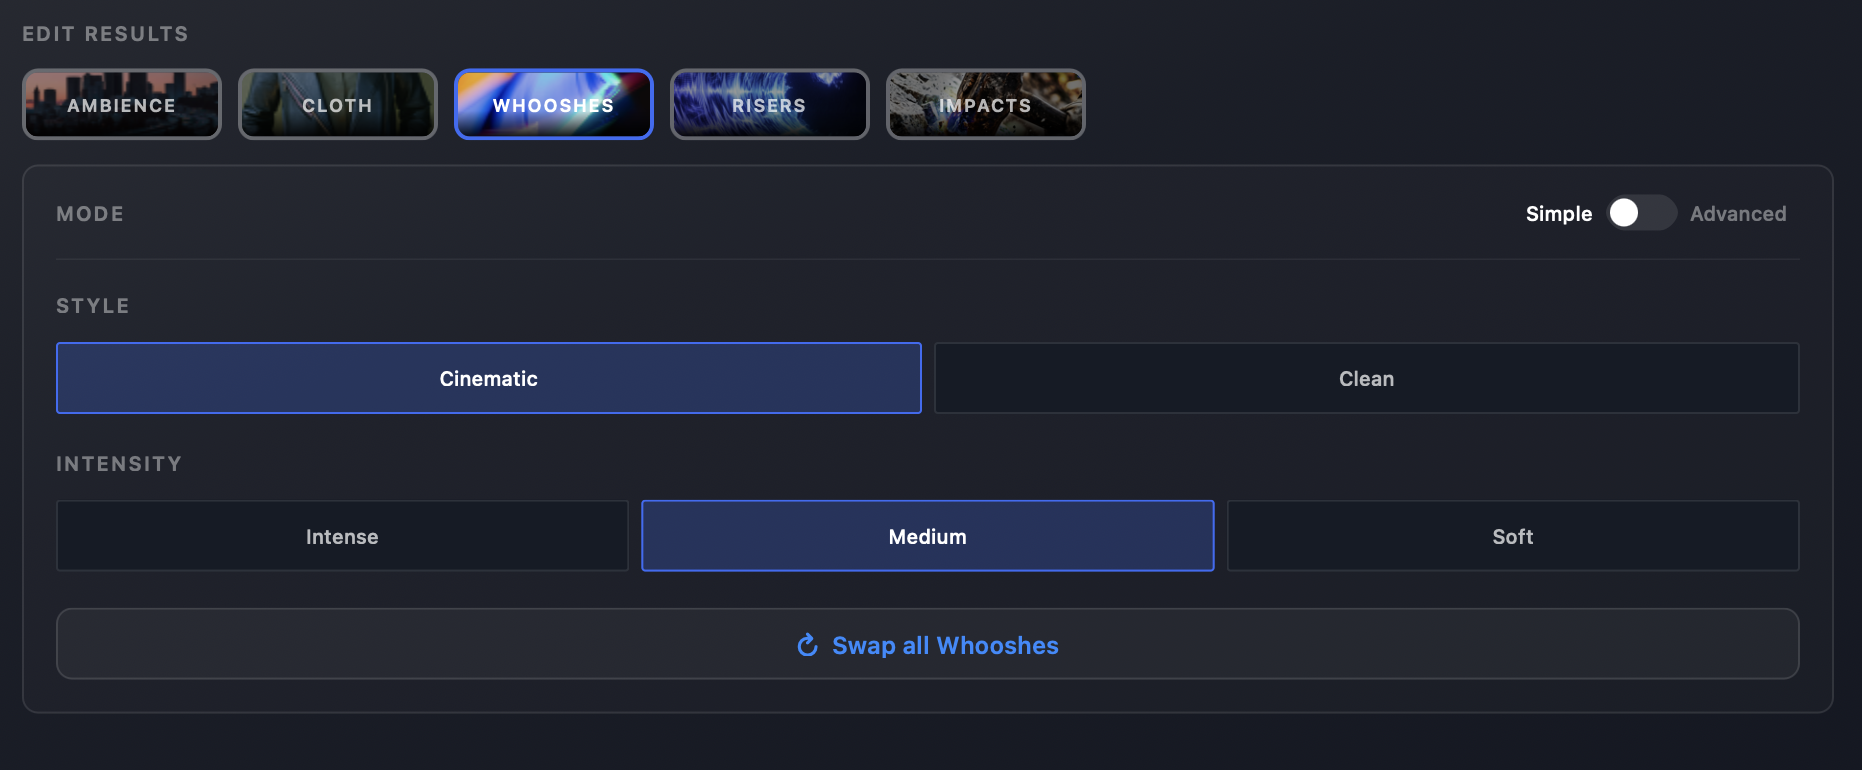
Simple mode gives you a Style and Intensity choice. Set those, then click Swap all to replace every clip of that element across the analysed region in one go. Use this when the whole element is the wrong flavour for the scene.
Advanced mode is for surgical changes. It works like the Ambiences grid: select the clip you want from the grid or by clicking it on the timeline, pick an alternative from the list, and hit Swap. Everything else stays as it is.
How many analyses you get
Each time you analyse a region, that counts as one analysis. Your allowance depends on your plan:
- Free (account only, no paid subscription): 5 analyses in total
- Krotos Studio: 50 per month
- Krotos Studio Pro: 100 per month
- Krotos Studio Max: 200 per month
Monthly allowances refresh each month.
Because a region is the unit, it is worth being deliberate with your in and out points rather than analysing the same stretch repeatedly.
Two things worth knowing
Swap only works on your most recent analysis. Once you select a new region and analyse it, swapping applies to that region. You cannot go back and swap effects in a region you analysed earlier in the session, or on a previous day. If a section needs swapping, do it before you move on.
We do not train on your video. The analysis of your footage is not used for training purposes, so you can run your own material through it without your content feeding our tools.
How this differs from the standalone app
Krotos Studio comes in more than one form, and they suit different jobs.
The Resolve plugin places synced sound effects on your timeline automatically. It is the fast route, and a good fit if you are an editor rather than an audio specialist, or if you want a solid first pass to build on.
The standalone app works the other way round. You load a preset and shape the sound yourself with the plugin's controls until it matches what you are hearing in your head, then drag it onto the timeline and sync it by hand. Slower, but you control every part of the sound.
Both are included in every paid tier, so it is a question of which one suits the task rather than which one you have paid for.
A note on the AI
The plugin is AI-assisted, not generative. The AI's job is deciding which sound effects fit your footage and where they belong, drawing on a library of over 100,000 recordings made by our sound designers. It does not create or synthesise audio. Every sound that lands on your timeline is a real recording, and it is royalty free.
Get started
If you already use Krotos Studio, download the latest installer and tick the DaVinci Resolve integration during setup. If you are new, start a free trial and run your first analysis on a scene you have been putting off.
Start your free trial or see Video to Sound in DaVinci Resolve.
