

Welcome to Video to Sound in Adobe Premiere
Video to Sound now runs directly inside Adobe Premiere via our new plugin integration. Simply select a region of your timeline including video, choose elements for the scene, hit Analyse and sound effects are synced automatically on the timeline. Once on the timeline, you can swap these for other sound effects with a few clicks, for something more appropriate to your vision, all while maintaining the sync.
This workflow is powered by our Video to Sound technology and our vast library of high-quality, royalty-free sound effects recorded by the world's best sound designers.
The plugin is AI-assisted and only uses real, royalty-free audio. It does NOT use generative AI to create or synthesise audio.
The plugin is part of the Krotos Studio platform — free to try, then available as part of a subscription. We offer different levels of use based on your subscription plan: Studio, Pro or Max.
What you can do with the plugin
Using the plugin you can automatically add synchronised, high-quality sound effects to your projects in Adobe Premiere. At this time, you can choose between a number of different elements to add to a scene:
- Ambiences
- Whooshes
- Transitions
- Risers
- Impacts
- Cloth
These will be automatically chosen, downloaded and synced based on the region of video you have selected.
Footsteps and Spot Effects will arrive in the plugin very soon and will be immediately available as part of your subscription plan.
Before you start
You will need the latest version of Creative Cloud and a version of Premiere newer than 2025.0.0 (25.0.0) to use the plugin.
Getting Started
1. If you are new user, create an account at krotos.studio. If you already have an account, head to Download. Your download will start automatically.
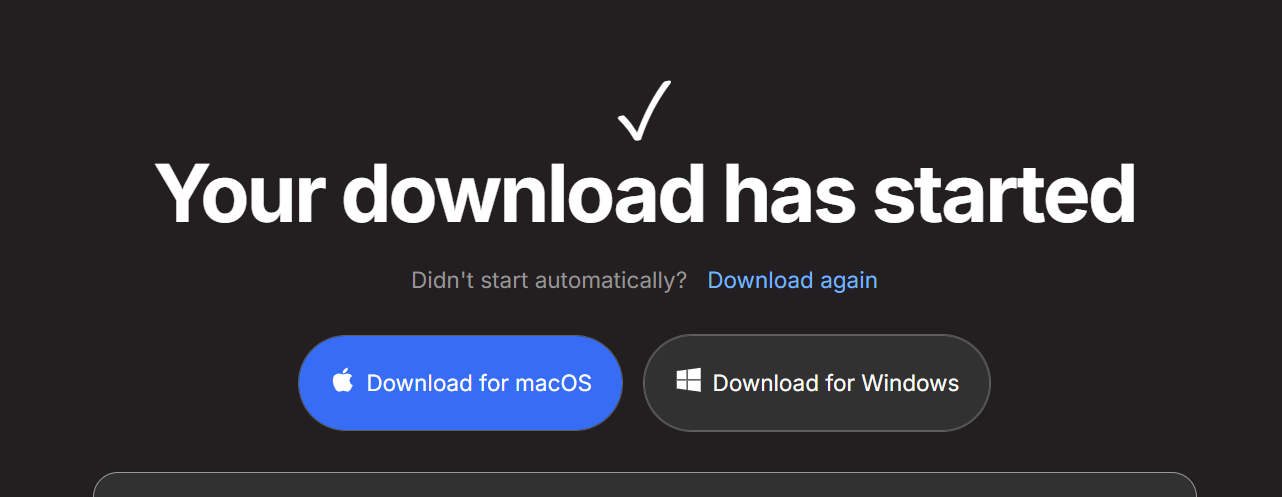
- Once downloaded, run the installer; this will install the Premiere plugin and the Krotos Studio standalone (this is also accessible from the Premiere plugin and allows you to dive deeper into designing sound effects is the plugin doesn't get you the results you are looking for)
- Open Premiere
- Add the plugin from Window > UXP Plugins. It will appear and can be used as a floating window or docked.
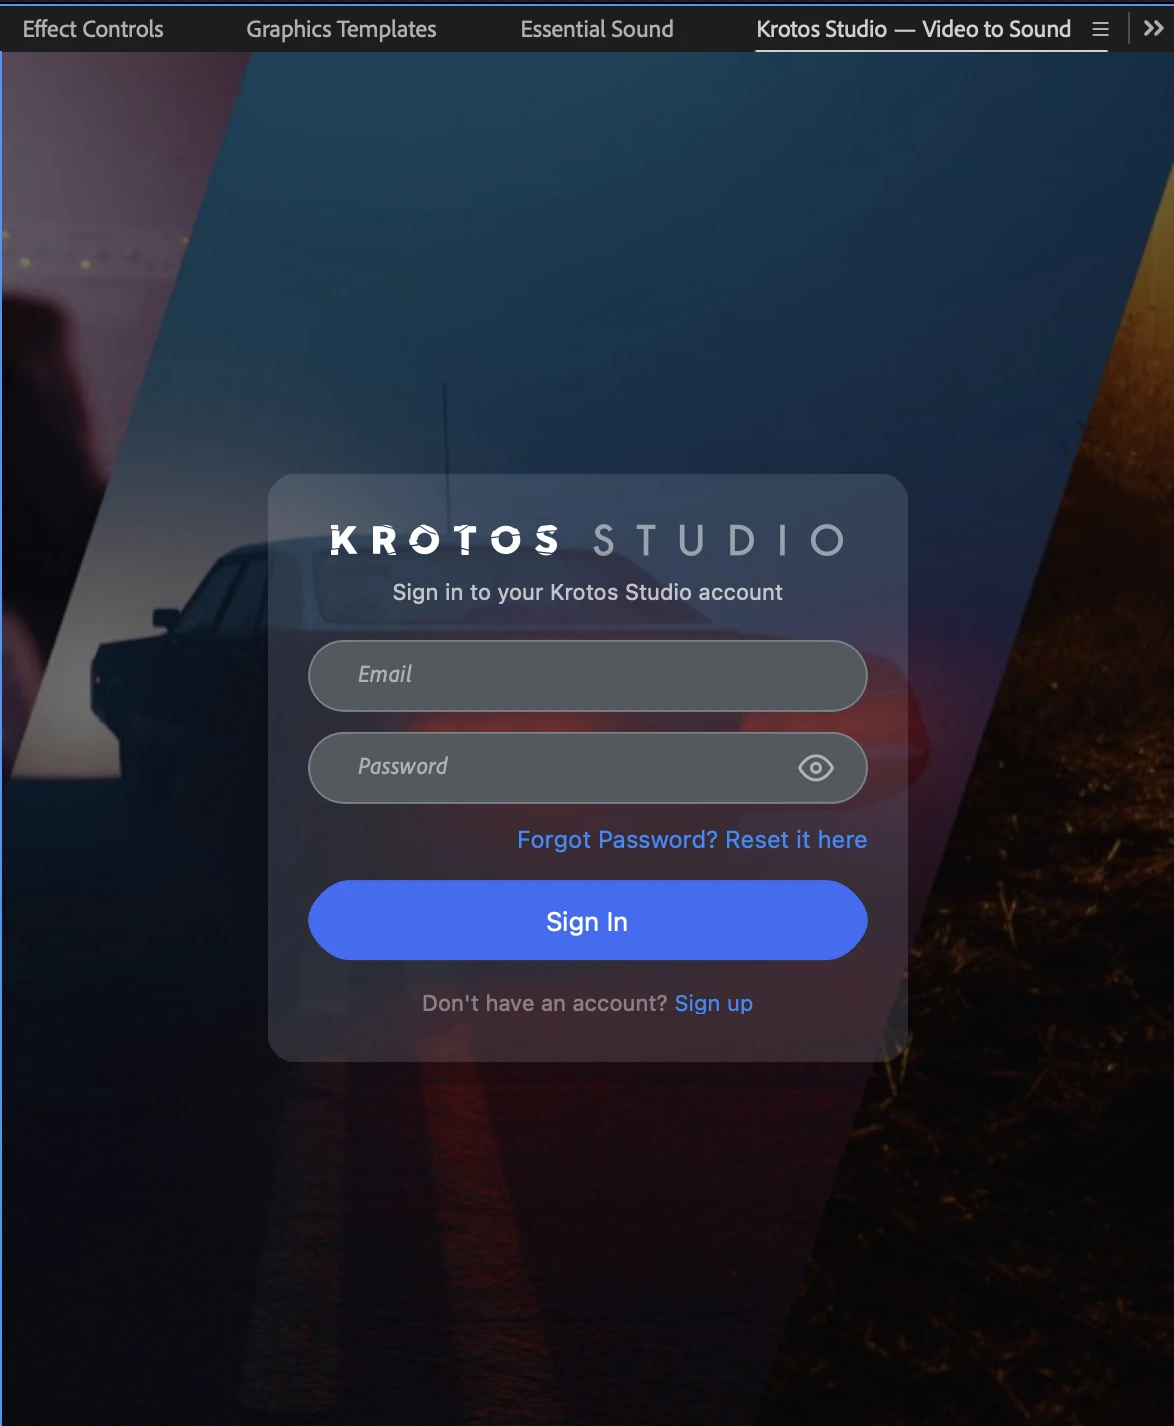
- Log in via the plugin using your krotos.studio account credentials.
Using Google Sign-in? Google Sign-in is not currently supported in the plugin. You will need to create a password. Click Forgot Password on the login screen, set a new password, then return to the plugin and use that password to log in.
- Select the elements you want to add to the scene. Click to select, click again to deselect.
- Select a region on your timeline using I and O on your keyboard, or right-click to set your in and out points. Drag the points to adjust. Video to Sound will only analyse between these two points.
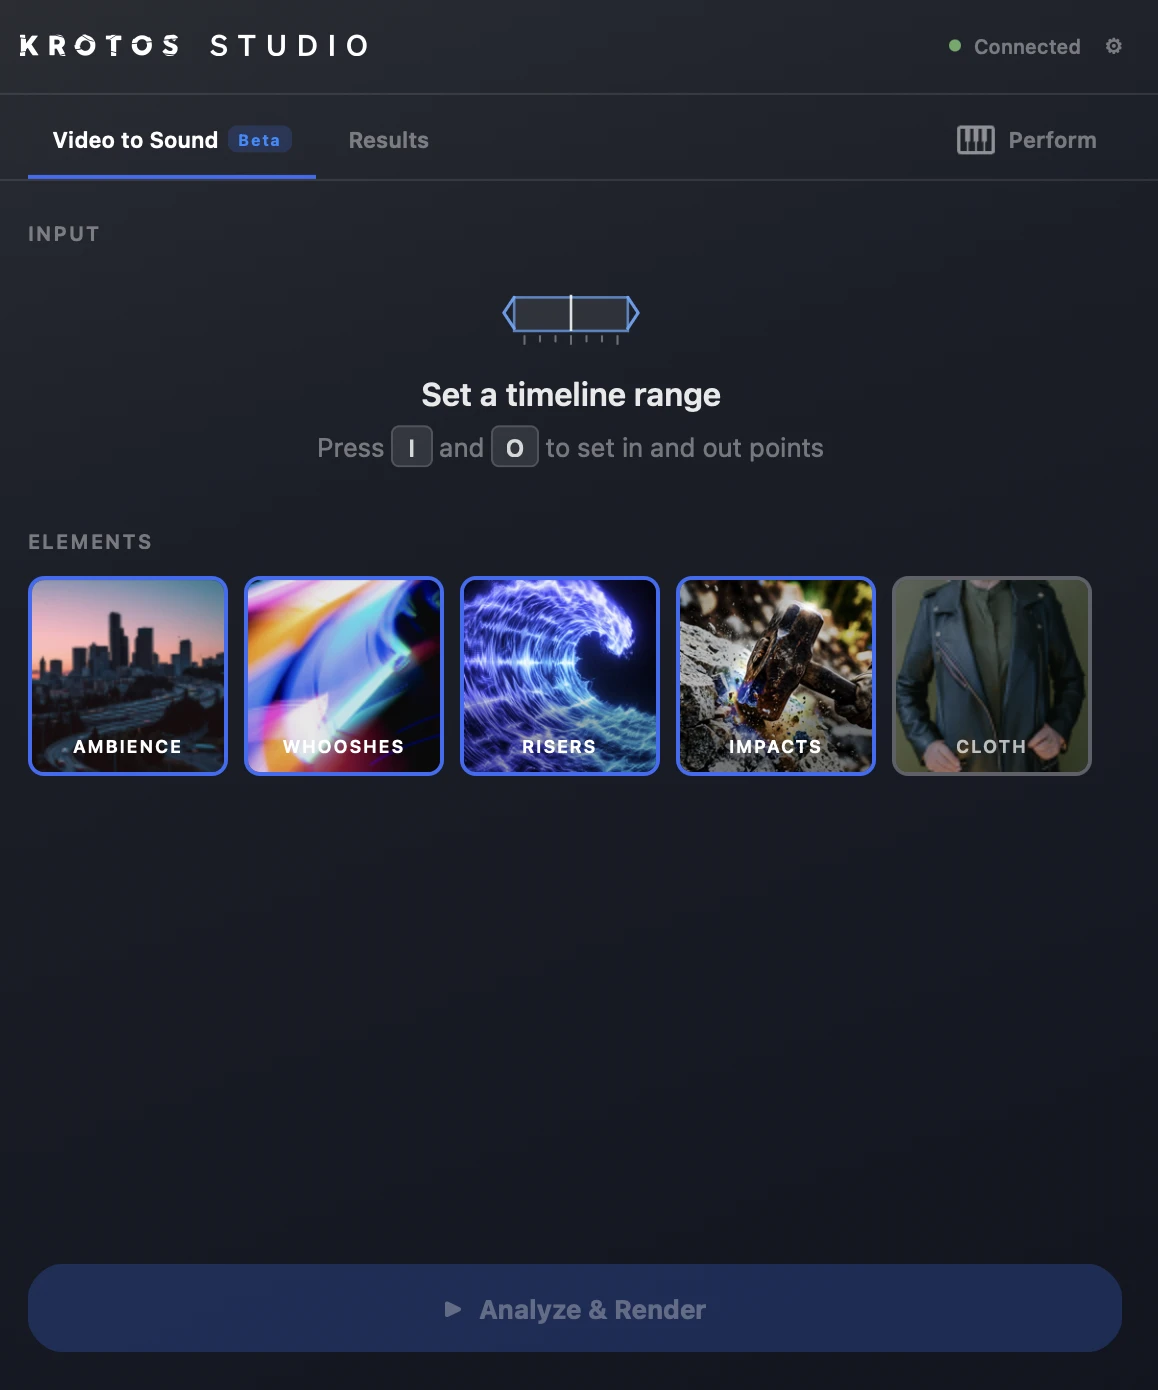
- Once you have selected a region and your elements, hit Analyse and Render. Your video will be analysed and sound effects will be automatically added to tracks in your project.
- To adjust the mix, click any clip on the timeline to adjust its level or delete it. This applies to every clip added by Video to Sound.
Swapping sound effects
If a sound effect does not fit the scene, you can swap it directly in the plugin UI while keeping it in sync. This is possible for all elements except Cloth.
Swapping is done from the Results tab. You are taken to this tab automatically once analysis is complete and your sound effects have been placed on the timeline.
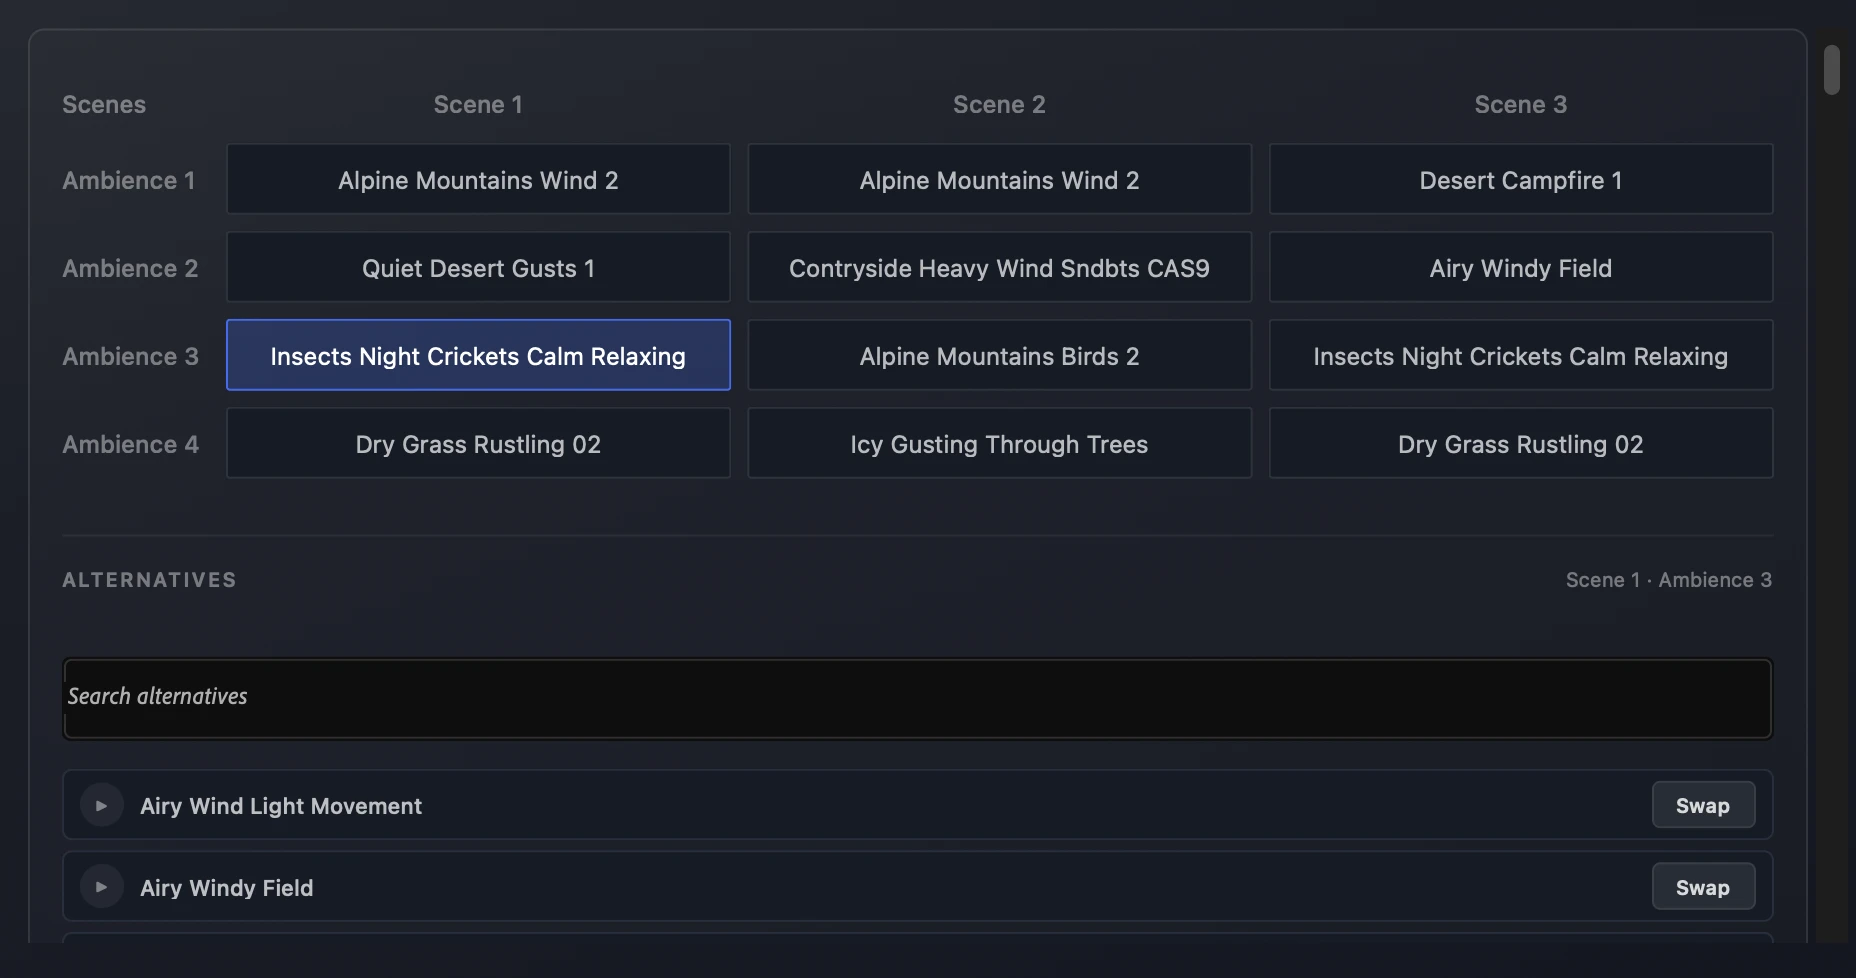
Ambiences
Use the Grid view showing each clip added to the timeline. Click a cell in the grid to select a clip, or click the clip on the Premiere timeline itself and the grid will update automatically. Browse the list of alternative sound effects, or use the search to narrow down results. Click the play button to preview an alternative. Once you have chosen one, click Swap and the clip will be replaced directly on the timeline.
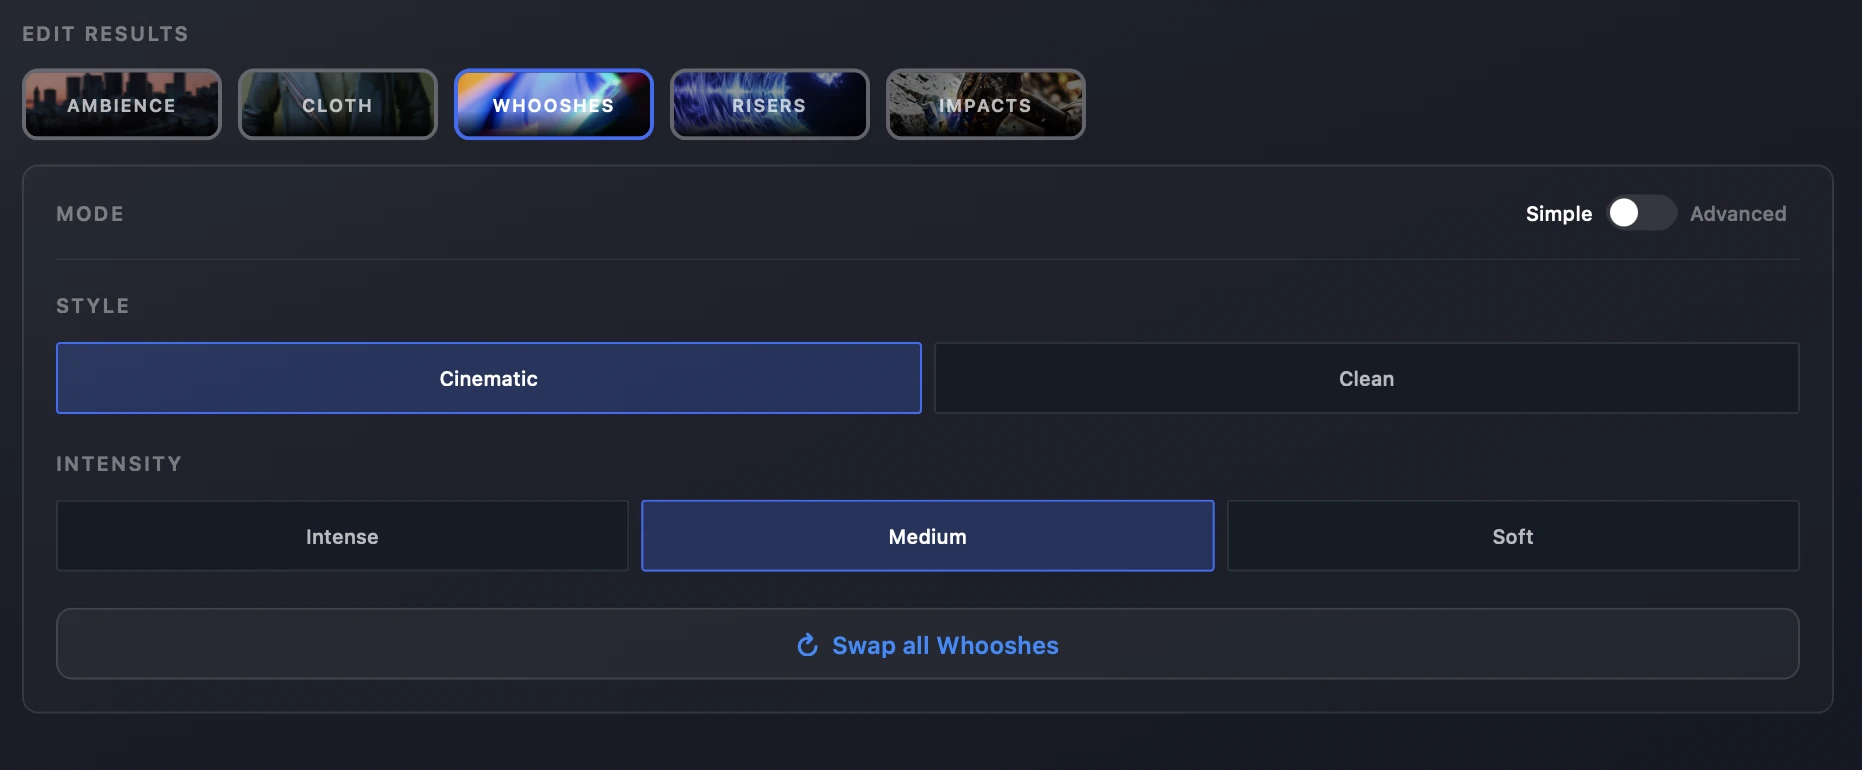
Whooshes, Risers and Impacts
These elements include both a Simple and Advanced mode.
- Simple mode — choose a Style and Intensity, then click Swap All to replace all clips for that element in the analysed region at once.
- Advanced mode — swap individual assets while leaving others in place. Use the grid to select a specific clip (or click the clip on the Premiere timeline), choose an alternative from the list, and hit Swap.
FAQ
Is the plugin using generative AI?
No. All use of AI is assistive, not generative. We use real, high-quality recordings made by our sound designers. AI is used only to decide which sound effects to choose, combine and place. Nothing is generated or synthesised.
Footsteps are marked as Coming Soon — what's the ETA?
We are working on a game-changing solution for footsteps. It should arrive very soon.
How many times can I analyse?
There is a fixed limit based on your plan. This also applies during the Beta.
- Free (account only, no active subscription) — 5 analyses
- Krotos Studio — 10 analyses
- Krotos Studio Pro — 100 analyses
- Krotos Studio Max — 200 analyses
Can I swap assets after analysing a new region?
You can only swap assets immediately after analysing a region. If you analyse a new region, swapping applies to that new region only. You cannot go back and swap assets from a region analysed earlier in the session or on a previous day. This is a current limitation of the workflow.
What are the minimum system requirements?
You will need Adobe Premiere 25.0.0 or above. We recommend updating to the latest version of Creative Cloud.
Where are my downloaded assets stored?
Assets are stored in a persistent folder outside your project directory.
- macOS: /Users/{user}/Library/Application Support/Adobe/UXP/PluginsStorage/PPRO/26/External/com.krotos.studio.videoToSfx/PluginData/sessions/
- Windows: C:\Users\{user}\AppData\Roaming\Adobe\UXP\PluginsStorage\PPRO\26\External\com.krotos.studio.videoToSfx\PluginData\sessions\