

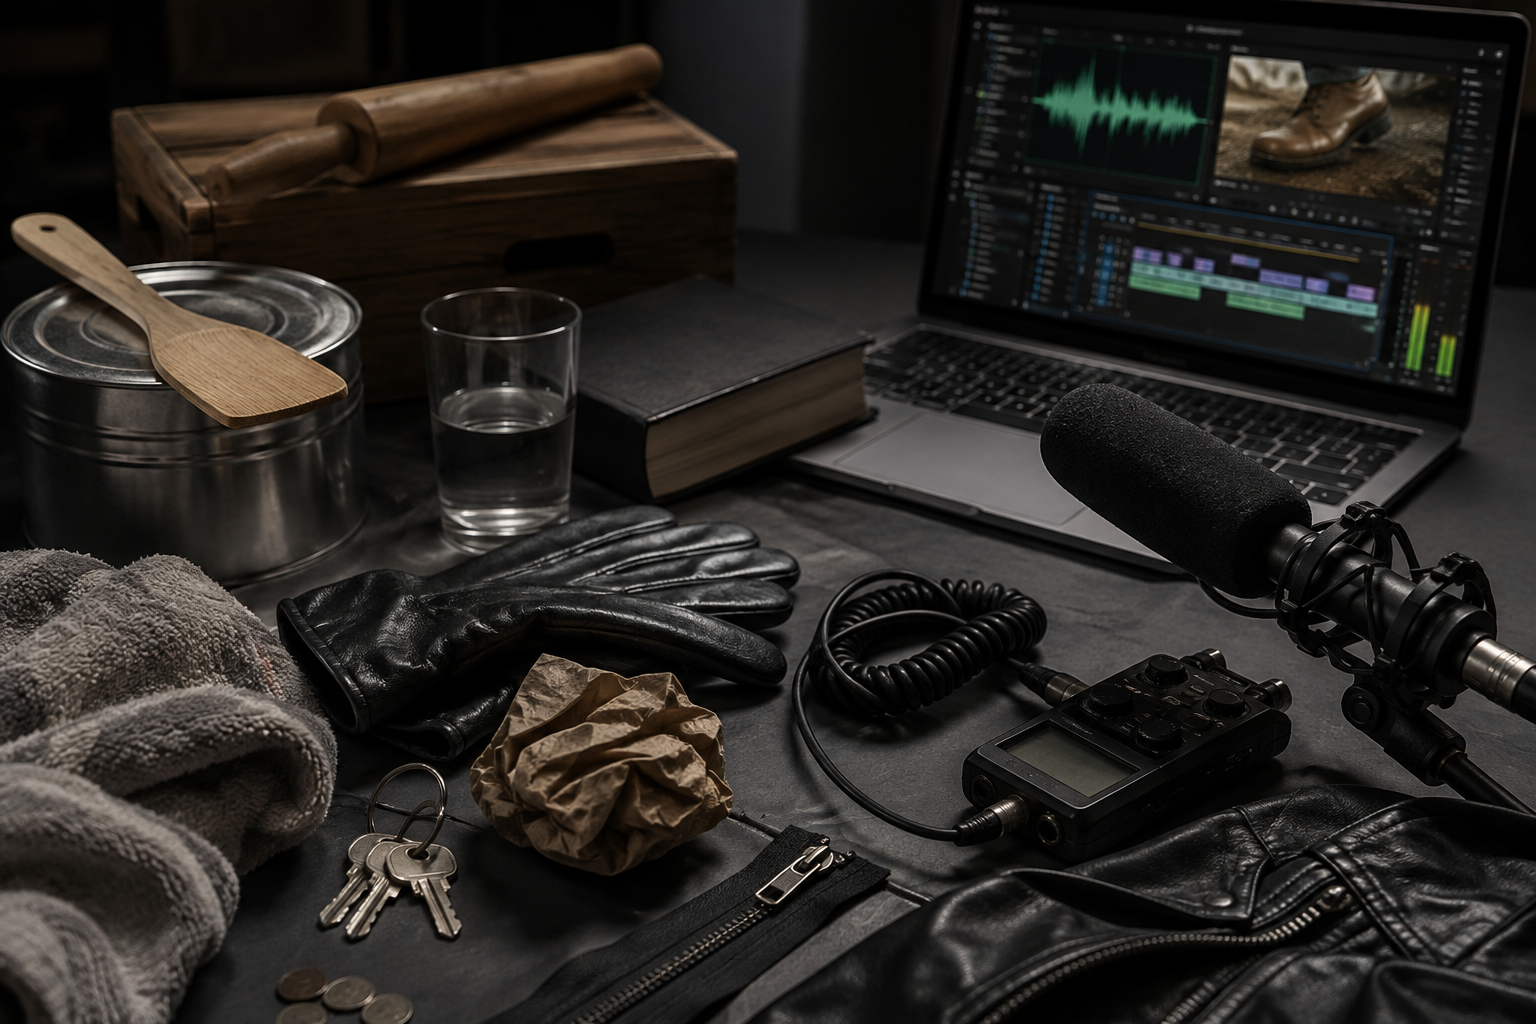
Every editor running against a deadline knows the pain of hunting the perfect sound effect, importing ten libraries and still not quite nailing sync. Ordinary household items are a much faster way to build professional movie sounds. This guide gives practical swaps, a tight recording checklist, and step-by-step editing shortcuts for fast turnaround in Adobe Premiere Pro and DaVinci Resolve. Expect clear decisions, quick layering rules and a printable checklist you can actually use on set or in the edit bay.
Practical prop list: quick swaps for common movie sounds
• Footsteps
• Shoes on tile or hardwood, leather gloves on a table, coconut shells for distant horse steps. Record heel and toe hits separately, close and 30 to 60 centimetres off for room tone.
• Impacts and hits
• Metal spatula on a tin lid, rolling pin on a wooden box, a thick book dropped onto a mat. Capture hard close hits and softer glancing blows for layering.
• Whooshes and swishes
• Thick towel waved fast, cardboard sheet flicked, a leather jacket swiped past the mic. Record front-on and side-on passes for different transient characters.
• Foley textures and body
• Crumpled paper, zip pulls, rustling jackets, glass clinks. Record tight close details and a second pass with room distance for ambience.
• Interior ambience and hums
• Fridge motor recordings, kettle hiss, distant traffic from a window. Capture 30 to 60 seconds of room tone at low level plus focused hum loops.
• Crowd beds and group sounds
• Newspaper shuffling, low murmurs by recording a few people in a small room, footsteps across different floorings. Get a wide stereo take and several mono close takes for layering.
How to pick one prop for multiple uses
Take a pair of leather gloves. Slap them together close to the mic for crisp hand claps and quick swishes, rub one glove along a table for soft fabric friction, and crease a glove repeatedly to get brittle crackles that can double for small impacts. Mic distance changes texture more than the prop often does. Close mic for attack and detail, pull back for room and ambience. Record several velocities and articulation styles, label each take, and you have dozens of usable elements from a single prop.
Fast recording setup: capture clean, usable takes in minutes
1. Choose your mic or device, and place it relative to the sound source, then lock it. Consistent placement saves time in the edit.
2. Set levels so peaks are about 6 dB below clipping, watch for transient overloads and leave room for processing.
3. Record a 30 second room tone at the location for clean ADR and ambient layering.
4. Do redundancy takes: at least three velocities or articulations per sound, plus a wide and a close pass.
5. Slate each take verbally and use a finger snap or clap for quick visual sync, then name the file on the recorder if possible.
6. Use lossless WAV, 24 bit and 48 kHz for video projects, or 96 kHz if you expect heavy pitch or time manipulation.
Quick file naming: scene_sfx_take_variant_date, for example SFX_FOOT_TILE_T01_close_20260812.wav. Keep folders per shoot, then per category. Export a small metadata text file listing scene, props used and any unusual processing.
Phone vs field recorder vs studio mic
Phone apps are fast and surprisingly usable for reference or quiet ambiences; use an app with high quality WAV export and a lav or small shotgun adapter if possible. Portable field recorders with XLR mics are the best balance of speed and quality on location, giving redundancy and manual gain control. Studio condensers offer the cleanest captures but need a controlled room. For most fast- turnaround edits, a field recorder plus a versatile shotgun or a dynamic for loud hits is the default recommendation.
Speed-first editing: integrate and process in Premiere Pro and DaVinci Resolve
1. Import organised folders as bins. Rename clips if necessary to match your timeline handles.
2. Place the low weight elements first, then build upwards with transients and textures. Trim to picture and nudge for tight sync.
3. Use high pass filters to remove rumble from small props. Use gentle EQ boosts for presence or dips to remove muddiness.
4. Time-stretch only when needed, and prefer pitch-preserving algorithms to keep character. Pitch shift for size changes, subtle amounts work best.
5. Apply light compression to glue a composite SFX, save a preset and batch apply it if you have multiple similar hits.
6. For quick ambience, set up a return reverb sent from multiple SFX tracks rather than inserting different reverbs on every clip.
Premiere Pro notes: Use the Essential Sound panel to tag SFX and apply quick loudness/denoise passes. For batch fades and consistent clip gain, select multiple clips and use the Audio Gain tool. Use File, Export, Media and choose Audio Track Export for stems.
Resolve notes: Use the Fairlight page for clip and track automation. Create bus tracks for groups such as footsteps and whooshes, then render stems using the Deliver page with individual track outputs or stems per track.
Quick layering order
Priority order that works reliably: impact, body, texture, air, ambience. Start with a solid impact to sell the hit, add body to give weight, texture for character and the transient, then a blurred air or whoosh for movement, and finally ambience to sit the sound in the scene. This keeps mix clarity and gives each layer a job so they do not fight each other.
Exporting deliverables from the timeline
For fast client delivery, export stems by group: Dialogue, SFX, Foley and Ambience. In Premiere choose Export Media, select Audio, and use Track Output if you routed tracks. In Resolve render individual tracks via the Deliver page or use Bounce to Tracks on Fairlight. For single events export trimmed WAVs at 48 kHz 24 bit, include a simple CSV or TXT mapping of filename to scene/timecode, and compress to a client-friendly ZIP.
Creative pairings and substitutions: think like a foley artist
Rules of thumb: match the size and material of the original source, focus on the contact point, and keep scale consistent. If the picture shows a heavy boot on gravel, priority is low frequency weight and scrape. If it is a delicate glass touch, focus on high frequency sparkle.
Examples
• Crowds: layer murmured conversations recorded from a small group, add distant footsteps using crumpled newspaper; both give believable diffuse activity.
• Footsteps: leather gloves for soft shoe on wood, coconut shells or two halves of a hard clack for horse hooves, and a heavy book for a muffled boot thud.
• Whooshes: a large towel or coat swung near the mic for broad whooshes, cardboard flicks for sharp pops, then layer a subtle library whoosh if you need cinematic polish.
• Interior ambience: fridge hum plus distant traffic and a recorded room tone makes a convincing domestic interior without a library bed.
When to layer organic recordings with synth or library elements: If you need extra low-end weight or cinematic sweep, add a sub-synth or a polished library whoosh beneath your organic recording. Use organic elements for sync points and unique character, then bring in libraries for scale and polish only where necessary.
When to favour organic recordings over library sounds
Choose organic recordings when the action is closely synced to picture, when the scene requires a unique or local texture, or when you need the exact timing of a specific movement. Libraries are great for background or for instantly adding mass, but they can sound generic if the performance needs personality. For tight editorial deadlines favour organic for sync-critical moments, then augment with curated library hits for depth.
Ethics, AI tools and a final fast-delivery checklist
AI tools can speed up matching, automated layering and video-to-sound suggestions. Use them as assistants that save time, not as a black box that replaces human judgement. Be transparent about what was recorded and what was produced or altered by algorithmic tools, check licence terms for any generated or library content, and never present algorithmically generated effects as recorded Foley without client agreement.
1. Confirm sample rate and bit depth, usually 48 kHz 24 bit for deliverables.
2. Include a metadata file listing props, record location, microphone used and any automated tools applied.
3. Verify licences or usage rights for any library or AI-assisted elements.
4. Provide both stems and single event WAVs as requested, and include a short README with track mapping and recommended sync offsets.
5. Back up final deliverables to a secondary drive or cloud storage immediately.
Client deliverables checklist
• WAVs at 48 kHz 24 bit, grouped into Dialogue, SFX, Foley, Ambience folders.
• Stem exports and any single-event files named scene_sfx_take_variant.
• A README or CSV mapping filenames to timecode and description.
• Licence notes for any library or AI-assisted assets, including source and usage restrictions.
• One clean room tone file and a brief note of recording setup for future reference.
If you want to test these shortcuts in a dedicated toolset, try a Krotos trial to explore preset-based layering and real-time auditioning. Join the Krotos community for quick preset packs, tips and a printable one-page foley checklist to take on your next shoot.
Frequently asked questions
What are some everyday sounds?
Everyday sounds include footsteps, doors closing, keys jingling, cups clinking, paper rustling, refrigerator hum, distant traffic, and clothing movement. These simple elements form the basis of most Foley and ambience beds and can be recorded quickly to give scenes authentic texture.
What are some examples of objects that make sound?
Common objects used for movie sounds are shoes, coconut halves for hooves, metal spoons on glass, leather gloves, towels for whooshes, books for thuds, zip fasteners, crumpled paper, and kitchenware like pans and lids. Each object produces a range of variations by changing mic distance, striking surface and technique.
What are 5 things that make sound?
Five everyday items that make useful sounds are shoes, paper, glass, metal utensils, and fabric. Each can be exploited for multiple Foley purposes: shoes for steps, paper for rustles and crowd textures, glass for tinkles, metal for impacts, and fabric for clothing and swishes.
