
Automated Dialogue Replacement, or ADR, is the process of re-recording an actor's lines after filming to replace or improve the on-set audio. Done fast and accurately it can rescue a scene, restore intelligibility and give you creative control over delivery. This guide explains what ADR is in plain terms, why it matters to editors and filmmakers, how the workflow works, a step by step application in Premiere Pro and DaVinci Resolve, checks to run before you hand over audio, and where Krotos tools can speed up the parts of the job that often slow you down.
ADR in plain English: what it actually means on set and in the edit
ADR is simply replacing or improving spoken lines by recording them again in a controlled environment, then syncing those performances back to picture. Unlike dubbing, which replaces all spoken parts for localisation or language conversion, ADR is usually used to fix specific lines where production audio is unusable or performance needs tightening. Voiceover can be similar technically, but it is typically recorded to narrate or comment, not to match a lip movement on screen.
Why you might need ADR
When production audio suffers from road noise, rain, aeroplane rumble, crowds, or a boomy lavalier, ADR becomes the most reliable fix. You might also ADR because an actor’s mumble missed a key line, microphone clipping ruined a moment, or continuity of performance needs a subtle adjustment. ADR is preferable to hunting for a cleaner take in the library when dialogue must match lip movement exactly, or when you want an actor to deliver a different line read to better serve the edit or tone.
Why ADR matters for video editors, filmmakers and creators
Good dialogue is the backbone of most scenes. Clean, well matched ADR means clearer storytelling, fewer times where crucial lines get lost in the mix, and more control over emotional nuance in the cut. For editors, ADR removes the need to sacrifice clarity with heavy processing or awkward EQ tricks that can make a scene sound unnatural. For filmmakers it restores the option to shape performance after the shoot without reshooting entire scenes.
Practical benefits during tight deadlines
When a deadline is breathing down your neck, solid ADR reduces time spent scouring sound libraries for passable clips or trying to mask issues with music. It lets you deliver a near-final dialogue pass to the mixer, keeping rounds of revision with directors and actors to a minimum. For broadcast and localisation, ADR makes creating clean dialogue stems straightforward, which speeds up conform and ensures compliance without a frantic last-minute fix.
How ADR works: the core components and typical post workflow
At its core ADR follows a predictable sequence. Spotting identifies lines that need replacement. You prepare a guide track that helps the actor match timing and performance. Recording captures the new takes in a quiet, treated space. Syncing aligns the recorded audio to picture with timecode or waveforms. Editing trims and matches performance to lip movement, and mixing blends ADR into the scene so it sits naturally.
What you need before you record
Checklist items that remove wasted sessions: locked picture or a near-final picture, a reference mix so the actor hears cues and ambience, a guide track with timecode and slate markers, clear cue sheets showing lines and frame numbers, and a quiet recording environment with a suitable microphone. Also have room tone recorded on set and a note of the on-set microphone style to help match texture later.
How the recorded ADR gets back into the edit
Syncing options include timecode as the cleanest method, a visible slate frame for manual alignment, or waveform matching when the old and new takes have shared reference content. After syncing, create dialogue stems or labelled tracks for delivery to the mixer. Common practice is to provide production audio, ADR takes, and room tone in separate stems so the re-recorded performance can be blended with original ambience if needed.
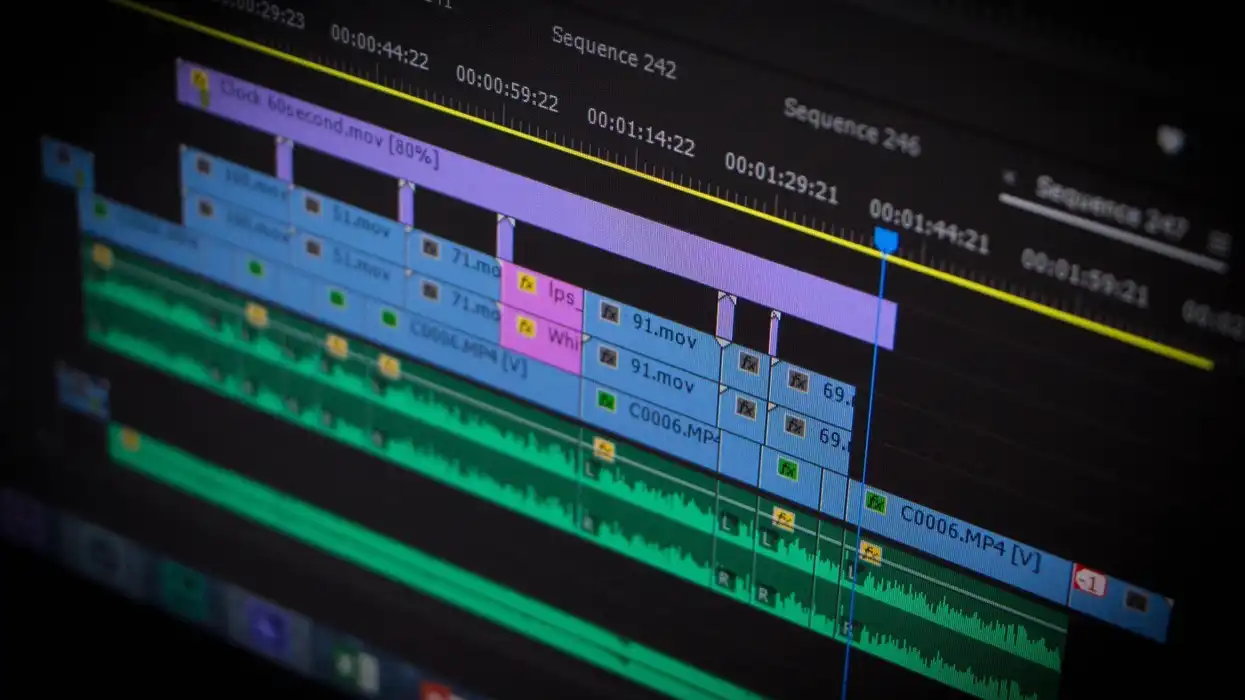
Step-by-step ADR workflow in Premiere Pro and DaVinci Resolve
This is a practical path from cut to recorded line back in your timeline. The same principles apply in both NLEs with small UI differences.
Preparing the edit and exporting a guide
Lock your picture and create a guide track containing: the locked picture’s background audio, a clearly marked slate frame or a 2 second tone for alignment, and brief stems that include the production dialogue bleed so the actor can match phrasing and pacing. Export as a stereo file at the project sample rate, clearly labelled with scene, take, and timecode. Send the file with a cue sheet that lists lines and exact frame numbers for each ADR cue.
Recording, choosing takes and replacing dialogue
In the session, play the guide for the actor and let them run multiple takes. Coach delivery for energy, breath placement and timing rather than trying to force a waveform match. When you import takes back into Premiere Pro or Resolve, align using timecode or waveform. Trim aggressively to remove false starts, use short crossfades to hide edits, and adjust clip gain to match the scene level. Choose takes that match emotional intensity first, then micro-edit timing so lip sync feels natural rather than mechanically exact.
Mixing ADR into the scene
Start by matching ambience and perspective, not only level. Use subtle reverb or convolution impulses that reflect the original room, and blend in room tone to mask edits. Gentle EQ can match tonal balance, and a de-esser removes sibilance introduced by different microphones. Create a dialogue stem that contains the final ADR performance and cleaned production audio as a backup, and include notes about any processing applied so the re-recorded audio can be tweaked by the mixer without hunting for decisions.
Quality checks and common ADR mistakes to avoid
Before you call a cue done, run a set of checks that flag the usual pitfalls.
Key things to check
Listen for lip sync across a variety of speakers and devices. Assess whether the performance matches emotional tone and timing, confirm consistent levels and tonal match, and check background ambience for continuity. Pay attention to breaths, mouth clicks and any unintended room resonances that can betray a studio take.
Common mistakes
Avoid over-tight editing that makes dialogue sound chopped, and do not ignore room tone which is the simplest way to make edits sit. Watch out for phase problems when blending ADR with production audio, and be wary of mismatched reverb settings that create different spatial perceptions. Over-processing with heavy EQ or compression can rob the performance of natural dynamics and make the ADR obvious.
Quick pre-deliver checklist
Before sending to your mixer, verify: sync points are correct across the session; levels are consistent and headroom is intact; breaths and clicks are addressed; room tone is present to cover edits; and files are labelled with scene, take and version metadata.
Troubleshooting fixes
If lip sync is off by a few frames, nudge the clip and use micro-crossfades for smooth transitions. For tonal mismatch try gentle EQ boosts or cuts around problematic bands rather than extreme filters. If the ADR sounds too dry, add a matched ambience bed or convolution reverb set to short pre-delay to recreate distance. For phase issues, check polarity and consider deleting a low-frequency band where phase artefacts are strongest.
Where Krotos tools can help your ADR workflow, practical and honest fit
Krotos tools are useful where sound design and ADR editing meet. They can speed up creation of supporting audio that helps ADR sit naturally in a scene, saving time looking through multiple libraries or assembling long ambience layers by hand. That means faster turnarounds and fewer excuses to compromise on sound quality when deadlines tighten.
Practical use cases for Krotos tools
Generate room tone and ambience beds that match the scene to mask ADR joins, quickly create foley hits like footsteps or cloth rustles to cover lip sync blemishes, and build whoosh or impact beds to support emotional beats without opening a full SFX library hunt. Procedural tools can also let you iterate variations quickly, so you can audition different textures and settle on what best supports the performance.
Trust and boundaries when using procedural or library tools
Krotos is a creative assistant, not a replacement for an actor’s performance. Use procedural generation and libraries to support authenticity, not to impersonate speech or mislead about who performed the line. Keep clear versioning and documentation for any generated sounds you deliver, so collaborators and clients understand which parts are actor ADR and which are added design. When AI or algorithmic methods are involved, treat them as tools for efficiency and sound shaping, while maintaining transparency and ethical use.
If you want to explore how Krotos tools can fit into your ADR workflow, try a free trial or book a short demo with the team to see presets, workflow examples and community presets that match common ADR scenarios. Join our user community for quick tips, shared presets and practical patches that other editors and sound designers use to get results faster.
Frequently asked questions
What is ADR Automated Dialogue Replacement?
Automated Dialogue Replacement, often shortened to ADR, is the process of re-recording dialogue in a controlled setting after filming, then replacing or augmenting the original on-set audio in postproduction. The goal is to restore clarity, correct performance issues, or change delivery while matching timing to the picture.
Technically ADR sessions use guide tracks, timecode or slate markers to keep new lines aligned with lip movement. ADR differs from other voice recording processes because it must pay close attention to timing, emotional match and ambience so the replacement feels natural in the final mix.
What is the difference between voiceover and ADR?
Voiceover is generally recorded for narration, exposition or off-screen commentary where the speaker does not need to match lip movements. ADR, by contrast, must be synchronised to what the actor is doing on screen and usually replicates or replaces words the actor originally said.
The workflows overlap technically, but ADR requires additional steps such as frame-accurate syncing, performance matching to on-screen action, and often more complex blending with room tone and production audio to preserve realism.
What is ADR in additional dialogue?
Additional dialogue refers to any lines recorded in post that are not part of the primary on-set performance. This can include background actors, crowd ADR, loop groups and small corrective lines. It is used to enhance the scene ambience, fix missing background elements, or replace problematic on-set background chatter.
These additional lines are treated like ADR in that they are recorded to match timing and perspective, but they tend to focus more on texture and presence rather than precise lip sync to a single character.
What is ADR and Foley?
ADR is the re-recording of spoken lines to replace production dialogue. Foley is the custom recording of everyday sound effects, like footsteps, clothing rustle and table knocks, performed in a studio and synced to picture. Both are postproduction processes that aim to improve the realism and clarity of an image and sound mix.
They serve different purposes but are complementary. ADR fixes and refines speech, while Foley restores and enhances the tactile sounds that situate a performance in a believable space. Both benefit from a careful matching of perspective and ambience so the finished scene feels cohesive.